Month: March 2025

mn driver manual

Category : Manuals

The MN Driver Manual is a key resource for understanding Minnesota driving laws‚ safe techniques‚ and licensing processes. It outlines state-specific rules and provides essential guidance for both new and experienced drivers.

Purpose and Importance of the Manual

The Minnesota Driver Manual serves as an essential guide for drivers‚ aiming to promote road safety and ensure compliance with state laws. Its primary purpose is to educate drivers on safe driving practices‚ traffic regulations‚ and the licensing process. By providing detailed information on driving laws and responsibilities‚ the manual helps drivers understand their role in maintaining road safety.

The manual is crucial for both new and experienced drivers‚ as it outlines the rules of the road‚ signs‚ and best practices to avoid accidents. It also includes updated guidance‚ such as procedures for motorists carrying firearms during traffic stops‚ ensuring drivers are informed and prepared. Regular updates reflect changes in laws and safety recommendations‚ making it a reliable resource for all drivers in Minnesota. The manual’s clear and concise content ensures that drivers are well-prepared to handle various driving scenarios responsibly.

Structure and Content Overview

The Minnesota Driver Manual is structured to provide a comprehensive understanding of driving laws and practices. It is divided into clear sections‚ each focusing on specific aspects of driving‚ such as licensing processes‚ road safety‚ and traffic regulations. The manual begins with an introduction to its purpose and importance‚ followed by detailed chapters on obtaining a driver’s license‚ including types of licenses and the steps required to secure one. It also covers practice permit requirements and road test expectations‚ ensuring new drivers are well-prepared. Additionally‚ the manual includes sections on road safety laws‚ safe driving tips‚ and emergency procedures‚ such as handling traffic stops‚ especially for drivers carrying firearms. The content is designed to be user-friendly‚ with clear language and organized information‚ making it an indispensable resource for all Minnesota drivers. Regular updates ensure the manual stays relevant and aligns with current state laws and safety standards.

Licensing Process in Minnesota

The licensing process in Minnesota involves obtaining a practice permit‚ completing driver education‚ and passing a road test. The permit is valid for two years and requires a licensed driver to accompany learners.

Types of Driver’s Licenses

Minnesota offers several types of driver’s licenses to accommodate different needs; The Class D license is the standard license for operating passenger vehicles. Commercial Driver’s Licenses (CDLs) are required for driving heavy commercial vehicles‚ with endorsements for specialized cargo. Motorcycle licenses are available as endorsements on a Class D license or as a standalone license; The state also provides resources like the Minnesota Commercial Drivers Manual and Motorcycle Operations Manual for specific license types. These manuals ensure drivers understand the unique requirements and safety protocols for their respective licenses. Additionally‚ Minnesota offers school bus driver handbooks to guide those seeking to transport students safely. The manuals are available online or at local license centers‚ making it easy for residents to access the information needed to obtain the correct license for their driving needs.

Steps to Obtain a Driver’s License

To obtain a driver’s license in Minnesota‚ applicants must follow a structured process. First‚ they should study the Minnesota Driver Manual‚ which is available in multiple formats‚ including online and at local license centers. Next‚ they must pass a knowledge test to receive a practice permit. This permit allows them to practice driving under the supervision of a licensed driver; After gaining sufficient experience‚ applicants can schedule a road test to demonstrate their driving skills. Passing the road test leads to the issuance of a driver’s license. The state also offers online practice tests and resources like the Class D‚ CDL‚ and Motorcycle Manuals to help applicants prepare. These resources ensure that drivers are well-informed and equipped with the knowledge needed to operate vehicles safely and legally in Minnesota.

Practice Permit and Road Test Requirements

In Minnesota‚ obtaining a driver’s license involves completing a practice permit phase and passing a road test. The practice permit is issued after passing a knowledge test and allows applicants to practice driving under the supervision of a licensed driver. The permit is valid for two years‚ during which time applicants must complete at least 50 hours of practice driving‚ including 10 hours at night. Once sufficient practice is completed‚ applicants can schedule a road test to demonstrate their driving skills. The road test assesses abilities such as turning‚ stopping‚ and obeying traffic laws. Upon passing the test‚ applicants are issued a driver’s license. Resources like online practice tests and the Minnesota Driver Manual are available to help applicants prepare for these requirements. These steps ensure that new drivers are adequately prepared to operate vehicles safely and legally on Minnesota roads.

Minnesota Road Safety and Laws

Minnesota’s road safety laws emphasize safe driving practices and compliance with traffic regulations. The state enforces rules such as not crossing double solid yellow lines except for permitted turns‚ and provides guidance for motorists carrying firearms during stops.

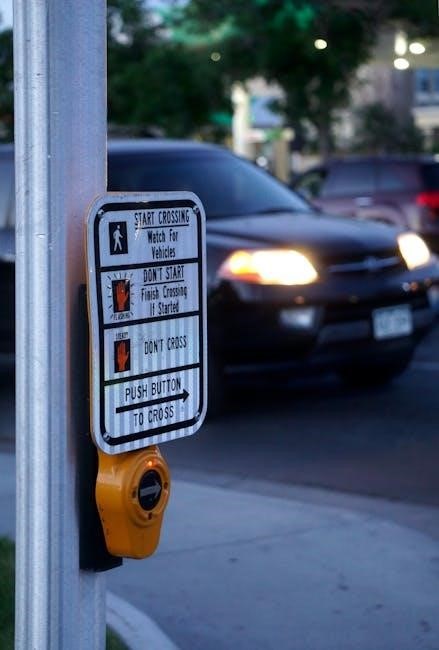
General Traffic Laws and Regulations

Minnesota’s traffic laws are designed to ensure road safety and orderly vehicle movement. Key regulations include obeying speed limits‚ stopping at stop signs‚ and yielding to pedestrians. Double solid yellow lines indicate areas where crossing is prohibited unless turning. Drivers must also adhere to specific rules when carrying firearms‚ such as informing officers during stops. Seatbelt use is mandatory for all passengers‚ and distracted driving laws prohibit texting while driving. Additionally‚ Minnesota follows a zero-tolerance policy for underage drinking and driving. These laws aim to reduce accidents and enhance safety for all road users. Understanding and complying with these regulations is crucial for drivers to avoid penalties and contribute to a safer driving environment.

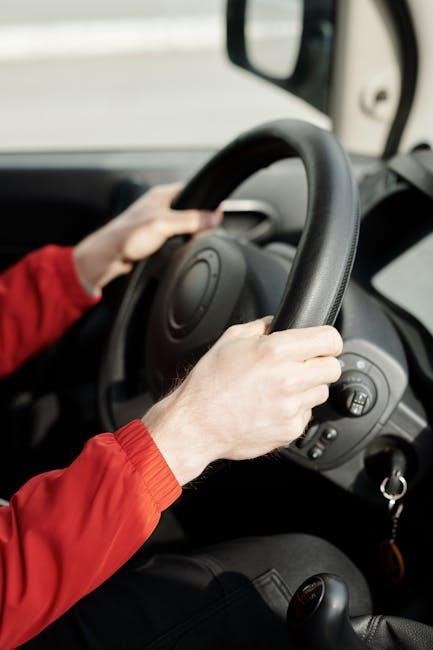
Safe Driving Practices and Tips

Safe driving practices are essential for minimizing risks on Minnesota roads. Stay alert and maintain a safe following distance to allow time to react. Always use turn signals to indicate your intentions. Avoid distractions like texting or using electronic devices while driving. Be cautious in adverse weather conditions‚ such as snow or heavy rain‚ by reducing speed and increasing following distance. Keep an eye out for pedestrians‚ cyclists‚ and motorcyclists‚ as they are more vulnerable. Never drive under the influence of alcohol or drugs‚ as this significantly increases accident risk. Wear a seatbelt at all times‚ and ensure all passengers do the same. Familiarize yourself with speed limits and adjust your speed accordingly. Practice defensive driving by anticipating the actions of other drivers. Regular vehicle maintenance‚ such as checking tires and brakes‚ also contributes to safer driving. By following these tips‚ drivers can help create a safer environment for everyone on the road.

Emergency Procedures and Traffic Stops

In emergency situations‚ Minnesota drivers should remain calm and follow specific procedures. If your vehicle breaks down‚ move to a safe location‚ such as the shoulder‚ and turn on hazard lights. If involved in an accident‚ ensure everyone’s safety‚ exchange information‚ and report the incident if required. For traffic stops‚ pull over safely‚ keep hands visible‚ and avoid sudden movements. Inform the officer if you are legally carrying a firearm. Follow all instructions and provide required documents. Stay respectful and cooperative throughout the interaction. After the stop‚ wait for the officer to dismiss you before driving away. These practices help ensure safety and compliance with the law.


cdi pocket guide

Category : Guide

Comprehensive Guide to the CDI Pocket Guide

The CDI Pocket Guide is a trusted resource for clinical documentation integrity professionals, blending clinical practice and coding expertise. Now in its 18th edition, it offers practical applications, updated standards, and expert insights, making it an indispensable tool for healthcare professionals seeking accurate documentation and compliance.

Overview of the CDI Pocket Guide

The CDI Pocket Guide is a premier resource for clinical documentation integrity professionals, offering comprehensive coverage of CDI principles, coding standards, and documentation best practices. Authored by experts Dr. Richard Pinson and Cynthia Tang, this guide provides clear, concise, and practical guidance to enhance documentation accuracy and compliance. It serves as an essential tool for clinicians, coders, and healthcare managers, blending clinical and coding knowledge seamlessly. Its 18th edition reflects updated standards and evolving healthcare requirements, ensuring relevance and utility in modern practice.

Historical Background and Evolution of the CDI Pocket Guide

First introduced nearly 20 years ago, the CDI Pocket Guide has evolved into a cornerstone resource for clinical documentation integrity. Initially designed as a concise, spiral-bound reference, it has expanded to include digital formats like ACDIS PRO. Authored by Dr. Richard Pinson and Cynthia Tang, the guide has grown to meet the changing needs of healthcare, incorporating updates in coding standards, regulatory requirements, and clinical practices. Its 18th edition reflects decades of expertise and adaptation, solidifying its role as a trusted tool for CDI professionals.

Key Features and Benefits of the CDI Pocket Guide

The CDI Pocket Guide offers a blend of clinical and coding expertise, providing clear, concise guidance for documentation integrity. Its 18th edition includes updated standards, practical applications, and expert insights. Key features include integration of clinical diagnostic criteria with coding standards, comprehensive coverage of ICD-10-AM and AR-DRGs, and enhanced documentation accuracy. Available in spiral-bound and digital formats, it ensures accessibility and efficiency for healthcare professionals, making it an essential tool for improving coding precision and compliance in clinical settings.

Target Audience for the CDI Pocket Guide

The CDI Pocket Guide is essential for CDI specialists, coding professionals, clinicians, and health information managers, providing them with authoritative guidance to enhance documentation and coding accuracy.

CDI Specialists and Coding Professionals

The CDI Pocket Guide is an indispensable resource for CDI specialists and coding professionals, offering concise, authoritative guidance to enhance documentation accuracy and compliance. It bridges clinical and coding knowledge, providing clear definitions, criteria, and standards essential for their roles. The guide’s updated content ensures professionals stay current with evolving coding standards, while its practical format allows for quick reference, supporting efficient and precise documentation and coding processes in healthcare settings.

Clinicians and Healthcare Providers

The CDI Pocket Guide is a vital resource for clinicians and healthcare providers, offering clear guidance on clinical documentation standards and their impact on patient care. It provides concise, evidence-based definitions and criteria, enabling clinicians to document accurately and effectively. The guide bridges the gap between clinical practice and coding, ensuring compliance with current standards. By enhancing documentation quality, it supports better patient outcomes and streamlined workflows, making it an essential tool for healthcare providers seeking to improve care and operational efficiency.

Health Information Managers

The CDI Pocket Guide is an essential tool for health information managers, providing comprehensive insights into clinical documentation standards and compliance. It supports effective leadership in documentation practices, ensuring accurate and reliable data for coding, billing, and quality metrics. The guide helps HIM professionals maintain data integrity, optimize workflows, and stay aligned with regulatory requirements. Its clear guidance on documentation standards and coding practices makes it a valuable resource for managing healthcare information effectively and efficiently.

Updates and Relevance in 2025

The 2025 CDI Pocket Guide offers the latest updates, ensuring alignment with current coding standards and regulatory changes. Enhanced content and digital tools keep professionals informed and efficient.

New Editions and Enhancements

The 2025 CDI Pocket Guide introduces the 18th edition, offering enhanced content and updated coding standards. Available in spiral-bound and digital formats, it provides comprehensive coverage of ICD-10-AM and AR-DRGs. Authored by Dr. Richard Pinson and Cynthia Tang, this edition includes expanded clinical documentation guidelines, improved organization, and access to ACDIS PRO, a digital reference tool. These updates ensure the guide remains a vital resource for CDI specialists, coding professionals, and clinicians, blending clinical and coding expertise seamlessly.

Alignment with Current Coding Standards

The 2025 CDI Pocket Guide is fully aligned with the latest coding standards, including ICD-10-AM and AR-DRGs. It provides detailed guidance on accurate documentation and compliance, ensuring healthcare professionals stay updated with regulatory requirements. The guide’s comprehensive coverage of current standards makes it an essential resource for maintaining precision in clinical documentation and coding, reflecting the most recent industry updates and best practices.

CDI Toolkit and Resources

The CDI Pocket Guide offers ACDIS PRO, a digital tool, alongside its traditional spiral-bound format, providing comprehensive resources for clinical documentation integrity professionals to stay updated and efficient.

ACDIS PRO and Digital Tools

ACDIS PRO is a cutting-edge digital tool complementing the CDI Pocket Guide, offering enhanced accessibility and functionality. It provides the same trusted content as the Pocket Guide but in an electronic format, allowing users to easily search, bookmark, and reference key information. Designed for CDI professionals, coders, and clinicians, ACDIS PRO ensures seamless updates and adherence to the latest coding standards, making it an essential resource for modern healthcare documentation needs.

Additional Resources for CDI Professionals

Beyond the CDI Pocket Guide, professionals can access a variety of supplementary resources, including training programs, webinars, and workshops. These tools provide in-depth insights into clinical documentation best practices, coding updates, and compliance strategies. Additional resources such as online forums and professional networks further support continuous learning and collaboration, ensuring CDI professionals stay updated on industry standards and advancements, enhancing their expertise and efficiency in clinical documentation integrity.

Clinical Guidelines and Documentation Standards

The CDI Pocket Guide integrates ICD-10-AM and AR-DRGs, providing clear guidelines for accurate documentation and compliance with current standards, ensuring precise coding and clinical integrity.

ICD-10-AM and AR-DRGs Coverage

The CDI Pocket Guide provides comprehensive coverage of ICD-10-AM and AR-DRGs, ensuring accurate coding and compliance with Australian documentation standards. It offers practical applications for clinical documentation improvement, helping professionals understand the latest updates and nuances in coding. The guide is a trusted resource for precise DRG assignments and adherence to clinical guidelines, making it essential for healthcare professionals working with Australian coding systems.

Best Practices for Accurate Documentation

The CDI Pocket Guide emphasizes clear, concise, and consistent documentation practices to ensure accuracy and compliance. It provides actionable strategies for clinicians and coders, focusing on precise terminology, complete diagnoses, and adherence to coding guidelines. The guide highlights the importance of thorough documentation to support accurate DRG assignments and compliance with regulatory requirements. By following these best practices, healthcare professionals can enhance documentation quality, reduce errors, and improve overall patient care outcomes.

Blending Clinical Practice and Coding

The CDI Pocket Guide seamlessly integrates clinical and coding knowledge, offering clear guidance for healthcare professionals. It bridges the gap between patient care and documentation standards, ensuring accuracy and compliance in clinical practice and coding processes.

Integration of Clinical and Coding Knowledge

The CDI Pocket Guide excels at merging clinical diagnostic criteria with coding standards, providing a clear and concise framework for healthcare professionals. It integrates expert clinical definitions, coding guidelines, and documentation best practices, ensuring a holistic understanding of patient care and data accuracy. This integration enables CDI specialists, clinicians, and coders to align clinical practices with coding requirements seamlessly, enhancing documentation precision and compliance in daily workflows.

Practical Applications in Healthcare Settings

The CDI Pocket Guide serves as a daily reference for healthcare professionals, aiding in accurate clinical documentation and coding. It supports compliance with ICD-10-AM and AR-DRGs, ensuring precise data capture and efficient workflows. By clarifying complex documentation standards, the guide helps clinicians and coders apply best practices consistently, directly impacting patient care quality and revenue integrity. Its practical insights make it an essential tool for real-world applications in healthcare settings.

Authoritative Authors and Their Expertise

Dr. Richard Pinson and Cynthia Tang bring over 60 years of combined experience, making the CDI Pocket Guide the authoritative resource for clinical documentation and coding excellence.

Dr. Richard Pinson and Cynthia Tang

Dr. Richard Pinson and Cynthia Tang are renowned experts in clinical documentation integrity and coding, bringing over 60 years of combined experience. Their collaborative work on the CDI Pocket Guide has established it as the gold standard for healthcare professionals. Dr. Pinson’s clinical expertise and Cynthia Tang’s coding knowledge seamlessly integrate to provide clear, concise, and authoritative guidance. Their contributions have shaped the field, making the guide an indispensable resource for accurate documentation, compliance, and coding excellence in healthcare settings.

Contributions to CDI and Coding

Dr. Richard Pinson and Cynthia Tang have revolutionized the field of clinical documentation integrity and coding through their authoritative work. Their collaborative efforts have standardized documentation practices, ensuring accuracy and compliance with evolving coding standards. By integrating clinical and coding expertise, they’ve provided healthcare professionals with a unified resource that enhances documentation quality. Their contributions have significantly advanced CDI and coding standards, making them pivotal figures in the industry’s progression and adoption of best practices.

Different Editions and Formats

The CDI Pocket Guide is available in its 18th edition, offering both spiral-bound and digital formats like ACDIS PRO, ensuring accessibility for all users.

18th Edition Highlights

The 18th edition of the CDI Pocket Guide is a comprehensive update, blending clinical expertise with coding precision. Authored by Dr. Richard Pinson and Cynthia Tang, it distills over 60 years of combined experience into concise, actionable insights. This edition refines clinical diagnostic criteria, aligns with the latest ICD-10-AM and AR-DRG standards, and enhances documentation best practices. It remains the go-to resource for CDI professionals, offering clarity and practical applications to improve accuracy and compliance in healthcare settings.

Spiral-Bound vs. Digital Versions

The 18th edition of the CDI Pocket Guide is available in both spiral-bound and digital formats. The spiral-bound version offers portability and easy reference, ideal for quick access in healthcare settings. In contrast, the digital version, such as ACDIS PRO, provides enhanced search functionality, regular updates, and accessibility across devices. Both formats ensure comprehensive coverage of clinical documentation standards, catering to different user preferences and workflows while maintaining the guide’s authoritative content and practical insights.

Benefits for Healthcare Professionals

The CDI Pocket Guide enhances documentation accuracy and improves coding efficiency, serving as a must-have resource for healthcare professionals to ensure compliance and optimal patient care outcomes.

Enhanced Documentation Accuracy

The CDI Pocket Guide ensures precise and consistent documentation by integrating clinical definitions with coding standards. It serves as a quick reference for healthcare professionals, helping them capture accurate and compliant documentation. The guide’s clear format and updated content enable users to apply coding guidelines effectively, reducing errors and improving overall documentation quality. This accuracy directly supports better patient care and compliance with regulatory requirements, making it an essential tool for maintaining high standards in clinical documentation integrity.

Improved Coding Efficiency

The CDI Pocket Guide enhances coding efficiency by providing clear, concise guidance on complex coding scenarios. Its structured format and updated content enable quick access to essential information, reducing time spent on documentation. By aligning with current coding standards, it streamlines processes and minimizes delays. The guide’s practical applications and expert insights ensure accurate and efficient coding, making it a valuable resource for professionals seeking to optimize their workflow and maintain compliance with regulatory requirements.

Future Directions and Innovations

The CDI Pocket Guide embraces technological advancements, with digital tools like ACDIS PRO enhancing accessibility and efficiency. Future editions will likely integrate AI and expanded clinical insights.

Technological Advancements in CDI Tools

The 2025 edition introduces ACDIS PRO, a digital tool offering enhanced features and accessibility. This innovation streamlines CDI processes, integrating AI for smarter queries and real-time updates. Cloud-based solutions ensure seamless access, while mobile compatibility allows professionals to work efficiently on the go. These advancements aim to modernize CDI practices, improving accuracy and collaboration across healthcare teams.

Expanding Role of CDI in Healthcare

The role of Clinical Documentation Integrity (CDI) continues to evolve, becoming integral to healthcare operations. Beyond coding, CDI now supports data integrity, compliance, and patient care quality. The CDI Pocket Guide reflects this expansion, offering insights into emerging standards and best practices. As healthcare becomes more data-driven, CDI professionals play a critical role in ensuring accurate documentation, which directly impacts patient outcomes and reimbursement. This growing importance underscores the need for resources like the CDI Pocket Guide to guide professionals in navigating this expanding field.

The CDI Pocket Guide remains an indispensable resource for healthcare professionals, offering authoritative guidance on clinical documentation and coding. With its 18th edition, it continues to adapt to industry changes, ensuring accuracy and compliance. Authored by experts Dr. Richard Pinson and Cynthia Tang, it bridges clinical practice and coding, providing essential insights for CDI specialists, clinicians, and health information managers. As healthcare evolves, the CDI Pocket Guide stands as a cornerstone for enhancing documentation integrity and operational efficiency.


73-87 chevy truck parts catalog pdf

Category : PDF

The 73-87 Chevy Truck Parts Catalog PDF is a comprehensive guide for restoration and maintenance, offering detailed specs, upgrades, and troubleshooting tips for Chevrolet trucks from 1973 to 1987.

1.1 Overview of the Catalog

The 73-87 Chevy Truck Parts Catalog PDF serves as a detailed guide, covering engine, transmission, suspension, and electrical components. It provides compatibility charts, DIY tips, and part numbers, aiding in restoration and upgrades. The catalog is structured to help users identify and source parts efficiently, ensuring accuracy and ease of installation for both novice and experienced enthusiasts.

1.2 Importance of the Catalog for Restoration and Maintenance

The catalog is vital for restoring and maintaining 73-87 Chevy trucks, providing detailed part specifications, troubleshooting guides, and maintenance schedules. It helps enthusiasts source authentic or compatible parts, ensuring accuracy and functionality. Whether for classic restoration or modern upgrades, the catalog is an indispensable resource for DIY projects and professional repairs, keeping these iconic trucks roadworthy and performing optimally.

Engine and Performance Parts

The catalog covers engine specs, compatibility, and performance enhancements, including LS swaps and diesel options, to boost power and efficiency for various driving needs.

2.1 Engine Specifications and Compatibility

The 73-87 Chevy Truck Parts Catalog PDF details engine specs, including inline-6, V6, and V8 options. It covers horsepower, torque, and compatibility across various truck models, ensuring accurate part selection for restoration or upgrades. The catalog also highlights emissions standards and fuel efficiency for different engine types, aiding in maintaining performance and reliability during repairs or modifications.

2.2 Performance Upgrades and Modifications

Performance upgrades for 73-87 Chevy trucks include engine swaps, such as LS conversions, and diesel options for enhanced towing capacity. Aftermarket components like cold-air intakes, performance exhausts, and tuning systems can significantly boost power. Lightweight aluminum parts and high-performance cams are popular modifications. These upgrades not only improve horsepower but also ensure reliability for both on-road and off-road applications.

Transmission and Drivetrain Components

The 73-87 Chevy Truck Parts Catalog PDF covers transmission types, rebuild kits, and drivetrain upgrades for enhanced towing and off-road performance.

3.1 Transmission Types and Rebuild Kits

The 73-87 Chevy Truck Parts Catalog details various transmission types, including manual and automatic options, along with compatible rebuild kits. These kits often include bearings, gaskets, and seals, ensuring proper function. The catalog also provides installation tips and compatibility charts to avoid mismatches. Rebuild kits are essential for restoring original performance and reliability, making them a priority for enthusiasts and restorers alike.

3.2 Drivetrain Upgrades for Towing and Off-Road Use

Drivetrain upgrades enhance performance for towing and off-road use. Diesel conversions, heavy-duty axles, and reinforced differentials improve torque and durability. SureFit kits simplify installation, while service manuals provide detailed guidance. These modifications ensure reliability and versatility for demanding tasks, making them essential for enthusiasts seeking robust capabilities.

Suspension and Steering Systems

The catalog offers detailed guides for suspension and steering systems, including SureFit kits for easy installation and options to balance stock reliability with aftermarket performance enhancements.

4.1 Stock Suspension vs. Aftermarket Upgrades

The stock suspension in 73-87 Chevy trucks is durable and reliable, designed for everyday driving. Aftermarket upgrades offer enhanced performance, especially for towing or off-road use, with improved suspension travel and load capacity. Choosing between them depends on your truck’s intended use, balancing cost, maintenance, and desired capabilities.

4.2 Steering System Maintenance and Replacement

Maintenance of the steering system involves regular checks for wear and tear, lubrication of components, and inspection of tie rods, drag links, and steering boxes. Replacement parts should be sourced from trusted suppliers to ensure compatibility and safety. Upgrading to modern steering systems can enhance handling and responsiveness, especially for trucks used in challenging conditions or towing applications.

Brakes and Safety Features

The catalog details brake system components, upgrades, and maintenance procedures, ensuring reliable stopping power and safety for 73-87 Chevy trucks, aligning with modern safety standards.

5.1 Brake System Components and Upgrades

The catalog details essential brake components, including rotors, drums, pads, and master cylinders, with options for OEM replacements or performance upgrades. Upgrading to stainless steel brake lines and modern disc brake conversions enhances stopping power and reliability, ensuring safety and improved performance for both stock and modified trucks.

5.2 Safety Modifications for Modern Standards

Upgrading to modern safety features enhances protection and compliance. Install anti-lock braking systems, improved seatbelts, and reinforced frames. Add LED lighting for better visibility and consider airbag integration for enhanced occupant safety. These modifications ensure classic trucks meet contemporary safety standards while retaining their timeless appeal.

Electrical and Wiring Systems

The 73-87 Chevy Truck Parts Catalog PDF covers electrical and wiring systems, providing detailed diagrams, troubleshooting guides, and tips for modern upgrades to enhance performance and reliability.

6.1 Wiring Diagrams and Troubleshooting

The catalog provides detailed wiring diagrams for 73-87 Chevy trucks, simplifying electrical system diagnostics. Troubleshooting guides help identify common issues, such as faulty connectors or blown fuses. Step-by-step instructions enable owners to repair or replace components efficiently, ensuring optimal electrical performance and reliability for both stock and upgraded systems.

6.2 Upgrading to Modern Electrical Systems

Upgrading to modern electrical systems enhances reliability and supports advanced features. LED lighting, high-output alternators, and improved wiring harnesses are popular upgrades. These modifications ensure better performance and compatibility with contemporary accessories like infotainment systems. The catalog provides detailed guidance for seamless integration, ensuring your classic Chevy truck meets modern electrical demands without compromising its timeless appeal.

Body and Interior Restoration

The 73-87 Chevy Truck Parts Catalog PDF covers exterior body panels, interior upgrades, and restoration tips, helping owners enhance both style and functionality of their classic trucks.

7.1 Exterior Body Panels and Accessories

The 73-87 Chevy Truck Parts Catalog PDF provides detailed information on exterior body panels and accessories, including doors, hoods, fenders, and trim. These components are essential for maintaining the truck’s original appearance or customizing it. The catalog offers both OEM and aftermarket options, ensuring compatibility and durability. Accessories like bumpers and grill guards enhance functionality and aesthetics, making restoration or personalization easier.

7.2 Interior Upgrades for Comfort and Style

Upgrade your 73-87 Chevy truck’s interior with modern amenities while maintaining its classic charm. Consider replacing worn-out seats with premium vinyl or leather options. Add custom dash trim, upgraded carpets, and retro-style gauges for a blend of comfort and style. Install modern infotainment systems for enhanced functionality. These upgrades ensure a comfortable ride while preserving the truck’s nostalgic appeal.

Wheels and Tires

The catalog highlights OEM and aftermarket wheel options, along with tire selections tailored to various driving conditions, ensuring optimal performance and durability for 73-87 Chevy trucks.

8.1 OEM and Aftermarket Wheel Options

The 73-87 Chevy Truck Parts Catalog PDF offers a wide range of OEM and aftermarket wheel options. From classic styles to modern designs, these wheels cater to both restoration projects and performance upgrades. SureFit kits simplify installation, ensuring a perfect fit. Options include polished aluminum, durable steel, and custom finishes, allowing you to enhance both style and functionality.

8.2 Tire Selection for Different Driving Conditions

Choosing the right tires for your 73-87 Chevy truck depends on driving conditions. All-season tires offer versatility for daily use, while off-road tires provide enhanced traction on rough terrain. Winter tires with specialized tread patterns improve safety in icy or snowy conditions. High-performance tires are ideal for towing or hauling heavy loads, ensuring stability and durability. Proper tire selection enhances both safety and performance.

Accessories and Customization

Accessories and customization options enhance both form and function, offering performance upgrades and personal touches like chrome grilles, custom wheels, and interior accents for a unique truck style.

9.1 Performance Accessories

Performance accessories for 73-87 Chevy trucks enhance power and efficiency. Popular upgrades include LS engine swaps, diesel conversions, and aftermarket air intakes. SureFit kits simplify installation, while exhaust systems and tuning chips optimize performance. These modifications cater to enthusiasts seeking improved towing capacity and off-road capabilities, ensuring modern functionality while maintaining classic appeal.

9.2 Customization Ideas for Personalization

Explore unique customization ideas for your 73-87 Chevy truck, such as resto-mod upgrades, custom paint jobs, or aftermarket wheels. Add personal touches like interior upholstery, LED lighting, or vintage-inspired decals. Consider performance-enhancing mods or modern tech integrations to make your truck truly one-of-a-kind, blending classic style with modern functionality for a personalized driving experience.

Tools and Resources for Restoration

This section covers essential tools for DIY projects, such as wrenches, air compressors, and diagnostic equipment. Online communities and forums offer invaluable support and resources.

10.1 Essential Tools for DIY Projects

For DIY projects on 73-87 Chevy trucks, essential tools include a socket set, wrenches, pliers, screwdrivers, and a multimeter. A compression tester and brake bleeding kit are vital for engine and brake repairs. Specialized tools like a suspension alignment kit and drivetrain rebuild tools are also recommended for specific tasks. These tools ensure efficiency and safety during restoration and maintenance.

10.2 Online Communities and Forums for Support

Online forums and communities, such as ChevyTalk or 73-87ChevyTrucks, offer invaluable support for restoration projects. These platforms provide troubleshooting tips, shared experiences, and access to a network of experts and DIY enthusiasts. Active discussions often cover topics like transmission swaps, engine upgrades, and rare part sourcing, making them indispensable resources for Chevy truck owners seeking guidance and inspiration.

The 73-87 Chevy Truck Parts Catalog PDF remains vital for restoration, while modern trends like diesel swaps and advanced tools promise exciting future possibilities for enthusiasts.

11.1 The Evolution of Chevy Truck Restoration

Over the years, Chevy truck restoration has evolved significantly, with advancements in resources and techniques. The 73-87 Chevy Truck Parts Catalog PDF reflects this evolution, offering detailed guidance for modern restorers. From classic stock rebuilds to custom modifications, enthusiasts now have access to comprehensive tools and communities, enabling them to preserve or transform their vehicles with precision and creativity, blending heritage with contemporary innovations.

11.2 Innovations in Parts Catalogs and Restoration

Modern parts catalogs now offer digital versions with interactive features like part number searches and 3D diagrams. Advances in 3D printing enable custom fabrication of rare components. Online forums and communities provide real-time support, while AI-powered diagnostic tools streamline troubleshooting. These innovations make restoration more accessible and efficient for enthusiasts of 73-87 Chevy trucks.


toji fushiguro workout pdf

Category : PDF

Discover the ultimate guide to achieving Toji Fushiguro’s physique, focusing on strength, speed, and combat mastery. This comprehensive PDF outlines a structured routine for muscle building, functional training, and tactical fitness, inspired by the Jujutsu Kaisen character. Perfect for those seeking a disciplined approach to physical transformation, combining calisthenics, weightlifting, and endurance exercises. Transform your body with a proven, results-driven program tailored to emulate Toji’s impressive abilities and physical prowess, ensuring a balanced and effective workout regimen.

1.1 Overview of the Workout Plan

The Toji Fushiguro Workout Plan is a structured, 4-day program blending weight training and functional exercises. It focuses on building strength, speed, and agility through compound lifts, calisthenics, and HIIT. The routine alternates between upper and lower body workouts, with full-body sessions to enhance overall fitness. Designed for tactical efficiency, it combines strength training with endurance exercises to mimic Toji’s impressive physical abilities, ensuring a balanced and results-oriented approach to achieving his physique.

1.2 Importance of the Routine

This workout routine is crucial for achieving a physique similar to Toji Fushiguro’s, focusing on strength, agility, and endurance. It helps build muscle, enhance reflexes, and improve combat readiness. By following this structured plan, individuals can develop functional fitness, increasing their overall physical performance and mental discipline, essential for emulating Toji’s mastery and tactical precision in both real-life and fictional combat scenarios.

Toji Fushiguro’s Physical Statistics

Toji Fushiguro stands at 183 cm and weighs 86 kg, showcasing elite strength, reflexes, and tactical precision. His physique reflects mastery of weapon-based combat and extreme pain tolerance, inspiring the workout routine.

2.1 Height and Weight

Toji Fushiguro stands at an impressive height of 183 cm (60 inches) and weighs approximately 86 kg (190 lbs). His balanced physique supports his elite strength, agility, and combat mastery, making him a formidable character. This physical structure is central to his ability to perform high-intensity tasks, inspiring the workout routine designed to emulate his powerful build and tactical prowess.

2.2 Body Composition

Toji Fushiguro’s body composition is lean and muscular, with a focus on functional strength and agility. His physique is characterized by a balanced mix of muscle mass and low body fat, enabling his elite physical performance. This composition supports his grappling techniques, weapon mastery, and high-intensity combat scenarios, making it a key aspect of his workout routine’s design and goals.

Key Abilities and Attributes

Toji Fushiguro possesses elite strength, exceptional reflexes, and masterful combat skills. His physical abilities include extreme pain tolerance, tactical precision, and weapon mastery, making him a formidable fighter.

3.1 Elite Strength

Toji Fushiguro’s elite strength is a cornerstone of his physical prowess, enabling him to dominate in combat. His workout emphasizes compound lifts like bench presses and squats, designed to build powerful muscles. This strength allows him to overpower opponents effortlessly, making it a key attribute in his non-cursed, weapon-based fighting style. Regular weight training and progressive overload are central to achieving this level of muscular development and raw power.

3.2 Reflexes and Agility

Toji Fushiguro’s exceptional reflexes and agility are vital for his combat effectiveness. His workout incorporates HIIT, plyometric exercises, and functional training to enhance quick movements and sharp reactions. Activities like box jumps, lateral quick steps, and circuit training improve his ability to dodge and counter with precision. These drills mimic real-world combat scenarios, ensuring his reflexes are lightning-fast and his agility unmatched, making him a formidable opponent in close quarters.

3.4 Combat Mastery

Toji Fushiguro’s combat mastery is rooted in his tactical precision and adaptability. His workout emphasizes functional training, weapon-based drills, and circuit exercises to enhance battle readiness. By incorporating martial arts techniques and scenario-based conditioning, Toji achieves peak combat efficiency. This focus ensures skills are seamlessly integrated, allowing him to dominate in real-world combat situations with calculated movements and relentless pressure.

Workout Routine Breakdown

The routine is structured around 4 days of weight training and 2 days of functional exercises, focusing on upper body, lower body, and full-body workouts. It emphasizes compound lifts like bench presses and squats, while incorporating HIIT and endurance training to enhance speed, agility, and stamina, ensuring a well-rounded physical development program inspired by Toji’s combat-ready physique.

4.1 Upper Body Training

Focus on building strength and muscle mass with exercises like bench presses, incline dumbbell presses, and overhead presses. Giant sets and circuits are used to enhance endurance and power, mimicking Toji’s combat-ready physique. This routine targets the chest, shoulders, and triceps, with a mix of compound lifts and isolation exercises to ensure balanced development. Aim for 4-5 sets of 8-12 reps to maximize hypertrophy and strength gains, achieving Toji’s formidable upper body capabilities.

4.2 Lower Body Training

Target the legs, calves, and core with exercises like squats, Romanian deadlifts, and calf raises. This routine emphasizes building powerful legs to match Toji’s agility and combat efficiency. Perform 4-5 sets of 8-12 reps for compound lifts, focusing on progressive overload to enhance strength and muscle development. Incorporate plyometric exercises to improve explosive power, ensuring a well-rounded lower body workout that supports both athleticism and endurance.

4.3 Full Body Workout

Engage in a comprehensive full-body routine combining compound lifts, functional training, and HIIT. Exercises like bench presses, squats, and deadlifts build overall strength. Incorporate bodyweight movements such as pull-ups and burpees for coordination and endurance. This workout mimics Toji’s physical demands, focusing on simultaneous upper and lower body engagement to enhance power, speed, and agility, ensuring a balanced and effective full-body transformation.

Calisthenics and Functional Training

Master bodyweight exercises and functional movements to build strength, flexibility, and stamina. Includes pull-ups, burpees, and core workouts, enhancing speed and agility for real-world combat efficiency.

5.1 Bodyweight Exercises

Bodyweight exercises are core to Toji’s training, focusing on pull-ups, push-ups, squats, and lunges to enhance strength and flexibility. These movements improve muscle endurance, mimicking Toji’s combat agility and precision. Planks and core workouts are emphasized to build stability and power, essential for his tactical movements. This approach ensures functional fitness, preparing the body for real-world physical demands without heavy equipment, aligning with Toji’s practical, effective training philosophy.

5.2 High-Intensity Interval Training (HIIT)

HIIT involves short bursts of intense exercise followed by brief rest periods, boosting cardiovascular fitness and muscular endurance. Toji’s regimen includes HIIT circuits like sprints, burpees, and jump squats to enhance speed and agility. This training mimics combat scenarios, improving reaction time and stamina. HIIT’s efficiency aligns with Toji’s disciplined approach, delivering maximum results in minimal time while refining tactical physical conditioning for peak performance in high-stakes situations.

Training Principles

The regimen emphasizes building strength, enhancing speed, and improving endurance through a balanced mix of compound lifts, giant sets, and circuit finishes, ensuring tactical physical fitness and peak performance.

6.1 Building Strength

The foundation of Toji’s workout focuses on building strength through compound lifts like bench presses and squats. These exercises target multiple muscle groups, enhancing overall power and muscle mass. Incorporating progressive overload ensures continuous growth, while giant sets maximize intensity. This approach mirrors Toji’s elite physicality, preparing the body for high-demand activities and combat scenarios, making strength the cornerstone of his regimen.

6.2 Enhancing Speed

Enhancing speed is crucial in Toji’s workout, achieved through HIIT and explosive movements. Circuit training and agility drills improve quickness and reaction time. These exercises mimic Toji’s rapid reflexes, ensuring a blend of power and velocity. By incorporating sprints and dynamic movements, the routine builds the speed necessary for high-intensity combat and tactical maneuvers, reflecting Toji’s swift and precise fighting style effectively. This focus ensures overall athletic performance is elevated significantly.

6.3 Improving Endurance

Endurance is a cornerstone of Toji’s training, achieved through HIIT and prolonged circuit workouts. These sessions enhance cardiovascular health and stamina, enabling sustained performance during intense battles. The program incorporates aerobic exercises and endurance drills to build lasting energy reserves. By pushing limits through continuous effort, the workout mirrors Toji’s relentless combat style, ensuring mental and physical resilience over time. This focus guarantees improved stamina and prolonged physical endurance.

6.4 Increasing Flexibility

Flexibility is crucial for Toji’s fluid movements and combat precision. The workout incorporates dynamic stretches, mobility exercises, and yoga-inspired routines to enhance range of motion. By focusing on consistent stretching and functional training, the program improves joint flexibility, reducing injury risk and allowing for seamless transitions between actions. This ensures optimal physical performance, aligning with Toji’s agile and adaptive fighting style for peak efficiency in every move.

Nutrition and Diet

A well-structured diet is essential for supporting Toji’s intense training. Focus on high-protein meals, balanced carbs, and healthy fats to fuel muscle growth and energy. Proper hydration and meal timing are emphasized to optimize performance and recovery, ensuring the body can handle the rigorous workout demands effectively.

7.1 Meal Frequency and Planning

Meal frequency and planning are crucial for Toji’s regime. Aim for 5-6 balanced meals daily, including lean proteins, complex carbs, and healthy fats. Plan meals in advance to maintain consistency, ensuring adequate hydration and portion control to support muscle growth and energy. This structured approach fuels intense workouts and aids in recovery, keeping you on track with your fitness goals.

7.2 Hydration Strategies

Hydration is vital for optimal performance in Toji’s workout. Aim to drink 3-4 liters of water daily, adjusting for sweat loss. Avoid sugary drinks and monitor intake to maintain electrolyte balance. Proper hydration enhances recovery, endurance, and focus, ensuring you meet the demands of the rigorous training. Stay consistent to maximize results and maintain physical peak, aligning with Toji’s disciplined approach to fitness.

Recovery and Rest

Recovery and rest are crucial for muscle repair and performance. Ensure adequate sleep, incorporate rest days, and engage in light activities to support overall physical rejuvenation and growth.

8.1 Importance of Rest Days

Rest days are essential for muscle recovery and overall performance. They allow your body to heal, rebuild, and adapt to the demands of training. Without adequate rest, you risk overtraining, which can lead to injuries and decreased progress. Incorporating rest days ensures sustained strength gains, prevents burnout, and maintains long-term consistency in your workout routine, aligning with Toji Fushiguro’s disciplined approach to physical excellence.

8.2 Sleep for Muscle Recovery

Sleep is crucial for muscle recovery, as it allows your body to repair and rebuild tissues. During sleep, hormones like growth hormone and testosterone are released, promoting muscle growth and repair. Aim for 7-9 hours of quality sleep nightly to optimize recovery, enhance physical performance, and support overall health. Poor sleep can hinder progress, so prioritize a consistent sleep schedule to maximize your workout results effectively.

8.3 Injury Prevention Tips

To prevent injuries, ensure proper warm-ups before workouts and maintain correct form during exercises. Avoid overtraining by listening to your body and incorporating rest days. Incorporate flexibility and mobility exercises to enhance joint health. Strengthen core muscles for better stability and balance. Gradually increase workout intensity to allow adaptation. Consult a professional to tailor routines to your fitness level, reducing injury risks and ensuring safe progress.

Downloading the Workout PDF

Access the complete Toji Fushiguro Workout Routine for free. Download the PDF to unlock the full training plan, designed to help you achieve his impressive physique and strength efficiently.

9.1 Accessing the Full Routine

The Toji Fushiguro Workout PDF is readily available for download, offering a comprehensive guide to achieving his iconic physique. Access the full routine by visiting the provided link, where you’ll find detailed workout schedules, exercise tips, and nutritional advice. This structured plan is designed to help users build strength, agility, and endurance, mirroring Toji’s elite physical conditioning. Start your transformation with this exclusive, easy-to-follow guide today and unlock your full potential.

9.2 Benefits of the PDF Guide

The Toji Fushiguro Workout PDF offers a structured, easy-to-follow plan tailored to build strength, agility, and endurance. It combines calisthenics, weightlifting, and HIIT for a balanced approach. Detailed exercise routines, nutritional advice, and recovery tips are included, ensuring a holistic transformation. The guide is ideal for those seeking a disciplined regimen to achieve a physique inspired by Toji’s elite physical conditioning and combat mastery.

Tips for Maximum Results

Stay consistent, track progress, and maintain discipline. Focus on proper form, gradually increase intensity, and ensure adequate nutrition and recovery to maximize your transformation and achieve Toji-like results.

10.1 Consistency and Dedication

Achieving Toji Fushiguro’s physique demands unwavering dedication and consistency. Stick to the routine, attending every session with focus and effort. Regularity ensures progressive overload, muscle adaptation, and visible results. Skipping workouts or lacking commitment will hinder progress. Embrace the discipline and maintain a long-term vision to successfully transform your body and mirror Toji’s elite physical state.

10.2 Tracking Progress

Monitoring your progress is essential to stay motivated and adjust your workout plan. Take regular body measurements, track weight changes, and document workout improvements. Use progress photos to visualize physical transformations. Maintain a workout log to record sets, reps, and weights lifted. By consistently tracking your journey, you can identify areas for improvement and ensure you’re on the right path to achieving your fitness goals effectively.

The Toji Fushiguro Workout PDF offers a comprehensive guide to achieving strength, speed, and agility. By following this structured plan, you can transform your physique. Stay committed, track your progress, and embrace the challenge. With dedication, you’ll unlock your full potential and embody the resilience of Toji Fushiguro. Start your journey today and see the results!

11.1 Final Thoughts

The Toji Fushiguro Workout PDF is a comprehensive guide designed to help you achieve a strong, agile, and resilient physique. By combining strength training, calisthenics, and functional exercises, this program offers a balanced approach to fitness. Consistency and dedication are key to seeing results. Embrace the challenge, stay motivated, and transform your body to unlock your full potential, just like Toji Fushiguro.

11.2 Encouragement and Motivation

Embrace the journey to achieving Toji Fushiguro’s physique with dedication and passion. Remember, consistency is key to unlocking your full potential. Push through challenges, celebrate progress, and stay committed to your goals. With discipline and perseverance, you’ll build strength, agility, and resilience, just like Toji. Motivate yourself to rise above limits and become unstoppable. The results will be worth the effort—transform your body and mind today!


stealth cam owners manual

Category : Manuals

This manual provides essential guidance for setting up, operating, and maintaining your Stealth Cam device, ensuring optimal performance and maximizing its features for wildlife monitoring and photography.

1.1 Purpose and Scope of the Manual

This manual is designed to guide users in understanding and utilizing their Stealth Cam device effectively. It covers setup, operation, maintenance, and troubleshooting, ensuring users can maximize their camera’s potential. The scope includes detailed instructions for various models, highlighting features like night vision, motion detection, and cellular connectivity, while emphasizing proper care and firmware updates for longevity and optimal performance.

1.2 Importance of Reading the Manual

Reading the manual ensures proper setup, operation, and maintenance of your Stealth Cam, preventing potential issues and maximizing functionality. It provides insights into advanced features like digital zoom, motion detection, and firmware updates, while outlining warranty details and troubleshooting tips, helping users achieve optimal performance and extend the lifespan of their device effectively and efficiently.

Stealth Cam Models Overview

Stealth Cam offers a range of models, including CORE STC-Z3IRTL and G30, each featuring advanced capabilities like digital zoom, night vision, and fast trigger speeds for optimal performance.

2.1 Popular Models and Their Features

Popular models include the G30, known for its ultra-fast trigger speed, and the CORE STC-Z3IRTL series, featuring advanced IR technology. The STC-XNVM model offers 9x digital zoom and night vision, while others like the RVLRP 360 provide cellular connectivity and 40MP resolution, catering to diverse needs in wildlife monitoring and photography.

2.2 Model-Specific Instructions and Guides

Each model has tailored guides available online, offering detailed setup instructions, component overviews, and feature-specific advice. For instance, the GXW Wireless model includes advanced CAM setup, while others provide mounting guides and firmware update instructions, ensuring users can maximize their camera’s potential with precise, model-specific directions and support resources.

Setting Up and Operating Your Stealth Cam

Setting up your Stealth Cam involves installing batteries, inserting an SD card, and updating firmware for optimal performance. Follow model-specific guides for customize settings and troubleshooting tips to ensure smooth operation and capture high-quality images effortlessly.

3.1 Battery Installation and Power Management

Properly install batteries by opening the compartment and sliding the release switch. Use high-quality, compatible batteries for optimal performance. Check voltage specifications to avoid damage. Manage power efficiently with low-battery alerts and power-saving modes. Avoid using incompatible batteries to prevent malfunctions. Regularly inspect batteries and replace them as needed to ensure reliable operation and extend lifespan. Always follow safety guidelines.

3.2 SD Card Compatibility and Usage

Use a Class 10 SD card up to 32GB for optimal performance. Format the card in the camera before use to ensure compatibility. Avoid using SD card viewers not manufactured by Stealth Cam, as they may cause conflicts. Always insert the card correctly to prevent damage. Regularly check storage capacity and replace or format the card as needed for smooth operation and data integrity.

3.3 Basic Operating Instructions

Power on the camera using the ON/OFF button, initiating the startup sequence. Navigate through modes and settings via the control panel. Use the menu to select options like photo, video, or timed capture. Ensure the SD card is properly inserted. Refer to the SD Card Compatibility and Usage section for card recommendations and formatting tips. Adjust settings as needed for optimal performance.

3.4 Customizing Camera Settings

Customize your camera settings to suit your needs. Adjust motion detection sensitivity, trigger speed, and image quality. Use the menu interface to modify settings like resolution, burst mode, and time-lapse intervals. Enable or disable features such as night vision or digital zoom. Review and save settings to ensure optimal performance for your specific use case. Refer to the firmware updates section for the latest enhancements.

Advanced Features of Stealth Cam

Explore advanced features like digital zoom, night vision, and motion detection. Customize settings for enhanced functionality, ensuring your camera captures high-quality images in various conditions effortlessly.

4.1 Digital Zoom and Night Vision Capabilities

Experience crystal-clear images with Stealth Cam’s advanced digital zoom and night vision features. The 9x digital zoom captures distant details, while night vision ensures high-quality images in low-light conditions. Utilizing an advanced CMOS sensor, these features minimize blurry photos and provide exceptional clarity, making them ideal for wildlife monitoring and surveillance.

4.2 Motion Detection and Trigger Speed

Stealth Cam’s motion detection covers multiple zones of angle and distance, ensuring accurate triggering. The ultra-fast trigger speed captures crucial moments without delay, minimizing missed shots. This feature is especially beneficial for wildlife monitoring, ensuring you never miss important action, and is designed to work seamlessly with the camera’s advanced sensors for reliable performance.

4.3 Cellular Connectivity and Remote Monitoring

Stealth Cam models with cellular connectivity allow remote monitoring via the Stealth Cam COMMAND app. This feature enables users to receive photo alerts, adjust settings, and view images on iOS or Android devices. It provides real-time updates, enhancing convenience for hunters and wildlife enthusiasts, ensuring optimal camera management from any location without physical access to the device.

Maintenance and Special Care Instructions

Regularly clean the camera lens and housing to ensure optimal performance. Avoid exposing the device to excessive moisture or immersion in water. Store in a dry, cool place when not in use.

5.1 Weather Resistance and Environmental Considerations

Stealth Cam models are designed to withstand various environmental conditions, including rain and snow, but avoid submerging the device in water. Ensure proper sealing of compartments and avoid extreme temperatures. Clean regularly to prevent debris buildup. Use in shaded areas to minimize direct sun exposure. Proper placement enhances durability and performance in outdoor settings.

5.2 Cleaning and Storage Tips

Regularly clean your Stealth Cam with a soft cloth to avoid scratches. Use a microfiber cloth for the lens to maintain image clarity. Store the camera in a cool, dry place, away from direct sunlight. Use an airtight container to protect from humidity. Remove batteries during long-term storage to prevent corrosion. Ensure all compartments are sealed to keep out pests and moisture.

Troubleshooting Common Issues

Troubleshoot issues like memory card errors, battery malfunctions, or camera freezes by checking connections, updating firmware, and ensuring proper setup. Refer to the manual for detailed solutions.

6.1 Resolving Memory Card Conflicts

Memory card conflicts can occur due to incompatibility or improper formatting. Ensure the card is compatible with your Stealth Cam model and format it using the camera’s settings. Avoid using cards from other devices to prevent conflicts. If issues persist, check for firmware updates or consult the manual for detailed troubleshooting steps.

6.2 Addressing Camera Malfunctions

If your Stealth Cam experiences malfunctions, start by checking the power source and ensuring batteries are installed correctly. Verify SD card compatibility and format it if necessary. Reset the camera by turning it off and on. For persistent issues, update the firmware or contact customer support for assistance. Regular maintenance can prevent such problems.

Warranty and Support Information

Your Stealth Cam comes with a Limited 1-Year Warranty. Extended warranty options are available for purchase. Visit the official website for details and customer support contact information.

7.1 Limited 1-Year Warranty Details

The Limited 1-Year Warranty covers defects in materials and workmanship for Stealth Cam products. It begins on the purchase date and is non-transferable. Damage from misuse, tampering, or normal wear is excluded. For warranty claims, contact customer support with proof of purchase. Extended warranty options are available for added protection and peace of mind.

7.2 Extended Warranty Options

Stealth Cam offers extended warranty plans to provide additional protection beyond the standard 1-year warranty. These plans cover repairs and replacements for parts and labor due to defects or accidental damage. Extended warranties can be purchased within the initial warranty period and vary in duration, offering flexible coverage options for continued product reliability and customer satisfaction.

Firmware Updates and Software

Regular firmware updates ensure your Stealth Cam operates at peak performance. Visit the official website to download the latest updates and install them using the Stealth Cam COMMAND app for enhanced functionality and improved camera operation.

8.1 Importance of Regular Firmware Updates

Regular firmware updates are crucial for enhancing your Stealth Cam’s performance, fixing bugs, and adding new features. They improve camera functionality, ensure compatibility with the latest software, and boost overall reliability. Updating firmware helps maintain optimal camera operation and integrates seamlessly with the Stealth Cam COMMAND app for remote monitoring and control.

8.2 Downloading and Installing Updates

Downloading and installing firmware updates ensures your Stealth Cam stays up-to-date. Visit the official website, select your model, and download the latest update. Transfer the file to your SD card, insert it into the camera, and follow on-screen prompts to complete the installation. Regular updates enhance functionality and ensure compatibility with the latest features and software.

Additional Resources and Downloads

Access official resources, including user manuals, firmware updates, and the Stealth Cam Command App. Visit the manufacturer’s website for comprehensive guides and software downloads.

9.1 Accessing User Manuals and Guides

Visit the official Stealth Cam website or platforms like ManualsLib to access over 145 user manuals for various models, including STC-Z3IRTL and CORE series. Each manual is available for download as a PDF, ensuring easy access to setup instructions, features, and troubleshooting tips for your specific device. Keep your camera up-to-date with the latest guides.

9.2 Stealth Cam Command App Setup

Download the Stealth Cam COMMAND app from the iOS or Android store. Create an account, then pair your camera via Bluetooth or Wi-Fi. The app allows remote monitoring, photo viewing, and customization of settings. Ensure your camera is updated with the latest firmware for seamless connectivity and optimal performance. Follow in-app instructions for a smooth setup experience.


e36 manual swap

Category : Manuals

The E36 manual swap is a popular modification among BMW enthusiasts, offering enhanced control and performance․ It involves replacing the automatic transmission with a manual setup, providing better driving dynamics and engagement․ This swap is particularly appealing for those seeking a more immersive driving experience without the need for expensive engine upgrades․ Many owners find it a rewarding project that combines mechanical skill with the satisfaction of a customized ride․

Why Consider a Manual Swap for Your E36

A manual swap enhances driving engagement, offering precise control and improved performance․ It eliminates the lag of automatic transmissions, delivering a more connected experience․ Additionally, a manual setup is lighter and more cost-effective in the long run․ Many enthusiasts find it a rewarding project, combining mechanical challenge with the satisfaction of a tailored driving experience․ It’s a popular choice for those seeking to optimize their E36’s potential without major engine modifications․

Understanding the Basics of the E36 Transmission System

The E36 transmission system is designed for compatibility across various engines, making manual swaps straightforward․ The bellhousing bolt pattern remains consistent, allowing any manual gearbox to fit without modifications․ The system includes the transmission, clutch, and flywheel, with hydraulic components controlling the clutch engagement․ This compatibility ensures a smooth transition during a manual swap, as the core structure remains unchanged․

Preparation and Planning

Assessing the project’s scope, creating a detailed parts list, and understanding budget and time commitments are crucial for a successful E36 manual swap․ Proper planning ensures a smooth process․

Tools and Equipment Needed for the Swap

A comprehensive toolkit is essential for an E36 manual swap․ This includes a socket set, wrenches, screwdrivers, and specialized tools like a transmission jack and jack stands․ A hydraulic clutch bleeding kit is necessary for the clutch system․ Additional tools such as a flywheel puller and dial indicator may be required for precise adjustments․ Ensure all equipment is organized and within reach to streamline the process and avoid delays․

Creating a Detailed Parts List

A detailed parts list is crucial for a smooth E36 manual swap․ Key components include the manual transmission, clutch, flywheel, and pedal box․ Additional parts like a wiring harness, shift knob, and drivetrain components may be needed․ Use RealOEM to cross-reference parts for accuracy․ Ensure all items are compatible with your specific E36 model․ A well-organized list helps avoid delays and ensures every necessary part is accounted for before starting the project․

Key Components for the Swap

Key components for the E36 manual swap include the transmission, clutch, flywheel, pedal box, and wiring harness․ These parts are essential for a successful conversion․

Manual Transmission Options for the E36

The E36 supports various manual transmission options, including the ZF 5-speed and Getrag 6-speed units․ These transmissions are compatible with both 4-cylinder and 6-cylinder engines․ The ZF 5-speed is a popular choice for its durability and smooth shifting, while the Getrag 260/265 offers closer gear ratios for improved performance․ Factors like cost, engine compatibility, and desired performance should guide your transmission selection․ Additionally, consider pairing with a limited-slip differential for enhanced traction․

Clutch and Flywheel Selection

Choosing the right clutch and flywheel is crucial for a smooth E36 manual swap․ The clutch must match the engine and transmission specifications․ A lightweight flywheel enhances acceleration, while a performance clutch improves grip․ Options include organic, ceramic, or racing clutches․ Brands like Sachs and UUC Stage 2 offer reliable solutions․ Ensure compatibility with your manual transmission and engine type for optimal performance and durability․

The Swap Process

The E36 manual swap involves removing the automatic transmission and installing a manual setup․ This includes replacing the pedal box, adjusting the shifter, and ensuring proper alignment․

Removing the Automatic Transmission

Removing the automatic transmission is the first major step in the E36 manual swap․ Begin by disconnecting the shifter and electrical connectors, followed by the cooling lines and transmission mounts․ Drain the transmission fluid and remove the crossmember and heat shield for access․ Carefully lift the transmission out, ensuring not to damage surrounding components․ This step requires precision and proper equipment to avoid complications․ Seek professional help if unsure․

Installing the Manual Transmission

Installing the manual transmission involves mounting the new gearbox securely․ Use a ZF five-speed manual transmission, compatible with the E36 chassis․ Ensure the clutch and flywheel are properly aligned and installed․ The E36 engine’s bellhousing bolt pattern matches all transmissions, simplifying installation․ Connect the driveshaft, shifter linkage, and clutch master cylinder․ Align the transmission with the engine and tighten all bolts․ This step requires precision to ensure proper gear engagement and smooth operation․

Wiring and Electronics

Wiring modifications are essential for the manual swap, ensuring proper transmission control and functionality․ Rewire the transmission selector and bypass the EWS immobilizer system for compatibility․

Understanding the Wiring Harness Modifications

Wiring harness modifications are critical for the manual swap․ The automatic transmission selector must be rewired to mimic neutral or park, enabling engine start․ Additionally, the EWS immobilizer system must be bypassed to ensure proper functionality․ Specific pin connections in the DME and transmission controls need adjustment․ Consult wiring diagrams to avoid errors and ensure compatibility between the manual transmission and existing electronics․ Proper modifications guarantee smooth operation and prevent electrical issues post-swap․

Bypassing the EWS Immobilizer System

Bypassing the EWS immobilizer system is essential for the manual swap, especially in models where the DME has failed․ This involves rewiring specific pins in the DME to simulate the immobilizer’s presence, allowing the engine to start․ For 94-95 325i models, bypassing the EWS II system ensures proper functionality post-swap․ This step is critical for avoiding startup issues and maintaining system compatibility with the manual transmission setup․

Pedal Assembly and Hydraulic System

The pedal assembly requires replacing the automatic pedals with a manual setup, including a clutch master cylinder․ The hydraulic system must be properly bled to ensure smooth clutch operation․

Installing the Manual Pedal Box

Installing the manual pedal box involves removing the automatic pedal assembly and replacing it with a three-pedal setup․ This includes the clutch pedal, brake pedal, and accelerator pedal․ The clutch master cylinder must be properly mounted and connected to the reservoir․ Ensure the pedal box is aligned and securely bolted in place․ A common modification involves cutting the reservoir nipple to accommodate the new setup․ Finally, test the pedal operation to confirm smooth and precise clutch engagement․

Bleeding the Clutch Hydraulic System

Bleeding the clutch hydraulic system is essential to remove air bubbles and ensure proper clutch engagement․ Use a bleeding kit to pump fluid through the system, starting from the slave cylinder and moving up to the master cylinder․ Ensure the reservoir is filled with the correct brake fluid and avoid introducing air during the process․ Test the pedal feel after bleeding to confirm a firm, responsive clutch operation․ This step is critical for smooth manual transmission functionality․

Engine and Drivetrain Compatibility

The E36 engine and drivetrain compatibility ensures a seamless manual swap, supporting various engines with appropriate transmission pairings and drivetrain components for enhanced performance․

Ensuring Engine Compatibility with the Manual Transmission

All E36 engines share the same bellhousing bolt pattern, simplifying manual transmission swaps․ Popular options include the M52, S52, and M50B25 engines, paired with transmissions like the ZF 5-speed․ Ensure compatibility by selecting the correct clutch and flywheel for your engine․ This setup guarantees smooth operation and optimal performance, making the swap straightforward for enthusiasts seeking enhanced driving dynamics․

Upgrading the Drivetrain for Optimal Performance

Upgrading the drivetrain is crucial for maximizing performance after a manual swap․ Pairing the E36’s engine with a compatible transmission like the Getrag 250G or T-56 ensures smooth power delivery․ For higher torque engines, upgrading the driveshaft, differential, and axles is recommended․ A limited-slip differential enhances traction, while lightweight components reduce unsprung mass․ These upgrades ensure the drivetrain handles increased power and delivers a refined, responsive driving experience․

Budgeting and Cost Considerations

The E36 manual swap cost varies, typically ranging from $1,500 to $4,000, depending on transmission type, clutch, and additional upgrades․ Used parts and DIY labor can reduce expenses significantly․

Estimating the Total Cost of the Swap

The total cost of an E36 manual swap can range from $1,500 to $4,000, depending on the transmission type, clutch, and flywheel․ A used manual transmission typically costs $500-$1,000, while a new clutch and flywheel can add another $300-$600․ Additional expenses include the pedal assembly, wiring modifications, and labor if hiring a professional․ Sourcing parts from forums or junkyards can significantly reduce costs․ Budget accordingly to avoid unexpected expenses․

Where to Source Affordable Parts

Online forums, salvage yards, and BMW enthusiast communities are excellent sources for affordable parts․ Websites like eBay, Facebook Marketplace, and local classifieds often list used transmissions, pedal assemblies, and clutch components at reduced prices․ Junkyards can provide cost-effective solutions for compatible E36 parts․ Additionally, specialized BMW forums and groups offer peer recommendations and direct sales, ensuring you find reliable components without overspending․

Common Mistakes to Avoid

Incorrect wiring modifications, improper pedal assembly installation, and insufficient clutch system bleeding are common errors․ Ensuring compatibility and proper EWS bypass are critical to avoid issues․

Pitfalls to Watch Out for During the Swap

Common pitfalls include incorrect wiring modifications, improper pedal box installation, and insufficient clutch system bleeding․ Ignoring EWS immobilizer bypass can prevent engine start․ Mismatched transmission and engine compatibility may cause mechanical failure․ Overlooking drivetrain upgrades can lead to performance issues․ Improperly modified wiring harnesses may result in electrical malfunctions․ Always ensure precise alignment of components and verify parts compatibility before installation to avoid costly setbacks․

Troubleshooting Common Issues Post-Swap

  • If the car won’t start, ensure the EWS immobilizer is properly bypassed and the transmission is in neutral․
  • Grinding gears may indicate incorrect clutch engagement or misaligned transmission components․
  • Clutch issues could stem from improper bleeding or a faulty master/slave cylinder․
  • Electrical problems may arise from wiring harness modifications; verify all connections․
  • Drivetrain noise could signal loose mounts or improper differential installation․

Community and Resources

Online forums and BMW enthusiast communities provide invaluable support for E36 manual swaps․ RealOEM and detailed DIY guides are essential tools for a successful project․

Online Forums and Communities for Support

BMW enthusiasts rely on forums like Reddit’s r/BMW, Bimmerforums, and Facebook groups for E36 manual swap guidance․ These communities offer DIY guides, technical advice, and troubleshooting tips․ Members share personal experiences, parts lists, and solutions to common issues․ RealOEM is frequently recommended for accurate parts identification, while YouTube tutorials provide step-by-step visuals․ Engaging with these resources fosters a supportive environment, helping owners navigate the swap process confidently and effectively․

Recommended DIY Guides and Tutorials

Popular DIY guides for the E36 manual swap include detailed step-by-step tutorials on YouTube, such as Chris and Jon’s E46 wagon swap and Tomy and Joel’s JDM E36 conversion․ These videos provide visual instruction and troubleshooting tips․ Additionally, downloadable part lists and Excel spreadsheets outline essential components, ensuring a smooth process․ Tools like the UUC stage 2 flywheel and M5 clutch are frequently recommended, along with the RE SSK shifter for enhanced performance and reliability․

Post-Swap Maintenance and Optimization

Post-swap maintenance involves regular clutch and hydraulic system checks, ensuring optimal performance and longevity․ Proper lubrication and fluid levels are crucial for smooth operation․

Breaking in the New Clutch and Transmission

Breaking in the new clutch and transmission is crucial for ensuring longevity and smooth operation․ Avoid aggressive driving for the first 300-500 miles, using gentle acceleration and gradual shifting․ This allows the clutch and transmission components to properly seat and wear in evenly․ Monitor for any unusual noises or behaviors during this period․ Proper break-in ensures optimal performance and prevents premature wear on critical components․

Regular Maintenance Tips for the Manual Setup

Regular maintenance is essential for the longevity of the manual setup․ Check the transmission fluid level regularly and replace it every 30,000 to 60,000 miles․ Lubricate the shifter and linkage to ensure smooth operation․ Inspect the clutch and bearings for wear, and replace them as needed․ Monitor the hydraulic system for leaks and bleed it annually․ Use the correct specification fluid for optimal performance․ Address any unusual noises or vibrations promptly to prevent major repairs․


avaya 9608 ip phone manual

Category : Manuals

Overview of the Avaya 9608 IP Phone

The Avaya 9608 IP Phone is a high-performance VoIP phone designed for seamless communication, offering advanced features like HD audio, a color display, and programmable buttons for enhanced productivity.

1.1 Key Features of the Avaya 9608 IP Deskphone

The Avaya 9608 IP Deskphone offers HD audio quality for crystal-clear voice clarity, enhancing communication effectiveness. It features a color display with an intuitive interface, making navigation and feature access straightforward. The phone includes 24 programmable call appearance buttons, allowing customization for frequently used features or contacts. SIP support ensures compatibility with modern VoIP systems, while Gigabit Ethernet models provide high-speed data transmission. Its sleek design and advanced call handling capabilities make it ideal for business environments seeking reliable and efficient communication solutions.

1;2 Importance of the User Manual for Effective Usage

The user manual is essential for understanding and utilizing the full potential of the Avaya 9608 IP Deskphone. It provides detailed instructions for initial setup, advanced features, and troubleshooting, ensuring seamless operation. The manual covers key topics like SIP configuration, call handling, and customization options, helping users navigate the phone’s capabilities confidently. By following the guide, users can optimize their communication experience, troubleshoot common issues, and unlock all available features for enhanced productivity.

Installation and Setup of the Avaya 9608 IP Phone

The Avaya 9608 IP Phone requires proper network configuration and physical installation. Follow the step-by-step guide in the manual to ensure a smooth setup process.

2.1 System Requirements for Installation

The Avaya 9608 IP Phone requires a compatible IP network infrastructure. Ensure your system supports VoIP and SIP protocols. A LAN connection is necessary for connectivity, and the phone must be powered via a PoE switch or an external power adapter. The 9608 model supports standard Ethernet, while the 9608G includes Gigabit Ethernet for faster data transmission. Verify that your network meets these requirements before proceeding with installation to ensure optimal performance and functionality.

2.2 Step-by-Step Installation Guide

Connect the Ethernet cable to the LAN port on the phone and the other end to your network switch. Ensure PoE is enabled or use an external power adapter. 2. Power on the device and wait for the boot process to complete. 3. Configure network settings via the phone’s interface or use DHCP for automatic IP assignment. 4. Enter SIP server details and credentials provided by your administrator. 5. Test the connection by making a test call to ensure proper functionality. Follow the on-screen prompts for any additional setup requirements.

Understanding the Phone Layout

The Avaya 9608 IP Phone features an intuitive design with a color display, message waiting indicator, navigation buttons, and programmable keys, ensuring easy access to essential functions and enhanced usability.

3.1 Description of the Keypad and Navigation

The Avaya 9608 IP Phone keypad features a standard dial pad with programmable buttons, navigation keys, and a five-way navigation cluster for easy menu access. The phone includes a message waiting indicator and a prompt line to guide users through features. The keypad is designed for intuitive operation, with clearly labeled buttons for functions like call handling, volume control, and feature access. This layout ensures users can efficiently navigate and utilize the phone’s capabilities with minimal learning curve.

3.2 Exploring the Display and Indicators

The Avaya 9608 IP Phone features a high-resolution backlit display that shows call information, date, time, and active line indicators. The display also provides visual feedback for features like call forwarding and do not disturb. Indicators such as the message waiting light alert users to new voice messages. The display is user-friendly, with clear menus and prompts to guide navigation. This intuitive design ensures users can easily access and manage phone functions, enhancing overall communication efficiency and user experience.

Basic Call Handling

The Avaya 9608 IP Phone simplifies making and receiving calls with intuitive controls. Lift the handset or press the speaker button to answer. Dial numbers using the keypad for outbound calls, and use the volume buttons to adjust audio levels during conversations.

4.1 Making and Receiving Calls

To make a call on the Avaya 9608 IP Phone, lift the handset or press the speaker button. Dial the desired number using the keypad and adjust the volume using the volume control buttons. To receive a call, the phone will ring and display caller information. Answer by lifting the handset or pressing the speaker button. If unavailable, press the “Ignore” soft key to send the call to voicemail, ensuring seamless call management.

4.2 Call Hold, Transfer, and Conference Features

The Avaya 9608 IP Phone offers efficient call management features. To place a call on hold, press the “Hold” soft key. For transfers, use the “Transfer” button, dial the target extension or number, and confirm. The conference feature allows adding participants by pressing the “Conference” soft key. These tools enable seamless collaboration and enhance productivity in handling multiple calls simultaneously.

SIP Configuration and Settings

The Avaya 9608 IP Phone supports SIP configuration, enabling seamless integration with VoIP systems. Configure SIP parameters through the admin interface, ensuring proper server settings for optimal functionality.

5.1 Configuring SIP Parameters

Configuring SIP parameters on the Avaya 9608 IP Phone involves setting up the SIP server address, port, and credentials. Access the phone’s web interface by typing its IP address in a browser. Log in with the provided username and password. Navigate to the SIP configuration section, typically found under advanced settings. Enter the SIP server address, port number, SIP proxy, and registrar details as provided by your SIP provider. Ensure the credentials are correct to prevent connection issues. After configuring, save the settings and test by making a call. If issues arise, verify the server address, credentials, and network connection. Refer to the Avaya manual for specific recommendations and consider enabling secure SIP settings for enhanced security.

5.2 Troubleshooting SIP-Related Issues

Troubleshooting SIP-related issues on the Avaya 9608 IP Phone involves checking network connectivity, SIP server settings, and credentials. Common issues include registration failures, call drops, and one-way audio. Verify the SIP server address, port, and credentials are correct. Ensure the phone has a valid IP address and firewall settings allow SIP traffic. Restart the phone or reset to factory settings if issues persist. Consult the Avaya manual or contact your SIP provider for further assistance.

Advanced Features of the Avaya 9608 IP Phone

The Avaya 9608 IP Phone offers advanced features like call forwarding, do not disturb, and a built-in messaging system for efficient communication management. It also supports programmable buttons for customization.

6.1 Call Forwarding and Do Not Disturb

The Avaya 9608 IP Phone features Call Forwarding, allowing users to redirect incoming calls to another number or voicemail. The Do Not Disturb mode silences incoming calls, ensuring uninterrupted workflow. These settings can be easily configured via the phone’s intuitive interface, enhancing productivity and flexibility. Call forwarding options include unconditional, busy, or no-answer forwarding, while Do Not Disturb can be toggled on/off with a single button, providing seamless call management tailored to user preferences.

6.2 Using the Phone’s Messaging System

The Avaya 9608 IP Phone offers a robust messaging system for managing voicemail and messages. Users can access their mailbox to listen to, delete, or reply to messages. The phone features a message waiting indicator, providing visual and audio alerts for new messages. Via the intuitive interface, users can navigate through messages and customize settings for notifications. The system integrates seamlessly with Avaya’s communication platform, ensuring efficient and organized message management tailored to user needs.

Customization and Personalization

The Avaya 9608 IP Phone allows users to personalize their experience with programmable buttons, customizable ring tones, and adjustable display settings for enhanced convenience and efficiency.

7.1 Programming Call Appearance Buttons

The Avaya 9608 IP Phone features 24 programmable call appearance buttons, allowing users to customize their communication experience. These buttons can be configured to handle multiple lines, speed dials, or special features like call forwarding. By accessing the phone’s settings menu, users can easily assign functions to each button, ensuring quick access to frequently used options. This customization enhances productivity and streamlines workflows, making the phone adaptable to individual or organizational needs. Proper configuration ensures optimal functionality and ease of use.

7.2 Customizing Ring Tones and Display Settings

The Avaya 9608 IP Phone allows users to personalize their experience through customizable ring tones and display settings. Users can select from various pre-installed ring tones or upload unique tones to suit preferences. The display brightness and contrast can be adjusted for optimal visibility. Additional features include customizable screen savers and text size options, ensuring a tailored experience. These settings enhance user comfort and productivity, making the phone adaptable to individual needs and work environments. Personalization options are easily accessible via the phone’s menu system, ensuring a seamless customization process.

Maintenance and Troubleshooting

Regularly update firmware, clean the phone, and check network connections to ensure optimal performance. Troubleshoot common issues like call dropouts or connectivity problems by restarting the device or contacting support.

8.1 Regular Maintenance Tips

Regular maintenance ensures optimal performance of the Avaya 9608 IP Phone; Update firmware periodically to access new features and security patches. Clean the display and keypad with a soft cloth to prevent dust buildup. Check network connections and cables for stability. Restart the phone monthly to clear cached data. Avoid exposing the device to extreme temperatures or moisture. For detailed procedures, consult the user manual or contact support.

8.2 Common Issues and Solutions

Common issues with the Avaya 9608 IP Phone include registration errors, poor audio quality, and frozen displays. For registration issues, power cycle the phone and ensure correct SIP settings. Audio problems may require checking headset connections or restarting the device. A frozen display can be resolved by unplugging and replugging the phone. Consult the user manual for detailed troubleshooting steps or contact technical support for persistent problems to ensure optimal functionality and performance.

Security Features and Best Practices

The Avaya 9608 IP Phone features secure SIP support, ensuring encrypted communication. Best practices include regular firmware updates, strong passwords, and physical security measures to prevent unauthorized access and maintain system integrity.

9.1 Securing Your Avaya 9608 IP Phone

The Avaya 9608 IP Phone offers robust security features to protect your communications. Enable secure SIP support for encrypted call data. Use strong, unique passwords for admin and user accounts. Regularly update firmware to patch vulnerabilities. Physically secure the device to prevent unauthorized access. Disable unnecessary ports and ensure the phone is connected to a trusted network. Encrypt sensitive data and configure secure authentication methods to safeguard your system from potential threats and maintain confidentiality.

9.2 Best Practices for Safe Usage

To ensure safe usage of the Avaya 9608 IP Phone, always use strong, unique passwords and keep firmware updated. Avoid using public networks for configuration and restrict access to authorized personnel. Regularly back up settings and monitor for unauthorized changes. Use encryption for data transmission and disable unnecessary features. Store the phone in a secure location to prevent tampering. Follow manufacturer guidelines for maintenance and report suspicious activity promptly to maintain system integrity and user privacy.

The Avaya 9608 IP Phone offers a blend of HD audio, a color display, and programmable buttons, making it ideal for enhancing business communication effectively;

10.1 Summary of Key Features and Benefits

The Avaya 9608 IP Phone combines HD audio quality, a vibrant color display, and 24 programmable buttons for enhanced productivity. Its SIP support ensures compatibility with modern VoIP systems, while built-in security features protect user data. The phone’s intuitive interface and customizable settings make it ideal for business environments. With Gigabit Ethernet options and reliable performance, it offers a seamless communication experience tailored to meet diverse organizational needs effectively.

10.2 Final Tips for Optimal Performance

For optimal performance, ensure your Avaya 9608 IP Phone is regularly updated with the latest software. Maintain a stable network connection and customize settings to suit your workflow. Use Quality of Service (QoS) settings to prioritize voice traffic. Clean the phone’s display and keypad regularly to maintain functionality. Lastly, review the user manual for advanced features and troubleshooting tips to maximize your communication experience.


peugeot boxer wiring diagram pdf

Category : United Kingdom

A Peugeot Boxer wiring diagram is a comprehensive guide to understanding the vehicle’s electrical system, essential for repairs, troubleshooting, and installing aftermarket accessories. These diagrams provide detailed visual representations of wire connections, circuits, and components, helping users identify and resolve electrical issues efficiently. They are indispensable for both professional mechanics and DIY enthusiasts, ensuring safe and accurate modifications or diagnostics.

1.1 Overview of the Peugeot Boxer Electrical System

The Peugeot Boxer’s electrical system is complex, comprising wiring, circuits, and components like fuses, relays, and control modules. It powers essential functions such as lighting, ignition, and electronic accessories. The system is organized into sections, with wiring diagrams providing a clear visual representation of connections and components. These diagrams are crucial for diagnosing issues and ensuring proper functionality across all electrical systems.

1.2 Importance of Wiring Diagrams for DIY Repairs and Maintenance

Wiring diagrams are essential for DIY repairs and maintenance of the Peugeot Boxer, offering a clear visual guide to the electrical system. They help identify faulty components, trace circuits, and understand connections, making troubleshooting easier and safer. Diagrams ensure accurate repairs, reduce time spent diagnosing issues, and prevent potential damage from incorrect wiring modifications.

Sources for Peugeot Boxer Wiring Diagrams

Peugeot Boxer wiring diagrams are available through official Peugeot websites, service manuals, online forums, and third-party PDF repositories. These sources provide detailed electrical system maps for DIY enthusiasts and professionals.

2.1 Official Peugeot Websites and Service Manuals

Official Peugeot websites and service manuals are the most reliable sources for accurate wiring diagrams. These resources are tailored to specific model years, offering detailed electrical schematics, component locations, and repair instructions. They are available for download in PDF format, ensuring compatibility with various devices, making them ideal for both professionals and DIY enthusiasts. Additionally, they are regularly updated, providing the latest technical information.

2.2 Online Forums and Communities

Online forums and communities are valuable resources for finding Peugeot Boxer wiring diagrams. Enthusiasts and experts often share PDF files, providing access to specific diagrams for various model years. These platforms also offer discussions, troubleshooting tips, and advice from experienced owners, making them an excellent alternative to official sources for locating hard-to-find or model-specific wiring diagrams.

2.3 Third-Party PDF Repositories

Third-party PDF repositories offer a wide range of Peugeot Boxer wiring diagrams, often available for free or through paid subscriptions. Websites like ManualsLib, AutoManuals, and specialized forums host comprehensive collections, including detailed diagrams for specific model years. These repositories are particularly useful for accessing diagrams not readily available on official Peugeot websites or service manuals, catering to both DIY enthusiasts and professional mechanics.

Understanding the Wiring Diagram

Understanding the Peugeot Boxer wiring diagram involves interpreting symbols, color codes, and layouts to identify components and connections clearly and efficiently for effective repairs.

3.1 Symbols and Abbreviations Used in the Diagram

The Peugeot Boxer wiring diagram uses standardized symbols and abbreviations to represent components like bulbs, relays, and fuses. These symbols are universally recognized, ensuring clarity for technicians and DIYers. Common abbreviations include ‘GND’ for ground and ‘IGN’ for ignition, while symbols for resistors and capacitors are also included. This consistency aids in quick identification and troubleshooting of electrical circuits.

3.2 Color Coding of Wires

Peugeot Boxer wiring diagrams use specific color coding to identify wire functions. Red wires often indicate constant power, while black denotes ground. Other colors like yellow or blue may signify ignition or accessory circuits. This standardized system helps technicians and DIYers trace connections efficiently, ensuring accurate diagnostics and repairs. Always refer to the diagram’s legend for precise color meanings.

3.3 Layout and Structure of the Diagram

The Peugeot Boxer wiring diagram is organized hierarchically, starting with the main power supply and branching into subsystems like lighting, ignition, and accessories. Each section is clearly labeled, with components represented by standardized symbols. The layout follows a logical flow, making it easier to trace circuits and identify connections. A detailed legend explains symbols and abbreviations, ensuring clarity for users.

Troubleshooting Common Electrical Issues

Identify symptoms, locate relevant circuits in the wiring diagram, and test components like fuses and relays. Use a multimeter to check for voltage and continuity, following the diagram to trace connections. Replace faulty parts based on test results to resolve issues efficiently.

4.1 Identifying Faulty Components Using the Wiring Diagram

Use the wiring diagram to trace connections and locate components causing electrical issues. Identify symptoms, test circuits with a multimeter for voltage and continuity, and cross-reference findings with the diagram. This method helps pinpoint faulty parts like blown fuses, bad relays, or damaged wires, ensuring accurate diagnostics and efficient repairs.

4.2 Step-by-Step Guide to Diagnosing Electrical Problems

Start by consulting the wiring diagram to understand circuit connections. Inspect wires and connectors for visible damage. Use a multimeter to test voltage and continuity. Isolate the faulty circuit using the diagram. Consult the troubleshooting section or repair manual for common issues. Plan and execute repairs based on diagnostic findings to restore functionality efficiently.

DIY Projects and Modifications

Wiring diagrams enable safe and effective DIY modifications, such as installing aftermarket lights or alarms. Plan carefully, use relays, and follow fuse specifications to avoid damage.

5.1 Upgrading Electrical Systems

Upgrading the Peugeot Boxer’s electrical system requires precise planning and wiring diagram analysis. Replacing outdated components with modern alternatives, such as LED lighting or advanced infotainment systems, is simplified by referencing the wiring diagram. It helps identify compatible circuits and ensures safe, efficient installations. Always follow a step-by-step guide and test each component post-installation for optimal functionality and safety.

5.2 Installing Aftermarket Accessories

Installing aftermarket accessories like alarms, dash cams, or towbar wiring in your Peugeot Boxer requires a detailed wiring diagram. This ensures proper connections, avoiding electrical conflicts. The diagram helps locate suitable power sources and ground points, while color-coded wires simplify the process. Always test connections post-installation to ensure functionality and prevent system damage or electrical malfunctions.

Model-Specific Wiring Diagrams

Peugeot Boxer wiring diagrams vary by model year, with detailed resources available for 1994-2006, 2006-2014, and later models. These PDFs provide year-specific electrical layouts for accurate repairs and modifications.

6.1 Differences Between Peugeot Boxer Generations

Different Peugeot Boxer generations (1994-2006, 2006-2014, and later) have distinct wiring diagrams due to evolving electrical systems. Older models feature simpler circuits, while newer generations incorporate advanced technologies like multiplexing and CAN bus systems. These variations require generation-specific diagrams for accurate repairs and modifications, ensuring compatibility with the vehicle’s unique electrical architecture and components.

6.2 Wiring Diagrams for Specific Years (1994-2006, 2006-2014, etc.)

Peugeot Boxer wiring diagrams vary by production year, reflecting changes in electrical systems. The 1994-2006 models have simpler circuits, while 2006-2014 diagrams include advanced features like multiplexing. Later models incorporate CAN bus systems for enhanced connectivity. Specific-year diagrams ensure accurate repairs, as components and configurations differ significantly across generations, requiring precise guidance for each era’s unique electrical setup and technology.

Safety Precautions When Working with Wiring

Always disconnect the battery and wear protective gear when handling wiring. Use insulated tools to avoid shocks. Ensure proper grounding and follow diagram guidelines to prevent damage or injury.

7.1 Essential Tools and Protective Gear

Essential tools include a multimeter, wire cutters, screwdrivers, and circuit testers. Protective gear like insulated gloves, safety glasses, and a face mask are crucial. Always use tools with insulated handles to prevent electrical shocks. Ensure proper ventilation and avoid loose clothing. Refer to your Peugeot Boxer wiring diagram for specific tool recommendations tailored to your vehicle’s electrical system.

7.2 Best Practices for Avoiding Electrical Shocks or Damage

Disconnect the battery before working on electrical systems to prevent shocks. Use multimeters on low settings and avoid short circuits. Ground yourself to discharge static electricity. Never touch live wires without insulated tools. Follow the Peugeot Boxer wiring diagram to identify live circuits and ensure all components are de-energized before starting repairs or modifications.

Software and Tools for Interpreting Wiring Diagrams

Adobe Acrobat is essential for viewing Peugeot Boxer wiring diagrams in PDF format. Specialized software like Service Box provides enhanced tools for interpreting and analyzing electrical systems effectively.

8.1 Adobe Acrobat for Viewing PDF Diagrams

Adobe Acrobat is an essential tool for viewing Peugeot Boxer wiring diagrams in PDF format. It offers features like zoom, search, and bookmarks, making it easy to navigate complex diagrams. Acrobat’s reliability and compatibility with multiple devices ensure clear visibility of wire colors, symbols, and component labels, aiding in accurate repairs and modifications. It remains the preferred choice for accessing detailed electrical system documentation.

8.2 Specialized Electrical Diagram Software

Specialized software enhances the interpretation of Peugeot Boxer wiring diagrams, offering advanced tools for editing, simulating, and analyzing electrical systems. Programs like EPLAN or AutoCAD provide detailed schematics, enabling users to trace circuits, identify components, and troubleshoot efficiently. These tools are invaluable for complex modifications and repairs, ensuring precise work and minimizing errors in the electrical system of the vehicle.

Comparison with Similar Vehicles

Advanced software like EPLAN or AutoCAD simplifies the interpretation of wiring diagrams, offering tools for circuit simulation, component tracing, and system analysis. These programs enable precise modifications and troubleshooting, ensuring accuracy and efficiency when working with complex electrical systems of the Peugeot Boxer, making them essential for both professionals and enthusiasts.

9.1 Citroen Jumper and Fiat Ducato Wiring Diagrams

The Citroen Jumper and Fiat Ducato share a common platform with the Peugeot Boxer, resulting in similar wiring diagrams. These vehicles often have interchangeable electrical systems, making their diagrams comparable for repairs and modifications. The shared architecture simplifies troubleshooting across models, allowing owners and technicians to use similar resources for diagnosing and resolving electrical issues efficiently.

9.2 Key Differences and Similarities

Despite sharing a common platform, the Peugeot Boxer, Citroen Jumper, and Fiat Ducato have distinct wiring configurations due to model-specific features and technologies. These differences are crucial for accurate diagnostics and modifications, ensuring compatibility and functionality. Using the correct wiring diagram for each model is vital to prevent electrical issues and ensure safe, effective repairs and upgrades.

Future Trends in Peugeot Boxer Wiring Systems

Future Peugeot Boxer wiring systems will feature enhanced connectivity, smarter diagnostics, and eco-friendly designs, ensuring efficient and sustainable electrical solutions for upcoming models.

10.1 Advancements in Electrical Systems

Advancements in Peugeot Boxer electrical systems include intelligent wiring, real-time diagnostics, and integrated connectivity. These innovations enhance performance, reduce complexity, and improve safety, making future models more efficient and user-friendly while ensuring compatibility with modern technologies and reducing environmental impact.

10.2 Integration of Modern Technologies

Peugeot Boxer now integrates advanced technologies like telematics, driver-assistance systems, and infotainment. These innovations enhance safety, efficiency, and connectivity, ensuring a modern driving experience. Updated wiring diagrams reflect these advancements, enabling seamless installation and maintenance of new features. Such integrations keep the Boxer aligned with current automotive trends, providing users with a sophisticated and connected vehicle.

Peugeot Boxer wiring diagrams are essential tools for efficient repairs and modifications. They provide clear guidance, ensuring safety and accuracy. Utilize official resources for reliability and always follow safety guidelines to avoid electrical risks.

11.1 Summary of Key Points

Peugeot Boxer wiring diagrams are crucial for understanding the vehicle’s electrical system, enabling effective troubleshooting and modifications. They provide detailed visual representations of circuits and components, aiding in diagnostics and repairs. Accessible through official manuals, forums, and PDF repositories, these diagrams ensure accuracy and safety. Regular updates and model-specific variations are essential for maintaining reliability and performance, while safety precautions and proper tools are vital for working with wiring systems effectively. Always refer to official sources for the most accurate and up-to-date information to avoid electrical risks and ensure successful outcomes.

11.2 Final Tips for Working with Peugeot Boxer Wiring Diagrams

  • Always use official Peugeot sources or verified PDFs for accuracy.
  • Disconnect the battery before starting any electrical work.
  • Use proper tools and protective gear to avoid damage or shock.
  • Cross-reference diagrams with repair manuals for clarity.
  • Seek professional help if unsure about complex modifications.
  • Download diagrams from trusted websites to ensure reliability.

220 901 dumps pdf

Category : PDF

The 220-901 Dumps PDF is a valuable resource for CompTIA A+ certification preparation, offering a comprehensive collection of exam questions and answers. It covers hardware, software, networking, and practical scenarios, providing candidates with the necessary tools to assess their knowledge and readiness. Regularly updated, these dumps ensure relevance and accuracy, helping aspirants understand key concepts and exam patterns effectively;

1.1 What Are 220-901 Dumps PDF?

220-901 Dumps PDF are study materials containing actual exam questions and answers for the CompTIA A+ 220-901 certification. They provide insights into hardware, software, networking, and practical scenarios, helping candidates assess their knowledge. Available in PDF format, these dumps are regularly updated to align with the latest exam content, ensuring accuracy and relevance for effective preparation.

1.2 Importance of Using Exam Dumps for Certification Preparation

Exam dumps are a valuable tool for certification preparation, offering real-world questions and answers that mirror the actual exam. They help candidates understand the exam format, identify knowledge gaps, and improve problem-solving skills. Regular practice with dumps enhances time management and boosts confidence, ensuring better performance on the CompTIA A+ 220-901 exam. They are a convenient and effective way to assess and refine readiness for the certification.

Overview of the CompTIA A+ 220-901 Exam

The CompTIA A+ 220-901 exam assesses IT professionals’ skills in hardware, software, networking, and security. It’s a critical step toward achieving CompTIA A+ certification, using dumps for effective preparation.

2.1 Exam Objectives and Structure

The CompTIA A+ 220-901 exam is designed to validate skills in installing, configuring, and troubleshooting hardware, software, and networking systems. It emphasizes practical scenarios, ensuring candidates can apply knowledge in real-world situations. The exam consists of multiple-choice and performance-based questions, covering topics like hardware components, operating systems, security, and networking fundamentals. Its structure is divided into sections, each focusing on specific skills, ensuring a comprehensive assessment of IT proficiency.

2.2 Key Topics Covered in the Exam

The exam covers essential topics such as hardware components, including RAM types, expansion slots, and storage devices. Software-related subjects like operating systems, security, and troubleshooting are also emphasized. Networking fundamentals, including protocols and configurations, are included to ensure a well-rounded understanding. These topics are designed to assess a candidate’s ability to handle practical scenarios and real-world IT challenges effectively.

Content of 220-901 Dumps PDF

The 220-901 Dumps PDF includes hardware-related questions, software and networking concepts, and practical scenario-based exercises to enhance exam preparation and technical understanding.

3.1 Hardware-Related Questions and Answers

The 220-901 Dumps PDF includes a wide range of hardware-related questions and answers, covering topics such as RAM types, expansion slots, backup media, monitor safety, and RAID configurations. It also addresses components like ports, expansion cards, cooling systems, and storage devices. These questions help candidates understand hardware diagnostics, troubleshooting, and best practices for computer technicians, ensuring they are well-prepared for real-world scenarios and exam challenges.

3.2 Software and Networking Concepts

The 220-901 Dumps PDF also covers software and networking concepts, including operating systems, network protocols, and security measures. It addresses topics like RAID configurations, monitor safety, and connectivity. The dumps include questions on network devices, such as routers and switches, and software-related tasks like installation and troubleshooting. These resources help candidates understand both hardware and software interactions, ensuring comprehensive preparation for the CompTIA A+ exam.

Benefits of Using 220-901 Dumps PDF

The 220-901 Dumps PDF enhances exam preparation efficiency by providing realistic practice questions. It helps candidates familiarize themselves with the exam format and improves problem-solving skills effectively.

4.1 Improved Exam Preparation Efficiency

The 220-901 Dumps PDF boosts preparation efficiency by offering real-world exam questions, enabling candidates to identify weak areas and focus on critical topics. Regular updates ensure content relevance, while structured answers provide clear explanations. This resource saves time by consolidating essential material, allowing focused study and better time management. Candidates gain confidence and readiness through practical exposure to exam-like scenarios, streamlining their learning process effectively.

4.2 Enhanced Understanding of Exam Format

The 220-901 Dumps PDF provides a clear understanding of the exam format, including question types, time management, and content structure. By practicing with real-world questions, candidates become familiar with the layout and expectations, reducing exam-day anxiety. This familiarity enhances their ability to navigate the test confidently, ensuring they can focus on demonstrating their knowledge rather than being overwhelmed by the format itself.

How to Use 220-901 Dumps Effectively

Regularly practice with the 220-901 Dumps PDF, review explanations, focus on weaknesses, and simulate exam conditions to build confidence and ensure thorough preparation effectively.

5.1 Study Strategies for Maximum Retention

Use spaced repetition to review 220-901 dumps regularly, focusing on weak areas. Practice active recall by testing yourself without notes. Engage in contextual learning by relating questions to real-world scenarios. Utilize flashcards for key terms and concepts. Prioritize understanding over memorization, ensuring deep comprehension of hardware, software, and networking topics. Track progress and adjust study schedules to reinforce challenging subjects, enhancing long-term retention and exam readiness effectively.

5.2 Practicing with Sample Questions

Practicing with sample questions from 220-901 dumps PDF helps simulate real exam conditions, improving time management and reducing anxiety. Candidates can assess their readiness by attempting varied question types, including multiple-choice and performance-based tasks. Reviewing incorrect answers enhances understanding and identifies areas for further study. Regular practice builds confidence and ensures familiarity with the exam format, making it easier to approach the actual test with precision and composure.

Finding Reliable Sources for 220-901 Dumps PDF

Trusted platforms like IT-Tests.com and ValidExamDumps offer verified 220-901 questions, ensuring accuracy and relevance. These sources provide updated content, reflecting the latest exam changes and standards.

6.1 Trusted Websites and Platforms

Reputable sources like IT-Tests.com and ValidExamDumps offer high-quality 220-901 dumps, ensuring authenticity and relevance. These platforms provide regularly updated questions, mirroring the actual exam format, and are verified by experts. They offer a 100% pass guarantee, making them reliable choices for candidates seeking accurate study materials. Their user-friendly formats, including PDF and online practice tests, cater to diverse learning preferences and exam preparation needs.

6.2 Avoiding Scams and Low-Quality Dumps

When searching for 220-901 dumps PDF, beware of scams and low-quality materials. Avoid unsolicited links or free offers, as they may contain malware or outdated content. Ensure the source is reputable, with expert-verified questions and regular updates. Steer clear of untrusted platforms, as they often provide irrelevant or incorrect information. Always check user reviews and opt for platforms offering a pass guarantee to ensure quality and reliability.

Format and Structure of 220-901 Dumps PDF

The 220-901 dumps PDF features a clean, professional layout with clear sections and sub-sections. Questions and answers are logically organized, making it easy to navigate and study. The format includes bookmarks for quick access to topics, while search functionality helps locate specific content efficiently. The structure ensures all exam topics are covered comprehensively, with clear typography and spacing for optimal focus.

7.1 User-Friendly Layout for Easy Navigation

The 220-901 dumps PDF is designed with a user-friendly layout, ensuring easy navigation through its extensive content. The document features clear headings, subheadings, and bullet points, making it simple to locate specific topics. Questions and answers are neatly organized, while bookmarks and search functionality allow quick access to desired sections. This intuitive design minimizes distractions, enabling focused study and efficient exam preparation. The clean format enhances readability, ensuring a seamless learning experience for all users.

7;2 Updated and Relevant Content

The 220-901 dumps PDF is regularly updated to reflect the latest exam objectives and questioning patterns. This ensures that the content remains relevant and aligns with the current CompTIA A+ certification requirements. Updated materials help candidates avoid outdated information, focusing instead on the most recent technologies and industry standards. Reliable sources ensure the dumps are refreshed periodically, maintaining their effectiveness for exam preparation and alignment with the exam’s focus areas.

Comparing Free vs. Paid 220-901 Dumps PDF

Free dumps offer cost-effective exam preparation but may lack updates and comprehensive coverage. Paid dumps provide reliable, updated content and comprehensive topic coverage, ensuring better exam readiness.

8.1 Pros and Cons of Free Dumps

Free 220-901 dumps offer cost-effective access to exam questions, helping candidates gauge their readiness without financial commitment. They are ideal for initial preparation and familiarizing oneself with exam formats. However, free dumps may lack updates, contain outdated content, or have inaccuracies. Some free resources are verified by experts, ensuring reliability, while others may include irrelevant or low-quality questions, potentially misleading exam preparation. Balancing convenience and quality is crucial when using free dumps.

8.2 Advantages of Paid Dumps

Paid 220-901 dumps offer numerous advantages, including access to regularly updated, high-quality content verified by experts. They provide comprehensive coverage of exam topics, ensuring relevance and accuracy. Paid dumps often include detailed explanations for answers, enhancing understanding. Additionally, they are free from ads and distractions, offering a focused study experience. Many paid options also come with a pass guarantee, making them a secure investment for serious candidates aiming to succeed in their certification exam.

The Role of Practice Exams in Certification Success

Practice exams play a crucial role in certification success by simulating real-test conditions, helping candidates assess their readiness, identify weaknesses, and refine their exam-taking strategies effectively.

9.1 Simulating Real-Exam Conditions

Practice exams simulate real-exam conditions, allowing candidates to familiarize themselves with question formats, time constraints, and test environments. This replication helps reduce exam anxiety, improves time management, and enhances readiness. By mimicking the actual test experience, practice exams enable candidates to assess their performance under pressure, ensuring they are well-prepared for the challenges of the real CompTIA A+ 220-901 certification exam.

9.2 Identifying Weaknesses and Strengths

Practice exams help candidates identify their weaknesses by highlighting areas where they struggle, such as hardware troubleshooting or networking concepts. This allows focused study on vulnerable topics. Conversely, they also reveal strengths, boosting confidence in areas like software installation or security. Regular self-assessment through dumps enables candidates to refine their skills, address gaps, and optimize their study time for a more targeted and effective exam preparation strategy.

220-901 dumps PDF is a valuable resource for effective exam preparation, offering comprehensive coverage of key topics and practical insights. Prepare thoroughly to ensure success.

10.1 Final Thoughts on Using 220-901 Dumps PDF

220-901 dumps PDF is an indispensable tool for CompTIA A+ certification preparation, offering a wide range of exam questions and answers. It covers essential topics like hardware, software, and networking, ensuring candidates are well-prepared. Regular updates guarantee the content stays relevant and accurate, helping aspirants identify weaknesses and improve their understanding of the exam format. Utilizing these dumps effectively can significantly enhance your chances of success in the CompTIA A+ exam.

10.2 Encouragement to Prepare Thoroughly

Thorough preparation with 220-901 dumps PDF is essential for excelling in the CompTIA A+ exam. These resources offer insights into hardware, software, and networking, helping you identify gaps and strengthen your skills. Regular practice with updated questions ensures familiarity with the exam format and boosts confidence. Dedicate time to study consistently, as diligent preparation is the key to achieving certification and advancing your IT career.


first alert 7010b manual

Category : Manuals

Welcome to the First Alert 7010B Manual, your comprehensive guide to understanding and installing the 7010B Smoke Detector․ This manual provides essential information for optimal performance and safety․

Key Features of the First Alert 7010B Smoke Detector

The First Alert 7010B features advanced photoelectric smoke sensing technology and Optipath 360 Technology for reliable smoke detection, reducing false alarms and providing 360-degree smoke entry for enhanced accuracy and safety․

2․1․ Photoelectric Smoke Sensing Technology

The First Alert 7010B utilizes photoelectric smoke sensing technology, which is highly effective in detecting smoke particles produced by smoldering fires․ This technology works by projecting a light beam inside a chamber․ When smoke enters, it scatters the light, triggering the alarm․ Photoelectric sensors are particularly sensitive to large smoke particles, making them ideal for detecting slow-burning fires, such as those involving furniture or bedding․ This feature enhances fire safety by providing an early warning system․ It also helps reduce false alarms compared to ionization-based detectors, ensuring reliable performance․ The photoelectric technology in the 7010B is a key reason why this smoke detector is trusted for its accuracy and responsiveness in various fire scenarios․

2․2․ Optipath 360 Technology

The First Alert 7010B features Optipath 360 Technology, a patented innovation designed to enhance smoke detection accuracy․ This technology provides 360-degree access to the smoke sensor, allowing smoke to enter from any direction․ By eliminating blind spots, Optipath 360 ensures faster and more reliable detection of smoke particles․ This advanced system is particularly effective in reducing false alarms caused by obstructions or uneven smoke distribution; The technology works seamlessly with the photoelectric sensor, improving overall performance in various fire scenarios․ With Optipath 360, the 7010B delivers enhanced sensitivity and responsiveness, making it a trusted choice for home fire safety․ Its integrated design ensures comprehensive smoke detection, providing peace of mind for users․

Installation Requirements and Recommendations

Ensure the First Alert 7010B is installed on a flat surface, avoiding areas near vents or doors; Proper ventilation and mounting height are crucial for optimal performance and reliability․

3․1․ Compatibility with Other Smoke Alarm Models

The First Alert 7010B is designed to be compatible with various smoke alarm models, ensuring seamless integration into existing systems․ It works with BRK Electronics Smoke Alarm Models such as 9120, 9120B, SC9120B, 7010, 7010B, 4120, 4120B, 4120SB, 4919, 2002RAC, and 100S․ Additionally, it is compatible with First Alert Smoke Alarm Models like SA4120․ This compatibility allows for interconnected systems, enhancing whole-house protection by ensuring all alarms sound when one detects smoke․ Proper installation and connection are crucial to maintain reliability and performance․ Always refer to the manual for specific compatibility details and wiring instructions to ensure safe and correct setup․

3․2․ Step-by-Step Installation Guide

Installing the First Alert 7010B Smoke Detector requires careful attention to ensure proper functionality and safety․ Begin by reading the manual thoroughly, paying attention to safety warnings and precautions․ Choose a location on the ceiling or wall, avoiding areas near vents, windows, or direct sunlight․ Mount the bracket securely using screws or adhesive, ensuring it is level․ Attach the smoke detector to the bracket by twisting it into place․ For hardwired models, connect the wires according to the wiring diagram in the manual․ Test the alarm by pressing the test button to ensure it emits a loud signal․ Finally, ensure all units in an interconnected system are tested together․ Always follow local regulations and consider professional assistance if unsure․ Proper installation is critical for reliable performance and fire safety․

Understanding the User Manual

Welcome to the First Alert 7010B Manual, designed to guide you through safe installation, operation, and maintenance․ This manual ensures you understand all features and safety precautions for optimal use․

4․1․ Important Safety Warnings and Precautions

The First Alert 7010B Manual emphasizes critical safety guidelines to ensure proper installation and operation․ It is essential to read all warnings carefully to avoid potential hazards․ Key precautions include maintaining clear ventilation openings to prevent obstruction, as blocked vents can impair the smoke sensor’s accuracy․ The detector must be installed in a well-ventilated area to avoid false alarms caused by cooking fumes or steam․ Additionally, the manual warns against placing the alarm near strong air currents or direct sunlight, which may affect performance․ It also stresses the importance of regular testing and maintenance to ensure reliability․ The 7010B model features a battery backup system, but proper installation of the battery is crucial for functionality during power outages․ Adhering to these precautions ensures the smoke detector operates effectively, providing early warnings and enhancing home safety․

4․2․ How to Read and Interpret the Manual

The First Alert 7010B Manual is designed to be user-friendly, providing clear instructions for installation, operation, and maintenance․ It is available in English and Spanish, ensuring accessibility for a broad audience․ The manual is structured into sections, starting with safety warnings, followed by product features, installation steps, and troubleshooting tips․ Users are advised to read the manual thoroughly before proceeding with any setup or testing․ Key sections include compatibility details with other smoke alarm models, such as the 9120B and SC9120B, and specific guidelines for hardwired systems․ The manual also emphasizes the importance of regular maintenance, such as cleaning the sensor and replacing batteries, to ensure optimal performance․ By following the manual’s instructions, users can maximize the effectiveness of their smoke detector and enhance home safety․

Troubleshooting Common Issues

The First Alert 7010B Manual provides solutions for common problems like false alarms, sensor blockage, or battery issues․ Refer to the manual for step-by-step guidance to resolve these issues effectively․

5․1․ Identifying Common Problems

Users of the First Alert 7010B Smoke Detector may encounter several common issues during operation․ One frequent problem is false alarms, often caused by dust, steam, or cooking smoke interfering with the sensor․ Another issue is sensor blockage, which can occur due to accumulated dirt or debris covering the smoke sensor․ Additionally, battery-related problems are common, such as low battery warnings or the alarm not functioning during power outages․ Some users also report intermittent chirping, which may indicate a faulty battery or improper installation․ Finally, compatibility issues can arise when integrating the 7010B with other smoke alarm models or home security systems․ Identifying these problems early is crucial to ensure the device functions correctly and provides reliable fire detection․ Always refer to the manual for specific troubleshooting guidance․

5․2․ Solutions for Optimal Performance

To ensure the First Alert 7010B Smoke Detector operates at its best, follow these solutions․ Regularly clean the sensor to prevent dust and debris from causing false alarms or reduced sensitivity․ Replace the battery annually or when the low-battery warning sounds, ensuring it is installed correctly․ For intermittent chirping, check for proper battery installation or replace the battery if it’s nearing expiration․ If the alarm sounds without smoke, try silencing it and verifying the source of the trigger, then cleaning the sensor․ Always install the detector in a well-ventilated area and avoid placing it near kitchens or bathrooms to minimize false alarms․ Finally, ensure compatibility with other smoke alarms in your system and refer to the manual for advanced troubleshooting․ Proper maintenance and adherence to these steps will maximize the detector’s reliability and performance․

Maintenance and Upkeep

Regularly clean the smoke detector to ensure optimal performance․ Replace batteries annually or when the low-battery warning sounds․ Inspect the unit monthly and follow the manual’s guidelines for proper upkeep․

6․1․ Cleaning the Smoke Detector

Regular cleaning is essential to maintain the First Alert 7010B Smoke Detector’s performance․ Use a soft, dry cloth or a vacuum cleaner to gently remove dust and debris from the exterior and vents․ Avoid using chemicals, water, or abrasive materials, as they may damage the sensor․ For internal cleaning, detach the detector from its base and use compressed air to remove particles․ Ensure all openings are clear to prevent obstruction․ Clean the battery compartment and connections with a dry cloth to maintain proper function․ Regular maintenance ensures accurate detection and reduces false alarms․ Always follow the manual’s guidelines for cleaning to avoid voiding the warranty․

By keeping the smoke detector clean, you ensure reliable protection for your home and family․

6․2․ Battery Care and Replacement

Proper battery care and replacement are crucial for ensuring the First Alert 7010B Smoke Detector functions reliably․ The 7010B model includes a battery backup, which provides power during outages․ To maintain performance, use a fresh, high-quality battery of the recommended type (typically a 9-volt battery)․ Avoid mixing old and new batteries or using expired ones․ When replacing the battery, remove the detector from its base, open the battery compartment, and insert the new battery correctly․ Ensure the battery drawer closes securely to activate the unit․ Test the alarm after replacement by pressing the test button․ Replace batteries annually or when the low-battery warning sounds․ Always dispose of used batteries responsibly․ Proper battery maintenance ensures continuous protection and peace of mind for your home and family․ Regular checks and timely replacements are essential for optimal functionality․