Month: December 2025

  • 0

pack man pen instructions

Category : Instructions

Packman Pen Instructions: A Comprehensive Guide

Welcome! This guide details using Packman disposable vapes, emphasizing ease of use and proper technique. From unboxing to refilling empty disposables, we’ll cover everything.

Enjoy a smooth vaping experience with our step-by-step instructions, ensuring safety and optimal performance. Remember to take slow, steady puffs for best results!

Understanding Packman Disposable Vapes

Packman disposable vapes have rapidly gained popularity, offering a convenient and user-friendly vaping experience. These devices are pre-filled and pre-charged, eliminating the need for messy refills or battery replacements – a significant advantage for both beginners and experienced vapers. Their compact design makes them incredibly portable, fitting easily into a pocket or bag for on-the-go enjoyment.

The core appeal lies in their simplicity. Unlike traditional vape kits requiring setup and maintenance, Packman disposables are ready to use straight out of the box. Simply unbox, and the device is activated with a simple draw. This makes them an excellent entry point into the world of vaping, removing the initial learning curve associated with more complex systems.

However, Packman also offers empty disposable vapes, providing a more sustainable and cost-effective option. These allow users to refill with their preferred e-liquid, extending the device’s lifespan and reducing waste. Understanding this distinction – pre-filled versus refillable – is crucial when choosing the right Packman product for your needs. The convenience factor remains high, even with the refillable options, as the process is straightforward and requires minimal effort.

What is a Packman Disposable Vape?

A Packman disposable vape is a self-contained vaping device designed for single-use. It comes pre-filled with e-liquid and pre-charged, meaning there’s no need to add liquid or worry about batteries. Once the e-liquid is depleted, or the battery dies, the entire device is responsibly discarded. This simplicity is a key characteristic, making it incredibly accessible for newcomers to vaping.

These vapes typically feature a sleek, pen-style design, hence the “Packman Pen” designation. They operate on a draw-activated mechanism – simply inhaling from the mouthpiece activates the device, producing vapor. There are no buttons to press or settings to adjust, further streamlining the user experience.

Packman distinguishes itself by offering both pre-filled and empty disposable options. The pre-filled versions provide ultimate convenience, while the empty disposables allow users to customize their vaping experience by filling them with their preferred e-liquid flavors and nicotine strengths. This flexibility caters to a wider range of preferences. The devices are designed for portability and discreet use, making them a popular choice for vapers on the go.

Packman Vape Features and Specifications

Packman vapes boast several key features. They generally have a compact, lightweight design for easy portability. The integrated battery capacity varies between models, typically ranging to support hundreds of puffs per charge. The e-liquid capacity in pre-filled versions is also model-dependent, usually between 2ml and 5ml.

A significant feature is the availability of both nicotine salt and freebase e-liquid options, catering to different vaping preferences. Nicotine salts provide a smoother throat hit and faster nicotine delivery, while freebase e-liquids offer a more traditional vaping sensation.

Empty Packman disposables are compatible with a wide range of e-liquids, allowing for customization. They feature a refill port, often concealed under a silicone plug, for easy filling. The devices utilize a mesh coil, known for its enhanced flavor production and longevity. Packman vapes are available in a diverse array of flavors, from classic tobacco and menthol to fruity and dessert blends. They are designed for simplicity and convenience, requiring no complex setup or maintenance.

Getting Started with Your Packman Pen

Begin by carefully unboxing your Packman vape. Activate the device—no buttons are typically needed! Inspect for any damage before use. It’s incredibly simple to set up and enjoy.

Unboxing Your Packman Disposable Vape

The first step to enjoying your Packman disposable vape is carefully unboxing the device. Typically, your vape will arrive in a sealed, protective package designed to maintain its condition during shipping and handling. Gently remove the vape from its packaging, taking care not to apply excessive force that could potentially damage the internal components.

Upon opening, you’ll find the Packman Pen itself, usually pre-filled with e-liquid and fully charged, ready for immediate use. Some packages may include a small instruction leaflet, though the device is designed for simplicity and requires minimal setup. Before you begin vaping, it’s crucial to visually inspect the device for any signs of damage that may have occurred during transit.

Check for cracks in the casing, leaks around the mouthpiece, or any other visible imperfections. If you notice any damage, refrain from using the device and contact the retailer or manufacturer for assistance. A thorough initial inspection ensures a safe and enjoyable vaping experience. Remember, a properly packaged and undamaged vape is the foundation for optimal performance and satisfaction.

Activating the Device

Most Packman disposable vapes are draw-activated, meaning they don’t have a power button. Activation is incredibly straightforward – simply begin inhaling from the mouthpiece to initiate vapor production. However, some models might require a quick initial activation process before the draw-activation function becomes operational.

To turn on your Packman, you may need to take a few quick puffs in succession (typically 3-5) without actually inhaling the vapor. This signals the device to power on the heating element. You’ll often notice a subtle indicator light, usually located near the mouthpiece, illuminate to confirm activation. This light may flash or remain solid, depending on the specific model.

If the device doesn’t activate after several attempts, double-check that the vape is not already depleted of e-liquid or battery life. A fully charged device with sufficient e-liquid is essential for proper activation. Once activated, the device will remain ready for use until the battery is exhausted or the e-liquid is depleted. Enjoy the convenience of effortless activation with your Packman Pen!

Initial Inspection for Damage

Upon receiving your Packman disposable vape, a thorough initial inspection is crucial to ensure a safe and enjoyable experience. Carefully examine the packaging for any signs of tampering or damage during shipping. If the packaging appears compromised, document it with photos before opening.

Once opened, meticulously inspect the device itself. Look for any visible cracks, leaks, or dents in the casing. Pay close attention to the mouthpiece and the area around the airflow inlets. Ensure the device feels solid and well-constructed, without any loose parts. A compromised device could potentially leak e-liquid or malfunction.

Check the indicator light (if applicable) to confirm it’s functioning correctly. If the light is damaged or doesn’t illuminate upon activation attempts, it could indicate an internal issue. If you detect any damage, refrain from using the device and contact the retailer or manufacturer for a replacement. Prioritizing safety through careful inspection is paramount.

Using the Packman Pen Correctly

Mastering the Packman Pen involves slow, steady puffs for optimal vapor production. Proper inhalation technique is key to a satisfying experience. Always prioritize vaping etiquette and safety!

Enjoy responsible vaping by following these simple guidelines for a consistently pleasant experience.

Taking Your First Puff

Congratulations on activating your Packman disposable vape! Now, for that first satisfying puff. Begin by gently placing the mouthpiece between your lips, ensuring a comfortable and secure seal. Avoid covering the airflow inlets, as this can restrict vapor production and diminish the overall experience.

Inhale slowly and steadily – this is crucial. Unlike traditional cigarettes, disposable vapes don’t require forceful draws. A gentle, consistent inhalation will draw the vapor from the device and deliver a smooth, flavorful hit. Resist the urge to take a quick, hard puff, as this can lead to coughing or discomfort.

Pay attention to your body. Start with a short puff and assess the vapor production and nicotine strength. You can always take another puff if desired, gradually increasing the duration and frequency to find your preferred level. Remember, disposable vapes are designed for convenience and enjoyment, so take your time and savor the experience.

If you experience any discomfort, such as throat irritation or dizziness, stop vaping immediately and consult with a healthcare professional. It’s important to listen to your body and adjust your vaping habits accordingly. With a little practice, you’ll quickly master the art of taking the perfect puff with your Packman Pen!

Inhalation Technique: Slow and Steady

Mastering the inhalation technique is key to a satisfying Packman vape experience. Forget the aggressive pulls associated with traditional smoking; disposable vapes thrive on a slow and steady approach. Think of it as sipping, not gulping. A gentle draw activates the device and allows the vapor to flow smoothly.

Consistent inhalation is paramount. Avoid short, choppy puffs, as these can result in inconsistent vapor production and a less flavorful hit. Instead, aim for a long, drawn-out inhale, maintaining a constant airflow. This ensures optimal heating of the e-liquid and a richer, more satisfying vapor cloud.

Control your airflow. While a steady inhale is important, also be mindful of how much air you’re drawing in. Experiment with different levels of restriction to find what feels most comfortable for you. Some users prefer a tighter draw, while others enjoy a more open airflow.

Practice makes perfect. Don’t be discouraged if your first few puffs aren’t ideal. It takes time to adjust to the nuances of vaping. With a little patience and experimentation, you’ll quickly develop a technique that delivers consistent, flavorful, and enjoyable vapor with your Packman Pen.

Vaping Etiquette and Safety

Responsible vaping is crucial for both personal well-being and consideration for others. Always be mindful of your surroundings when using your Packman Pen. Avoid vaping in non-designated areas, respecting local laws and regulations regarding public vaping.

Discretion is key. While vaping has become more commonplace, some individuals may still be sensitive to it. Be considerate of those around you and avoid exhaling vapor directly in their faces. Maintain a respectful distance and be mindful of potential sensitivities.

Proper disposal is essential. Packman disposables, once depleted, should be disposed of responsibly, following local e-waste guidelines. Never litter or discard them improperly, as they contain electronic components and potentially hazardous materials.

Storage matters. Keep your Packman Pen out of reach of children and pets. Store it in a cool, dry place, away from direct sunlight and extreme temperatures. This helps maintain the device’s integrity and prevents accidental activation. Prioritize safety and responsible use for a positive vaping experience.

Refilling a Packman Empty Disposable Vape

Refilling is simple! Locate the port, remove the silicone plug, and carefully fill with e-liquid. After filling, prime the coil to ensure proper saturation for optimal vapor production.

Enjoy extended use of your Packman device with this easy process!

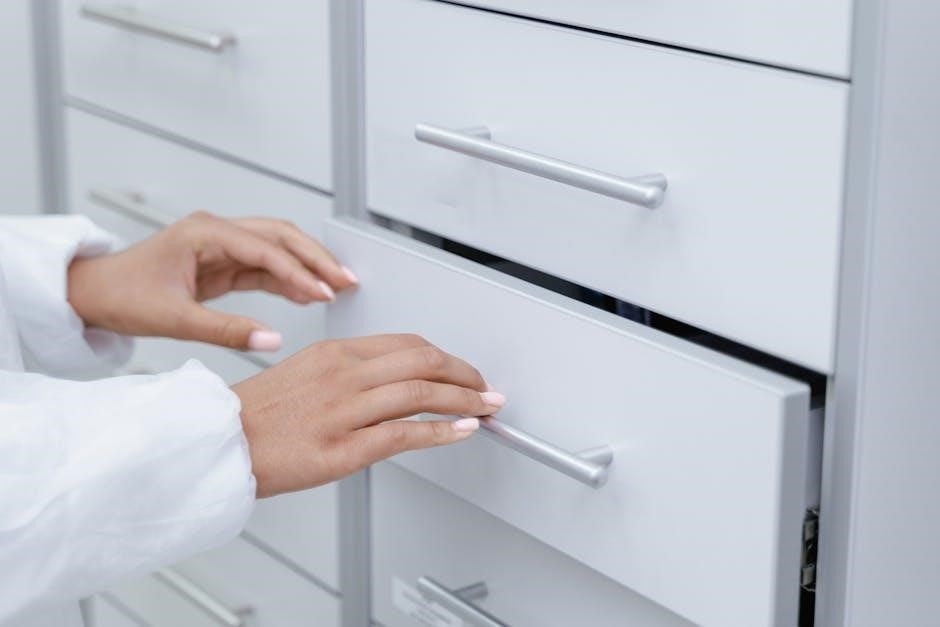
Locating the Refill Port

Finding the refill port on your Packman Empty Disposable Vape is crucial for a successful refill. Unlike pre-filled disposables, the empty versions are designed for user customization, allowing you to enjoy your preferred e-liquid flavors and nicotine strengths. The refill port is typically located on the top of the device, often concealed beneath a small silicone plug.

To identify the port, carefully examine the top surface of the vape. You’ll be looking for a small, circular or slightly oval opening, usually around 2-3 millimeters in diameter. This opening is sealed with a rubber or silicone stopper to prevent leakage when the device isn’t in use. The plug is designed to be easily removed and replaced, ensuring a secure seal after refilling.

In some models, the port might be slightly recessed, requiring a gentle nudge to access. Avoid using sharp objects to pry open the plug, as this could damage the device. Instead, use your fingernail or a soft, rounded tool to carefully lift the plug. Once removed, you’ll have access to the internal chamber where you can add your e-liquid. Always ensure the device is turned off before attempting to refill it.

Take your time and inspect the top of the device thoroughly. If you’re still having trouble locating the port, refer to any included documentation or online resources specific to your Packman model.

Filling the Device with E-Liquid

Once you’ve located and opened the refill port, carefully begin filling your Packman Empty Disposable Vape with your chosen e-liquid. It’s recommended to use a bottle with a fine tip applicator or a syringe to ensure precise and mess-free filling. Avoid overfilling the device, as this can lead to leakage and potential damage to the coil.

Slowly introduce the e-liquid into the refill port, observing the liquid level within the device. Most Packman Empty Disposables have a visible fill line or a maximum capacity indicated in milliliters (mL). Generally, a capacity of 2mL is standard, but always check your specific model’s specifications. Leave a small gap between the liquid level and the top of the port to prevent spillage when replacing the silicone plug.

Be cautious to avoid getting e-liquid into the central airflow chimney, which is typically a separate opening near the refill port. Filling the chimney can cause gurgling and a poor vaping experience. If accidental spillage occurs, gently blot it with a clean tissue before proceeding. Use high-quality e-liquid from reputable brands to ensure optimal flavor and performance.

After filling, securely replace the silicone plug, ensuring it’s firmly seated to create a tight seal. This prevents leaks and maintains the integrity of the device.

Priming the Coil After Refilling

After refilling your Packman Empty Disposable Vape, priming the coil is crucial for a satisfying vaping experience. This process ensures the coil is fully saturated with e-liquid, preventing dry hits and extending its lifespan. Allow the device to sit for approximately 5-10 minutes after filling, allowing the e-liquid to wick into the coil naturally. This initial soak is vital.

To expedite the priming process, take a few small, gentle puffs without activating the battery. This draws e-liquid into the coil without generating vapor. Repeat this process several times, gradually increasing the duration of each puff. You may notice a slight e-liquid taste initially, which is normal and will dissipate as the coil becomes fully primed.

Avoid excessive puffing during priming, as this can flood the coil and cause leakage. If you detect a burnt taste, stop priming immediately and allow the device to sit for a longer period before attempting again. Patience is key during this step.

Once you taste a clear vapor flavor, the coil is adequately primed and ready for use. Start with small, controlled puffs to further ensure proper saturation and enjoy your freshly refilled Packman vape!

Troubleshooting Common Issues

Encountering problems? This section addresses common Packman vape issues like activation failures, weak vapor, and leaks. We’ll provide simple solutions to get you back to vaping quickly and safely.

Don’t worry! Most issues are easily resolved with a few quick checks and adjustments.

Device Not Activating

Is your Packman Pen refusing to turn on? Don’t panic! Several factors could be at play. First, ensure the device isn’t simply out of battery. While disposables have a set lifespan, a brand-new device should activate immediately upon inhalation. If it doesn’t, try a few more puffs – sometimes a slightly firmer draw is needed to trigger the heating element.

Check for proper activation. Some Packman models require a specific number of clicks (often five) to power on or off. Refer to any included documentation or online resources for your specific model. If clicking doesn’t work, the device might be defective.

Inspect the contacts. Although less common with disposable vapes, ensure there’s no debris obstructing the airflow or the connection point. A quick visual check can reveal any obvious blockages. If the issue persists after these steps, it’s likely a manufacturing defect, and contacting the retailer or manufacturer is recommended. Remember, attempting to disassemble or repair a disposable vape is generally not advised and could be dangerous.

Finally, consider the age of the device. If it’s been sitting unused for an extended period, the e-liquid may have settled, preventing proper vaporization. A few gentle shakes might help, but a non-activating device is often simply at the end of its life.

Weak Vapor Production

Experiencing a lackluster vaping experience with minimal vapor? Several issues could contribute to weak vapor production with your Packman Pen. The most common culprit is a depleted battery. As the battery voltage drops, the coil receives less power, resulting in thinner vapor clouds. If the device is nearing the end of its lifespan, this is a likely cause.

Another factor is e-liquid viscosity. If you’ve refilled an empty disposable, ensure the e-liquid isn’t too thick. Higher VG (vegetable glycerin) liquids can sometimes require more power to vaporize effectively; Allowing sufficient time for the coil to prime after refilling is crucial – see the ‘Priming the Coil’ section for details.

A clogged coil can also restrict vapor. While disposables aren’t designed for coil cleaning, accumulated residue can hinder performance. Gently tapping the device might dislodge some buildup. If refilling, ensure the e-liquid port is properly sealed to prevent leaks that could contaminate the coil.

Finally, consider your inhalation technique. Short, weak puffs won’t generate much vapor; Remember to take slow, steady draws to allow the coil to heat up and vaporize the e-liquid efficiently.

Leaking Issues and Solutions

Discovering e-liquid leakage from your Packman Pen can be frustrating, but often has a straightforward solution. The primary cause is usually a compromised seal around the refill port, particularly after refilling an empty disposable vape. Ensure the silicone plug is firmly and correctly reinserted after each fill – a loose plug is a direct pathway for leaks.

Overfilling the device is another common mistake. Leave a small air gap at the top of the tank to prevent pressure buildup and potential leakage. Avoid tilting the device excessively, especially immediately after refilling, allowing the e-liquid to settle and saturate the coil properly.

Condensation can sometimes mimic a leak. Temperature fluctuations can cause condensation to form inside the device, appearing as liquid around the mouthpiece. This is generally harmless and will dissipate with normal use.

If a leak persists, carefully wipe away any e-liquid from the device’s exterior. Avoid getting e-liquid on your skin or in your eyes. If the leak is substantial or originates from within the device itself, discontinue use and consider replacing it.


  • 0

wisc-v administration and scoring manual pdf

Category : Manuals

WISC-V Administration and Scoring Manual: A Comprehensive Overview (Updated 12/17/2025)

Today‚ December 17th‚ 2025‚ marks the release of this essential guide‚ offering a detailed exploration of the WISC-V’s administration and scoring procedures‚
accessible as a downloadable PDF resource for professionals.

This manual introduces unique features and functionalities‚ ensuring mastery of the WISC-V’s capabilities‚ and provides important software information for optimal utilization.

The Wechsler Intelligence Scale for Children – Fifth Edition (WISC-V) represents a significant advancement in cognitive assessment for children aged 6 years 0 months through 16 years 11 months. This comprehensive assessment tool is designed to evaluate a child’s cognitive abilities‚ providing valuable insights into their intellectual functioning.

This Administration and Scoring Manual‚ available as a PDF‚ serves as the foundational resource for professionals administering and interpreting the WISC-V. It details the theoretical underpinnings of the scale‚ outlining the changes and improvements made from previous editions. Understanding these updates is crucial for accurate assessment and informed decision-making.

The WISC-V moves beyond simply providing a Full Scale IQ (FSIQ) score. It offers a nuanced profile of cognitive strengths and weaknesses‚ utilizing five index scores – Verbal Comprehension‚ Perceptual Reasoning‚ Working Memory‚ Processing Speed‚ and a General Ability Index (GAI) – to paint a more complete picture of the child’s cognitive landscape. This manual guides users through each step‚ ensuring standardized procedures are followed for reliable and valid results. Accessing the PDF version allows for convenient and readily available reference during testing sessions.

Purpose of the Administration and Scoring Manual

The primary purpose of this WISC-V Administration and Scoring Manual‚ conveniently available as a PDF‚ is to provide examiners with the detailed guidance necessary to administer‚ score‚ and interpret the WISC-V accurately and consistently. It ensures standardized testing procedures are followed‚ maximizing the reliability and validity of assessment results.

This manual functions as a comprehensive resource‚ detailing specific administration guidelines for each subtest‚ including precise instructions‚ timing requirements‚ and scoring criteria. It’s designed to help professionals master the functions and capabilities of the WISC-V‚ minimizing errors and ensuring comparable results across different administrations.

Furthermore‚ the manual clarifies the nuances of interpreting the various index scores and confidence intervals‚ enabling clinicians to develop meaningful and individualized reports. The PDF format facilitates easy access to critical information‚ supporting informed clinical judgment and effective communication of findings to parents‚ educators‚ and other stakeholders. It’s an essential tool for responsible and ethical psychological assessment.

Key Changes from WISC-IV

This WISC-V Administration and Scoring Manual‚ readily accessible as a PDF‚ highlights significant updates from the WISC-IV‚ designed to enhance the test’s psychometric properties and clinical utility. Notable changes include updated normative data‚ reflecting a more current population‚ and revised standardization samples for improved representation.

The WISC-V introduces new subtests and modifications to existing ones‚ impacting both the assessment process and score interpretation. The manual details these alterations‚ providing clear guidance on administration and scoring differences. It emphasizes the importance of understanding these changes to avoid misinterpretations and ensure accurate results.

Furthermore‚ the scoring system has been refined‚ with new index scores and a revised Full Scale IQ (FSIQ) calculation. This PDF manual thoroughly explains these modifications‚ offering practical examples and illustrative cases. Mastering these updates is crucial for professionals transitioning from the WISC-IV to the WISC-V‚ ensuring a seamless and effective assessment experience.

Test Components & Materials

The WISC-V Administration and Scoring Manual PDF details all test components‚ including stimulus books‚ response booklets‚ and standardized administration guidelines for comprehensive assessment.

Core Subtests: Overview & Purpose

The WISC-V Administration and Scoring Manual PDF meticulously outlines ten core subtests‚ forming the foundation of the intelligence assessment. These subtests are categorized to evaluate distinct cognitive domains‚ providing a nuanced understanding of an individual’s intellectual profile.

Verbal Comprehension includes Similarities and Vocabulary‚ assessing verbal reasoning and acquired knowledge. Visual Spatial comprises Block Design and Visual Puzzles‚ evaluating nonverbal reasoning and spatial organization. Fluid Reasoning features Matrix Reasoning and Figure Weights‚ measuring abstract reasoning and problem-solving abilities.

Working Memory is assessed through Digit Span and Picture Span‚ examining auditory and visual working memory capacity. Finally‚ Processing Speed is evaluated with Symbol Search and Coding‚ gauging efficiency in visual scanning‚ motor speed‚ and attention.

Each subtest’s purpose‚ administration procedures‚ and scoring criteria are comprehensively detailed within the manual‚ ensuring standardized and reliable assessment practices. Understanding these core components is crucial for accurate interpretation of WISC-V results.

Supplemental Subtests: When & Why to Use Them

The WISC-V Administration and Scoring Manual PDF details five supplemental subtests designed to broaden the assessment and provide additional insights beyond the core measures. These aren’t routinely administered but offer valuable data in specific clinical scenarios.

Comprehension assesses social understanding and practical reasoning. Information evaluates general knowledge acquired from culture and experience. Arithmetic measures quantitative reasoning and computational skills. Letter-Number Sequencing examines working memory and mental manipulation. Cancellation assesses sustained attention and visual selective processing.

These subtests are particularly useful when clarifying specific cognitive strengths or weaknesses‚ investigating inconsistent performance patterns‚ or addressing unique referral questions. The manual guides clinicians in determining when supplemental testing is appropriate‚ emphasizing the importance of tailoring the assessment to the individual’s needs.

Careful consideration of the examinee’s background and the assessment’s purpose‚ as outlined in the PDF‚ is vital for effective utilization of these supplemental measures.

Materials Included in the WISC-V Kit

The comprehensive WISC-V Administration and Scoring Manual PDF outlines all physical components included within the complete assessment kit. This ensures examiners have a clear understanding of the materials required for standardized administration. The kit contains stimulus books for Verbal Comprehension and Visual Spatial subtests‚ featuring age-appropriate stimuli.

Additionally‚ the kit includes the Working Memory Index stimuli‚ a Digit Span booklet‚ and a Coding stimulus book. Manipulatives‚ such as blocks for the Block Design subtest‚ are also provided. Examiners receive standardized protocol booklets for recording responses and scoring.

Crucially‚ the kit does not include the Administration and Scoring Manual itself – this is often accessed digitally as a PDF for convenient reference and automatic scoring features. The PDF manual details proper material usage and maintenance‚ ensuring test validity.

Supplemental materials‚ sold separately‚ may include additional stimulus cards or scoring templates.

Administration Procedures

The WISC-V Administration and Scoring Manual PDF details standardized testing protocols‚ emphasizing rapport building and specific guidelines for each subtest’s proper execution.

Standardized Testing Procedures

The WISC-V Administration and Scoring Manual PDF meticulously outlines the standardized procedures crucial for reliable and valid assessment results. Maintaining consistency across administrations is paramount; therefore‚ strict adherence to the manual’s guidelines is essential.

These procedures cover environmental considerations – ensuring a quiet‚ well-lit‚ and distraction-free testing space – as well as specific instructions for presenting stimuli and recording responses. The manual emphasizes the importance of using the exact wording provided for each instruction‚ avoiding any deviation that could potentially influence the examinee’s performance.

Timing protocols are also rigorously defined‚ with precise limits for each subtest to maintain standardization. Examiners must be thoroughly familiar with the start and stop cues‚ and accurately record all response times as indicated. Furthermore‚ the PDF provides detailed guidance on probing techniques‚ clarifying when and how to elicit further information from the examinee without leading them to a specific answer. Proper implementation of these standardized procedures safeguards the integrity of the assessment process.

Establishing Rapport with the Examinee

The WISC-V Administration and Scoring Manual PDF highlights the critical role of rapport in obtaining genuine performance from the examinee. A comfortable and trusting environment minimizes anxiety and encourages optimal effort. The manual stresses the importance of a warm‚ friendly‚ and non-judgmental demeanor throughout the assessment process.

Begin by explaining the purpose of the testing in age-appropriate language‚ emphasizing that it’s not a pass-fail situation‚ but rather an opportunity to showcase their skills. Acknowledging and validating the examinee’s feelings – particularly any expressed nervousness – can significantly reduce apprehension.

The PDF suggests using positive reinforcement and encouragement‚ praising effort rather than solely focusing on correct answers. Maintaining eye contact‚ actively listening‚ and demonstrating genuine interest in the examinee’s responses are also key components of rapport building. A strong rapport not only improves test performance but also contributes to a more positive testing experience overall.

Specific Administration Guidelines for Each Subtest

The WISC-V Administration and Scoring Manual PDF provides meticulously detailed‚ subtest-specific instructions. Strict adherence to these guidelines is paramount for ensuring standardized administration and valid results. Each subtest section within the PDF outlines precise starting points‚ prompting phrases‚ timing requirements‚ and scoring criteria.

For example‚ the manual details specific stimulus presentation order for Block Design‚ and clarifies permissible prompts for Vocabulary; It emphasizes the importance of maintaining a neutral expression and avoiding any cues that might influence the examinee’s responses.

The PDF also includes illustrative examples and common errors to avoid during administration. Variations in administration‚ even seemingly minor ones‚ can impact scores. Therefore‚ examiners are urged to thoroughly familiarize themselves with the protocol for each subtest before beginning the assessment‚ referencing the manual frequently during testing.

Scoring Procedures

The WISC-V Administration and Scoring Manual PDF details precise scoring methods‚ transitioning from raw scores to standardized scores‚ and ultimately‚ index scores for comprehensive analysis.

Raw Score Calculation

Determining raw scores is the foundational step in WISC-V scoring‚ meticulously outlined within the WISC-V Administration and Scoring Manual PDF. This process involves accurately recording the examinee’s responses for each item within the core and supplemental subtests.

The manual provides explicit guidelines for scoring each subtest‚ detailing specific criteria for correct‚ incorrect‚ and incomplete responses. For instance‚ in Block Design‚ raw scores reflect the number of correctly completed designs within the allotted time. Similarly‚ in Vocabulary‚ the raw score represents the number of defined words.

Consistent application of these scoring rules‚ as detailed in the PDF‚ is paramount to ensure reliable and valid results. The manual emphasizes the importance of adhering to the standardized procedures‚ avoiding subjective interpretations‚ and documenting any deviations from the protocol. Careful attention to detail during raw score calculation directly impacts the accuracy of subsequent score conversions and interpretations.

Furthermore‚ the WISC-V Administration and Scoring Manual PDF includes illustrative examples and practice exercises to facilitate mastery of the raw scoring process‚ ensuring clinicians can confidently and accurately assess examinee performance.

Standard Score Conversion

Following raw score calculation‚ the WISC-V Administration and Scoring Manual PDF details the crucial process of converting raw scores into standardized scores. This conversion utilizes normative tables provided within the manual‚ allowing for a comparison of the examinee’s performance against a representative sample of their age peers.

Standard scores‚ expressed with a mean of 100 and a standard deviation of 15‚ provide a clear indication of the examinee’s relative standing. The PDF offers separate tables for each subtest‚ index‚ and the Full Scale IQ (FSIQ)‚ streamlining this conversion process.

Accurate utilization of these tables is vital for meaningful interpretation. The manual emphasizes careful attention to age-based tables and provides guidance on handling instances of age interpolation. This ensures the most precise standardized score representation.

The WISC-V Administration and Scoring Manual PDF also clarifies the statistical basis of these conversions‚ reinforcing the validity and reliability of the resulting scores‚ and enabling informed clinical decision-making.

Index Score Calculation (FSIQ‚ Verbal Comprehension‚ Perceptual Reasoning‚ Working Memory‚ Processing Speed)

The WISC-V Administration and Scoring Manual PDF provides explicit instructions for deriving index scores‚ representing broad cognitive abilities. These include the Full Scale IQ (FSIQ)‚ Verbal Comprehension Index (VCI)‚ Perceptual Reasoning Index (PRI)‚ Working Memory Index (WMI)‚ and Processing Speed Index (PSI).

The PDF details specific subtest combinations contributing to each index‚ outlining the precise summation or averaging procedures. For example‚ the VCI is derived from Similarities‚ Vocabulary‚ and Comprehension subtests. Clear‚ step-by-step guidance ensures accurate index score computation.

Furthermore‚ the manual explains how to apply weighting factors‚ if any‚ during index score calculation. It emphasizes the importance of adhering to these procedures to maintain the psychometric properties of the WISC-V.

The WISC-V Administration and Scoring Manual PDF also clarifies how index scores relate to the underlying cognitive processes‚ aiding in comprehensive interpretation and report writing.

Interpretation of Results

The WISC-V Administration and Scoring Manual PDF guides professionals in understanding test results‚ utilizing confidence intervals and qualitative performance analysis for insightful reporting.

Understanding Confidence Intervals

Confidence intervals‚ detailed within the WISC-V Administration and Scoring Manual PDF‚ are crucial for interpreting the stability of obtained scores. They represent a range within which the examinee’s true score likely falls‚ acknowledging inherent measurement error.

A wider confidence interval indicates greater uncertainty‚ often seen with lower scores or when examinee performance is inconsistent. Conversely‚ narrower intervals suggest more reliable scores. The manual provides clear guidance on calculating and interpreting these intervals for each index and subtest score.

Understanding confidence intervals prevents over-interpretation of small score differences and informs clinical decision-making. Practitioners should consider the width of the interval alongside the score itself when drawing conclusions about an individual’s cognitive abilities. The PDF resource offers illustrative examples and practical applications of confidence interval analysis.

Furthermore‚ the manual emphasizes the importance of communicating confidence interval information in reports‚ providing stakeholders with a more nuanced understanding of the assessment results.

Qualitative Analysis of Performance

The WISC-V Administration and Scoring Manual PDF stresses that standardized scores are only part of the interpretive picture. Qualitative analysis – observing the examinee’s behavior during testing – provides invaluable context. This includes noting strategies used‚ error patterns‚ attention‚ motivation‚ and any unusual responses.

Detailed observations‚ documented alongside quantitative data‚ can reveal strengths and weaknesses not fully captured by scores alone. For example‚ a child might achieve a good score on a task but require significant prompting‚ indicating reliance on external cues. The manual offers specific prompts to guide these observations.

Analyzing qualitative data helps differentiate between genuine cognitive deficits and factors like test anxiety or language barriers. It informs hypothesis generation and guides further assessment. The PDF provides examples of how to integrate qualitative findings into comprehensive reports‚ enriching the overall understanding of the examinee’s cognitive profile.

Reporting WISC-V Results Effectively

The WISC-V Administration and Scoring Manual PDF emphasizes clear‚ concise‚ and individualized reporting. Reports should integrate both quantitative (standard scores) and qualitative (observational) data‚ avoiding jargon and focusing on practical implications. The manual provides sample report formats as guidance.

Effective reports translate complex cognitive findings into understandable language for parents‚ educators‚ and other stakeholders. Highlight strengths as well as areas needing support. Recommendations should be specific‚ measurable‚ achievable‚ relevant‚ and time-bound (SMART goals).

The PDF stresses the importance of contextualizing scores within the examinee’s background and presenting a balanced perspective. Avoid over-interpretation and acknowledge limitations of the assessment. Ethical considerations‚ including confidentiality and informed consent‚ are also addressed‚ ensuring responsible and impactful reporting.


  • 0

chain link fence installation guide pdf

Category : PDF

Chain Link Fence Installation Guide

Detailed PDF specifications cover PVC-coated chain link systems, outlining materials for frameworks, fabrics, posts, and accessories, ensuring proper installation․

Comprehensive guides detail post spacing, concrete footings, fabric attachment, and accessory installation for a secure and lasting chain link barrier․

Chain link fencing represents a practical and economical solution for a wide array of property security and containment needs․ Often detailed in comprehensive installation guides, including readily available PDF documents, this fencing type offers durability and effectiveness․ These guides, like those from Fencing Without Boundaries and Slagle Fence, emphasize the importance of understanding the system’s components before beginning any work․

Historically, chain link has been favored for its cost-effectiveness and relative ease of installation, making it a popular choice for both residential and commercial applications․ Modern guides, such as those specifying PVC-coated options, focus on longevity and aesthetic appeal․ The core principle remains consistent: a woven mesh of galvanized or PVC-coated steel wire, supported by sturdy posts and framework․

Understanding the nuances of proper installation, as outlined in these PDF resources, is crucial for maximizing the fence’s lifespan and security․ From verifying property lines to correctly tensioning the fabric, each step contributes to a robust and reliable barrier․

Benefits of Chain Link Fences

Chain link fences offer a compelling combination of security, affordability, and durability, frequently detailed within comprehensive installation guides available as PDF downloads․ A primary benefit is cost-effectiveness; they represent a budget-friendly perimeter solution compared to alternatives like wood or wrought iron․ Resources from Slagle Fence highlight this advantage․

Security is another key benefit, providing a clear deterrent against trespassers and offering a safe enclosure for children or pets․ PDF guides, like those from Polyvinyl Chloride Building Materials, emphasize proper installation techniques to maximize this security․ Furthermore, chain link requires minimal maintenance, reducing long-term ownership costs․

Versatility is also notable; chain link adapts to various terrains and applications․ Installation guides demonstrate how to navigate slopes and incorporate gates seamlessly․ The availability of PVC coating enhances aesthetics and extends the fence’s lifespan, as detailed in numerous PDF specifications․ Ultimately, chain link provides a practical and reliable fencing solution․

Tools and Materials Required

PDF installation guides consistently outline essential tools and materials for successful chain link fence projects․ Core requirements include a post hole digger, crucial for creating appropriately sized and spaced holes for post placement, as detailed in various PDF specifications․ Concrete mix is vital for securely setting posts, ensuring stability and longevity․

Regarding materials, chain link fabric – specified by gauge and coating type in PDF documents – forms the fence’s body․ Post materials, typically steel or aluminum, dictate strength and corrosion resistance․ Fittings and accessories, such as tension bands, brace bands, and caps, are indispensable for proper assembly, as illustrated in guides from Fencing Without Boundaries․

Additional tools include levels, measuring tapes, wrenches, pliers, and safety glasses․ PDF resources often provide detailed material lists and quantities, streamlining the purchasing process․ Proper preparation with these tools and materials, guided by a comprehensive PDF, is key to a professional and durable fence installation․

Post Materials (Steel, Aluminum)

PDF guides emphasize the importance of selecting appropriate post materials – typically steel or aluminum – based on project needs and budget․ Steel posts, often galvanized, offer superior strength and are ideal for high-security applications or areas requiring robust support, as detailed in installation specifications․

Aluminum posts, while lighter and corrosion-resistant, are generally suited for lighter-duty residential fences․ PDF documentation clarifies that aluminum’s cost-effectiveness makes it a popular choice for many homeowners․ The gauge or thickness of the post material is also crucial, with heavier gauges providing greater stability․

Installation PDFs frequently detail specific post size recommendations based on fence height and local wind conditions․ Choosing the correct material and gauge, guided by a PDF, ensures the fence’s structural integrity and longevity․ Proper material selection prevents premature failure and maintains the fence’s intended function․

Chain Link Fabric (Gauge & Coating)

PDF installation guides meticulously detail chain link fabric specifications, focusing on gauge and coating․ The gauge, referring to wire thickness, directly impacts the fence’s durability; lower gauges indicate thicker, stronger wire․ Common gauges range from 6 to 11․5, with lower numbers preferred for security or high-traffic areas, as outlined in detailed PDF documents․

Coatings are crucial for corrosion resistance․ PDFs highlight several options, including galvanized, vinyl-coated, and polyester-coated․ Galvanized provides a zinc layer, while vinyl coating offers superior protection and aesthetic appeal․ PDF specifications often include coating weight measurements to ensure quality․

Installation PDFs emphasize matching fabric gauge and coating to the intended application and environmental conditions․ Proper selection, guided by PDF recommendations, maximizes the fence’s lifespan and minimizes maintenance․ Understanding these specifications is vital for a long-lasting, secure chain link fence․

Fittings & Accessories (Tension Bands, Brace Bands, Caps)

PDF installation guides thoroughly cover essential fittings and accessories for chain link fences․ Tension bands, crucial for securing the chain link fabric to terminal posts, are detailed with specific sizing and installation instructions within the PDFs․ Brace bands, used to reinforce corner and gate posts, are explained with diagrams showing proper placement and bolt sizes․

Loop caps, vital for supporting the top rail, are illustrated in PDF schematics, demonstrating how they fit over post tops․ PDFs also specify the use of post caps to prevent water accumulation and corrosion inside posts․ Tension wire, used to tighten the fabric, is detailed with instructions on securing it to end bands․

These PDF resources emphasize using the correct accessories for the chosen gauge and height of the chain link fabric․ Proper installation, as outlined in the PDFs, ensures the fence’s structural integrity and longevity, preventing sagging and maintaining security․

Concrete Mix & Post Hole Digger

PDF installation guides consistently emphasize the importance of a robust foundation, detailing appropriate concrete mix specifications for chain link fence posts․ Recommendations typically lean towards a mix with a minimum compressive strength, ensuring long-term stability․ The PDFs often specify the correct ratio of cement, sand, and gravel for optimal results, alongside guidance on adding water․

Regarding excavation, PDF documents highlight the necessity of a reliable post hole digger – manual or powered – to achieve the required depth and diameter․ Diagrams within the PDFs illustrate proper hole dimensions based on post size and soil conditions․ They also detail techniques for ensuring straight, clean holes for optimal concrete adhesion․

PDF resources stress the importance of thoroughly compacting the soil at the base of the hole before pouring concrete, preventing settling․ Proper concrete mixing and hole preparation, as detailed in the PDFs, are critical for a durable and secure fence installation․

Planning Your Fence Layout

Chain link fence installation guide PDFs universally stress meticulous pre-planning․ They emphasize the critical first step of property line verification, advising homeowners to consult official surveys or local land records to avoid disputes․ PDFs often include disclaimers regarding responsibility for accurate boundary identification․

PDF documents dedicate sections to gate placement considerations, recommending strategic locations for accessibility and security․ They advise factoring in pedestrian and vehicular traffic flow, as well as potential obstructions․ Diagrams within the PDFs illustrate optimal gate swing directions and width requirements․

Furthermore, PDF guides highlight the importance of marking post locations accurately before digging․ They suggest using stakes and string to visualize the fence line and identify potential challenges, such as underground utilities or uneven terrain․ Careful planning, as detailed in these PDFs, minimizes installation issues․

Property Line Verification

Chain link fence installation guide PDFs consistently prioritize accurate property line verification as the foundational step․ These documents strongly recommend consulting official property surveys, plats, or county land records before commencing any installation work․ Ignoring this step can lead to costly legal disputes and fence relocation․

PDF guides often include cautionary notes emphasizing that homeowners are solely responsible for ensuring their fence remains within their property boundaries․ They advise against relying on assumed lines or neighborly agreements․ PDFs frequently suggest contacting a professional surveyor if there’s any uncertainty regarding property lines․

Detailed PDF instructions explain how to locate and interpret property markers, such as iron pins or concrete monuments․ They also highlight the importance of understanding local zoning regulations and setback requirements, which dictate how close a fence can be built to property lines․ Thorough verification, as outlined in these PDFs, is paramount․

Gate Placement Considerations

Chain link fence installation guide PDFs dedicate sections to strategic gate placement, emphasizing accessibility and functionality․ These documents advise considering traffic flow – pedestrian and vehicular – when determining gate locations․ PDFs often recommend positioning gates to minimize obstruction of walkways or driveways․

PDF guides highlight the importance of sufficient space around the gate for full swing operation, preventing collisions with landscaping or structures․ They detail how to account for gate post size when planning the overall fence layout․ PDFs frequently suggest avoiding gate placement in areas prone to water accumulation or snowdrifts․

Detailed PDF instructions cover considerations for single versus double gates, depending on access needs․ They also address the impact of gate width on security and convenience․ Proper gate placement, as outlined in these PDFs, enhances both the usability and aesthetic appeal of the fence system․

Installing the Posts

Chain link fence installation guide PDFs meticulously detail the post installation process, beginning with precise hole dimensions․ PDFs specify depth and diameter requirements based on post material (steel or aluminum) and local soil conditions․ Corner posts receive particular attention, with PDFs emphasizing the need for robust concrete footings to withstand tension․

These PDF guides provide step-by-step instructions for setting corner posts plumb and securely․ Line post spacing is also clearly defined, typically ranging from 8 to 10 feet, as detailed in the PDFs․ PDFs illustrate proper concrete pouring techniques, including mixing ratios and curing times for optimal strength․

PDF documents often include diagrams showing correct post alignment and concrete encasement․ They stress the importance of allowing sufficient curing time before proceeding with fence fabric installation, ensuring a stable and long-lasting structure, as per the PDF instructions․

Digging Post Holes (Depth & Diameter)

Chain link fence installation guide PDFs provide precise specifications for post hole dimensions․ PDFs generally recommend a hole depth of at least 24-36 inches, or deeper in areas with frost lines, to ensure stability․ Diameter requirements vary based on post size and material; PDFs typically specify 8-12 inch diameter holes for standard line posts․

These PDF documents emphasize the importance of accurate hole depth and diameter for proper post setting․ PDFs often include charts correlating post size with recommended hole dimensions․ They also detail techniques for maintaining straight hole walls to prevent concrete cracking․

PDF guides frequently advise using a post hole digger or auger for efficient excavation․ They stress the need to remove any rocks or debris from the hole before setting the post, as detailed in the PDF instructions, ensuring a solid foundation for the fence․

Setting Corner Posts

Chain link fence installation guide PDFs prioritize corner post installation as foundational for fence integrity․ PDFs detail aligning corner posts precisely with the planned fence layout, utilizing string lines and levels for accuracy․ They emphasize plumbness – ensuring posts are perfectly vertical – before concrete sets․

PDF documents specify bracing corner posts temporarily with wooden supports to maintain alignment during concrete pouring and curing․ These PDFs often illustrate bracing techniques․ They also detail the importance of checking for squareness, particularly at 90-degree corners, using the 3-4-5 triangle method as outlined in the PDF․

PDF guides frequently recommend setting corner posts deeper than line posts for increased stability․ They also advise against disturbing the post during concrete setting․ Proper corner post placement, as detailed in the PDF, is crucial for a structurally sound and aesthetically pleasing fence․

Setting Line Posts (Spacing)

Chain link fence installation guide PDFs consistently emphasize consistent line post spacing for a professional appearance and structural integrity․ PDF documents typically recommend spacing line posts between 8 and 10 feet apart, though this can vary based on terrain and local wind load requirements, as detailed in the PDF․

PDF guides illustrate using a string line stretched tightly between corner posts to ensure line posts are aligned․ They stress maintaining consistent depth for all line posts, referencing diagrams for proper hole dimensions․ PDFs often include tables specifying post height based on fence height and post spacing․

PDF instructions highlight the importance of checking plumbness after setting each line post, using a level․ They also advise against over-excavating post holes, as this can compromise stability․ Following the PDF’s spacing recommendations ensures a uniform and robust chain link fence installation․

Concrete Pouring & Curing

Chain link fence installation guide PDFs universally detail concrete pouring as a critical step for post stability․ PDF documents specify using a concrete mix with a minimum compressive strength of 2000 PSI, often recommending pre-mixed concrete for consistency․ PDFs illustrate slowly adding concrete to the post hole, avoiding sudden impacts that could shift the post․

PDF guides emphasize compacting the concrete around the post with a shovel or rod to eliminate air pockets․ They advise filling the hole to within a few inches of the surface, then sloping the concrete away from the post to promote water runoff, as shown in PDF diagrams․

PDF instructions stress the importance of proper curing – keeping the concrete moist for at least 3-7 days․ This prevents cracking and ensures maximum strength․ PDFs recommend covering the concrete with plastic sheeting or burlap and periodically wetting it․ Following these PDF guidelines guarantees a durable foundation․

Attaching Top Rail

Chain link fence installation guide PDFs consistently highlight top rail attachment as a key structural element․ PDF documents detail the use of “loop caps” – guides placed atop line posts to receive the top rail, ensuring proper alignment and height․ These PDFs illustrate how the rail rests within these caps․

PDF instructions emphasize that top rail sections, typically 21 feet long, should be connected end-to-end using tension bands and brace bands․ PDF diagrams show how these bands secure the rail to the terminal posts and corner posts, creating a continuous run․ PDFs often specify using galvanized or PVC-coated rails for corrosion resistance․

PDF guides stress ensuring a snug fit between rail sections and utilizing appropriate hardware․ Proper attachment, as detailed in the PDFs, prevents sagging and maintains the fence’s overall integrity․ Following these PDF instructions is crucial for a professional finish․

Loop Cap Installation

Chain link fence installation guide PDFs universally demonstrate loop cap installation as the initial step in top rail attachment․ These PDFs illustrate how loop caps are securely fastened to the top of each line post, typically using carriage bolts․ PDF diagrams emphasize ensuring the caps are level and consistently positioned for a uniform rail height․

PDF instructions detail the importance of using the correct size carriage bolt – often 5/16 x 1-1/4 inch – to prevent loosening․ PDFs often include torque specifications for tightening these bolts․ The PDFs highlight that the loop cap creates a channel guiding and supporting the top rail․

PDF guides stress that proper loop cap installation is fundamental to a straight, stable top rail․ PDFs frequently show visual aids clarifying correct placement and fastening techniques․ Following these PDF instructions ensures a professional and durable fence structure․

Top Rail Sections & Connections

Chain link fence installation guide PDFs consistently show top rail sections typically arriving in 21-foot lengths, resting within the loop caps atop line posts․ PDFs detail how sections connect using specialized fittings – rail sleeves and end cups – ensuring a smooth, continuous run․

PDF instructions emphasize sliding rail sections through loop caps, then securing connections with set screws within the rail sleeves․ PDF diagrams illustrate proper alignment and tightening procedures․ PDFs often specify using a wrench to firmly tighten set screws, preventing rail slippage․

At fence ends or gate posts, PDFs demonstrate the use of terminal posts and end cups to cap the rail․ PDF guides highlight the importance of maintaining consistent rail height throughout the installation․ Following these PDF instructions guarantees a structurally sound and aesthetically pleasing fence top rail․

Installing the Chain Link Fabric

Chain link fence installation guide PDFs detail unrolling the fabric along the fence line, often recommending assistance due to the material’s weight․ PDFs emphasize maintaining a consistent distance between the bottom of the fabric and the ground, typically 2-4 inches․ PDF instructions show initial attachment using tie wires, spaced approximately every 12-18 inches along the top rail․

PDF guides illustrate how to weave the tie wires through the fabric’s diamond pattern and around the top rail․ PDFs stress the importance of avoiding over-tightening at this stage, allowing for tensioning adjustments․ PDFs often include diagrams showing proper tie wire technique for secure attachment․

Before full tensioning, PDFs advise temporarily securing the fabric to line posts with additional tie wires․ PDFs highlight the need for careful handling to prevent damage to the fabric’s coating during installation, ensuring longevity․

Fabric Unrolling & Initial Attachment

Chain link fence installation guide PDFs consistently recommend unrolling the fabric as close to the fence line as possible, often suggesting two-person operation due to the roll’s weight and bulk․ PDFs detail laying the fabric out along the entire run before securing, allowing for adjustments and minimizing waste․ PDF instructions emphasize checking for any damage during unrolling․

PDF guides illustrate initial attachment typically beginning at a corner post, using pre-cut lengths of tie wire․ PDFs specify weaving the tie wire through the first diamond mesh opening and around the top rail, securing it loosely․ PDFs advise spacing these initial attachments approximately every 24 inches․

PDFs often include warnings against stretching the fabric excessively during initial attachment, preserving the ability to properly tension it later․ PDFs highlight the importance of maintaining a consistent height off the ground during this phase․

Tensioning the Fabric

Chain link fence installation guide PDFs universally detail tensioning as a critical step for a professional, secure fence․ PDFs explain utilizing a chain link stretcher – a specialized tool applying force to tighten the fabric․ PDFs emphasize the importance of safety precautions when operating the stretcher, including wearing gloves and eye protection․

PDF instructions outline attaching the stretcher to the fabric using a tension band and a connecting link․ PDFs specify gradually increasing tension, monitoring the fabric’s appearance for even stretching and avoiding over-tensioning which can damage the mesh․ PDFs often include recommended tension levels based on fabric gauge․

PDF guides illustrate securing the tensioned fabric by adding additional tension bands and tightening the stretcher’s ratchet mechanism․ PDFs stress the need to check for wrinkles or sags, adjusting tension as needed to achieve a smooth, taut surface․

Securing the Chain Link Fabric

Chain link fence installation guide PDFs consistently detail securing the fabric with tension wire and tie wire as essential for long-term stability․ PDFs illustrate running tension wire along both the top and bottom of the fence, threaded through the fabric’s mesh and secured to terminal posts with carriage bolts․

PDF instructions emphasize wrapping the tension wire around the post’s end band and tightening with pliers for a firm hold․ PDFs specify using tie wire – typically 11․5 gauge galvanized steel – to attach the fabric to the top rail and line posts․ PDFs detail spacing tie wires approximately every 12-18 inches․

PDF guides demonstrate twisting the tie wire securely around both the fabric and the rail/post, creating a strong connection․ PDFs often advise against over-tightening the tie wire to prevent fabric distortion․ Proper securing, as outlined in PDFs, ensures the fence withstands wind and external forces․

Tension Wire Installation (Bottom & Top)

Chain link fence installation guide PDFs universally emphasize tension wire as critical for fabric stability․ PDFs instruct running tension wire continuously along both the top and bottom of the fence line, within the fabric’s first and last vertical mesh openings․

PDFs detail securing the tension wire to terminal posts using 5/16 x 1-1/4 inch carriage bolts, passing through end bands․ PDFs illustrate wrapping the wire around the bolt before tightening, ensuring a secure grip․ PDFs often recommend using pliers to twist the wire multiple times for added firmness․

PDF guides stress maintaining consistent tension throughout the wire’s length․ PDFs clarify the tension wire’s purpose is to distribute stress and prevent sagging․ Correct installation, as detailed in PDFs, is vital for a taut, professional-looking fence․ PDFs also note the wire should be on the outside of the fence․

Tie Wire Attachment (Spacing & Method)

Chain link fence installation guide PDFs consistently detail tie wire attachment as crucial for securing the fabric to the framework․ PDFs specify using 11․5-gauge tie wire, pre-cut to appropriate lengths for efficient installation․ PDFs recommend spacing tie wires approximately 12-18 inches apart along both the top and bottom of the fabric․

PDF guides illustrate wrapping the tie wire around both the chain link mesh and the fence rail or post․ PDFs emphasize twisting the wire tightly using pliers, creating a secure connection․ PDFs often depict a figure-eight wrapping pattern for enhanced hold․

PDFs caution against over-tightening, which can damage the fabric․ PDFs stress consistent spacing for a uniform appearance and structural integrity․ Proper tie wire attachment, as outlined in PDFs, ensures the fence fabric remains taut and resists wind loads, contributing to long-term durability․

Gate Installation

Chain link fence installation guide PDFs dedicate sections to gate installation, emphasizing proper post setup․ PDFs detail installing gate posts with increased depth and concrete volume for stability, crucial for handling gate weight and frequent use․ PDFs specify using heavier-duty posts specifically designed for gate applications․

PDF guides illustrate hinge and latch installation, often recommending specific hardware types for chain link․ PDFs demonstrate aligning the gate within the opening, ensuring smooth operation and secure closure․ PDFs highlight the importance of plumb and level installation for proper functionality․

PDFs often include diagrams showing brace band placement for added gate post reinforcement․ PDFs stress adjusting the latch mechanism for a snug fit, preventing unwanted opening․ Following PDF instructions ensures a securely installed gate, complementing the overall fence system․

Gate Post Installation

Chain link fence installation guide PDFs consistently emphasize robust gate post installation․ PDFs specify using larger diameter posts for gates compared to line posts, due to increased stress․ PDFs detail digging deeper and wider post holes for gate posts, often recommending a minimum depth of 36 inches, and a wider diameter concrete footing․

PDF guides illustrate the importance of precise post alignment, ensuring the gate swings freely․ PDFs often recommend temporarily bracing the gate post during concrete setting to maintain plumb․ PDFs detail the correct concrete mix ratio for optimal strength and durability around the gate post․

PDFs frequently show diagrams of brace band placement, reinforcing the post against racking forces; PDFs stress allowing sufficient concrete curing time before attaching gate hardware, typically several days, for maximum stability․ Following these PDF guidelines guarantees a secure gate post foundation․

Gate Hinge & Latch Installation

Chain link fence installation guide PDFs provide detailed instructions for hinge and latch attachment․ PDFs typically illustrate using carriage bolts to secure hinges to both the gate post and the gate frame, ensuring a strong connection․ PDFs emphasize proper hinge alignment for smooth gate operation, avoiding binding or sagging․

PDF guides often depict different hinge types – band hinges, post hinges, and wrap-around hinges – with specific installation steps for each․ PDFs detail latch installation, including proper spacing and alignment with the gate frame․ PDFs frequently show diagrams of securing the latch with appropriate hardware․

PDFs stress the importance of tightening all bolts securely, but avoiding over-tightening which can damage the gate or post․ PDFs may include troubleshooting tips for common issues like gate sticking or latch misalignment․ Following these PDF instructions ensures a functional and secure gate closure․

Finishing Touches & Safety

Chain link fence installation guide PDFs often dedicate sections to finishing details and crucial safety precautions․ PDFs recommend capping posts with appropriate caps to prevent injury and corrosion, enhancing the fence’s longevity․ PDFs may suggest adding privacy slats for increased seclusion and aesthetic appeal, detailing secure attachment methods․

PDFs consistently emphasize safety during installation, advising the use of safety glasses, gloves, and appropriate footwear․ PDFs warn against digging near underground utilities and recommend contacting local authorities before starting excavation․ PDFs highlight the importance of proper lifting techniques to avoid back injuries․

PDF guides often include a final inspection checklist, ensuring all connections are secure and the fence meets local regulations․ PDFs may also address ongoing maintenance, like periodic tension adjustments and rust prevention․ Prioritizing these finishing touches and safety measures guarantees a durable and secure fence installation․


  • 0

3rd grade morning work pdf free

Category : PDF

What is 3rd Grade Morning Work?

Third grade morning work, often delivered as free PDF worksheets, is a series of short, focused activities students complete upon arrival to school.

These printable tasks reinforce essential skills and prepare young learners for the day’s lessons, fostering independence and a positive classroom routine.

The Purpose of Daily Practice

Daily practice with 3rd grade morning work PDF resources serves a crucial role in solidifying foundational skills. Consistent, short bursts of review prevent skill decay and build fluency in areas like ELA and math.

These free worksheets aren’t about introducing new concepts; instead, they reinforce previously taught material. This targeted practice boosts student confidence and prepares them for more complex tasks later in the day.

Furthermore, morning work establishes a predictable classroom routine, minimizing wasted time and maximizing instructional minutes. It’s a proactive approach to learning!

Benefits for Students

Utilizing 3rd grade morning work PDF materials offers numerous advantages for students. These free printable worksheets promote independent work habits and responsibility, as students begin tasks immediately upon entering the classroom.

Regular practice strengthens key skills in ELA, math, and even science and social studies, leading to improved academic performance. The consistent routine reduces morning chaos and fosters a calm, focused learning environment.

Moreover, morning work provides teachers with a quick assessment of student understanding, informing instructional decisions and allowing for targeted support.

Where to Find Free 3rd Grade Morning Work PDFs

Numerous online platforms offer free 3rd grade morning work PDFs, including Teachers Pay Teachers, Twinkl, and general printable worksheet websites, providing accessible resources.

Teachers Pay Teachers Resources

Teachers Pay Teachers (TpT) is a vibrant marketplace brimming with free morning work resources for 3rd grade. Many educators generously share their creations, offering a diverse selection of printable PDFs.

You can find comprehensive bundles covering various skills, or targeted worksheets focusing on specific concepts like ELA or math. A quick search for “free 3rd grade morning work” yields numerous results, allowing you to preview and download materials directly.

TpT is a trusted source, providing quality resources created by fellow teachers, ensuring alignment with educational standards and classroom needs. Browse, download, and enhance your morning work routine today!

Twinkl Resources

Twinkl provides an extensive library of award-winning printable ELA and math resources, perfect for 3rd grade morning work. They offer a wealth of free and premium materials designed to engage young learners and reinforce key skills.

Explore their dedicated morning work section, featuring a variety of PDF worksheets covering topics like grammar, punctuation, multiplication, and division. Twinkl’s resources are known for their high-quality design and alignment with curriculum standards.

Utilize these bundles to streamline your daily routine and provide consistent practice for your students, fostering a positive learning environment.

General Free Printable Worksheet Websites

Numerous websites offer a vast collection of free printable worksheets suitable for 3rd grade morning work. These resources cover diverse subjects, including math, ELA, science, and social studies, providing comprehensive practice opportunities.

Teachers can easily access and download PDF files for activities like reading comprehension passages, grammar exercises, and basic math problems; These websites are valuable for supplementing classroom instruction and offering differentiated learning options.

Remember to preview materials to ensure alignment with your curriculum and student needs, maximizing the effectiveness of these readily available resources.

Types of Skills Covered in 3rd Grade Morning Work

Third grade morning work PDF resources commonly focus on ELA and math, but increasingly incorporate science and social studies for well-rounded daily practice.

ELA (English Language Arts) Focus

Third grade morning work PDF materials heavily emphasize ELA skills. These printable worksheets often include daily language review, covering grammar, punctuation, and capitalization.

Vocabulary building exercises are also prevalent, introducing new words and reinforcing existing knowledge. Reading comprehension passages, though brief, assess understanding and analytical skills.

Furthermore, many resources incorporate writing prompts – encouraging students to practice sentence construction and express their ideas. These focused ELA activities, readily available as free printables, build a strong foundation in literacy.

Math Skills Practice

Third grade morning work PDF resources provide consistent math practice. Free printable options frequently feature exercises focused on foundational skills like addition, subtraction, multiplication, and division.

A significant portion is dedicated to fraction practice, a key concept for this grade level, with worksheets designed to build understanding.

Problem-solving activities, often presented as word problems, encourage critical thinking and application of mathematical concepts. These daily math drills, easily accessible as free PDFs, reinforce fluency and build confidence in mathematical abilities.

Incorporating Science and Social Studies

While primarily focused on ELA and Math, free 3rd grade morning work PDFs increasingly integrate snippets of Science and Social Studies. These brief activities might include simple fact recall, like identifying states or planets.

Short reading passages related to historical figures or scientific concepts are common, followed by comprehension questions.

Vocabulary building related to these subjects is also included, expanding students’ knowledge base. These integrated printable worksheets offer a well-rounded start to the day, subtly reinforcing learning across multiple disciplines.

Specific Examples of Morning Work Activities

Free 3rd grade morning work PDFs feature diverse activities, including daily language review worksheets, engaging fraction practice printables, and vocational task bundles.

Daily Language Review Worksheets

Daily Language Review worksheets, readily available as free 3rd grade morning work PDFs, are a cornerstone of effective classroom routines. These printable resources typically present students with a short passage containing grammatical errors, punctuation mistakes, or capitalization issues.

Students are tasked with identifying and correcting these errors, reinforcing essential ELA skills. Many worksheets focus on parts of speech, sentence structure, and proper usage. These quick, focused exercises help solidify grammar concepts and build a strong foundation for writing. Week one worksheets are often used to assess prior knowledge.

Fraction Practice Printables

Fraction Practice Printables, often found within free 3rd grade morning work PDF bundles, provide essential math skill reinforcement. These printable resources typically focus on foundational fraction concepts, such as identifying fractions, comparing fractions, and understanding equivalent fractions.

Activities may include shading shapes to represent fractions, identifying fractions of a set, or completing number sentences involving fractions. These short, daily exercises help students build fluency and confidence with fractions. Files like “Fraction Printables” (14.9 MB) are readily downloadable, offering valuable practice.

Vocational Task Bundles (Related Skills)

Vocational Task Bundles, sometimes included in comprehensive 3rd grade morning work PDF resources, extend learning beyond core subjects. These printable activities integrate practical life skills, fostering independence and real-world application of knowledge.

Examples might include tasks related to time management, following directions, or basic problem-solving. A “Vocational Task Bundle” (file size unspecified) suggests these resources aim to develop essential skills alongside academic content. These bundles complement traditional morning work, offering a holistic learning experience for students.

Utilizing Weekly Formats & Skill Themes

Free 3rd grade morning work PDFs often employ a consistent weekly structure with focused skill themes each day, ensuring targeted practice and review.

Consistent Weekly Structure

Free 3rd grade morning work PDFs thrive on predictability. A consistent weekly format, readily available for download, establishes a routine that students quickly understand and embrace.

This structure typically involves five days of activities, each building upon previously learned concepts. Many printable resources offer a Monday-to-Friday layout, simplifying lesson planning for teachers.

The repetition of format—the same type of activity each day, or a similar layout—reduces cognitive load, allowing students to focus on the skills themselves rather than deciphering instructions. This streamlined approach maximizes learning time and minimizes classroom disruptions.

Focused Skill Themes Per Day

Effective 3rd grade morning work PDFs often organize activities around specific skill themes each day. For example, Monday might focus on grammar, Tuesday on multiplication facts, Wednesday on reading comprehension, Thursday on geometry, and Friday on a review of the week’s concepts.

This targeted approach allows for concentrated practice and reinforces learning in a manageable way.

Free printable resources frequently categorize activities, making it easy for teachers to select worksheets aligned with their current curriculum. This daily focus ensures students receive consistent exposure to key skills, solidifying their understanding and building confidence.

Downloading and Printing Morning Work PDFs

Free 3rd grade morning work PDFs are readily available online, typically as standard PDF files for easy downloading and printing on common paper sizes.

File Types (PDF Specifics)

Third grade morning work PDFs are almost universally provided in the Portable Document Format, ensuring consistent appearance across various devices and operating systems.

This format preserves formatting, fonts, and images, crucial for printable worksheets. File sizes vary, ranging from approximately 1.01 MB to 14.9 MB, depending on the content and length of the morning work bundle.

PDFs are generally compatible with any device capable of opening them – computers, tablets, and smartphones – allowing for flexible access and printing options for teachers and parents seeking free resources.

Print Quality and Paper Considerations

When utilizing free 3rd grade morning work PDFs, print quality significantly impacts usability. Standard printer settings generally suffice, but selecting a higher quality print option enhances clarity, especially for detailed graphics or smaller fonts.

Paper choice also matters; standard 20lb printer paper is adequate for daily practice, but heavier weight paper (24lb or higher) offers increased durability.

Consider printing in grayscale to conserve ink, as many printable worksheets don’t require color. Proper paper and print settings maximize the value of these free resources.

File Sizes and Download Speeds

Downloading free 3rd grade morning work PDFs varies in speed depending on file size and internet connection. Files range from relatively small (1.01 MB, like “Morning Work Grade Three”) to larger (14.9 MB, such as “Fraction Printables”).

Larger files naturally take longer to download. A stable internet connection is crucial for efficient access to these printable resources.

Slow download speeds can be mitigated by closing unnecessary programs and browser tabs. These free resources are readily available, but patience may be needed with larger files.

Customizing Morning Work for Your Students

Free 3rd grade morning work PDFs can be adapted to meet diverse learning needs by selecting appropriate skill levels and incorporating student preferences.

Adapting to Different Learning Levels

Utilizing free 3rd grade morning work PDFs allows for easy differentiation. Teachers can select worksheets targeting specific skills where students need reinforcement.

For students needing a challenge, offer more complex problems or open-ended tasks within the printable packets. Conversely, provide simplified versions or fewer problems for those requiring extra support.

Consider grouping students based on skill level and assigning tailored morning work. This ensures everyone is appropriately challenged and experiences success, fostering a positive learning environment. Regularly assess student progress to adjust assignments accordingly, maximizing the impact of these free resources.

Adding Student Choice

Enhance engagement with free 3rd grade morning work PDFs by incorporating student choice. Offer a selection of printable worksheets focusing on similar skills, allowing students to pick the one that appeals to them most.

This autonomy boosts motivation and ownership of learning. Create “morning work bins” with various options, or use a rotating menu board.

Even simple choices, like selecting the order of tasks, can make a difference. Remember, free resources provide flexibility – leverage it to cater to individual preferences and foster a more enjoyable start to the day!

Popular Search Terms & Trends (as of 12/04/2025)

As of today, “3rd grade morning work free” is a highly searched term on Pinterest, with 59 people actively seeking printable PDF resources.

“3rd Grade Morning Work Free” on Pinterest

Pinterest serves as a vibrant hub for educators seeking readily available resources, and the search term “3rd grade morning work free” demonstrates significant current interest. Users are actively pinning and exploring printable PDF options to supplement their classroom instruction.

The platform showcases a diverse range of free worksheets, covering ELA and math skills, often categorized by weekly themes or specific concepts. Educators utilize Pinterest to discover and curate collections of morning work, streamlining their preparation process and accessing a wealth of community-shared materials. This trend highlights the demand for accessible, high-quality educational content.

Current Search Volume & Interest

As of today, December 4th, 2025, data indicates a notable level of online engagement surrounding “3rd grade morning work free”. Specifically, approximately 59 individuals have recently searched for this term, demonstrating consistent demand for accessible educational resources.

This interest likely stems from teachers seeking cost-effective ways to reinforce skills and establish productive classroom routines. The prevalence of searches for free PDF worksheets suggests a preference for readily printable materials. This trend underscores the ongoing need for easily implemented, supplemental learning activities for third-grade students.