loom knitting instructions for beginners pdf
Category : Instructions
Loom knitting is a versatile craft, offering accessible patterns via PDF resources like “Loom Knitting Made Easy” (36 pages) for beginners seeking guidance.
It’s a fantastic method for creating wearables and home décor, with numerous PDF guides available to jumpstart your crafting journey.
What is Loom Knitting?
Loom knitting is a method of creating fabric by looping yarn around pegs on a loom, differing from traditional knitting with needles. It’s an approachable technique, especially for beginners, and numerous PDF guides simplify the learning process. Resources like “Big Book of Loom Knitting” (190 pages) and “Loom Knitting Made Easy” (36 pages) offer comprehensive instructions.
Unlike traditional knitting’s warp and weft, loom knitting focuses on creating rows directly on the loom. This makes it easier to manage yarn and maintain consistent tension. These beginner-friendly PDFs provide step-by-step instructions, enabling crafters to quickly produce items like scarves and hats.
Benefits of Loom Knitting for Beginners
Loom knitting offers several advantages for those new to yarn crafts. It’s significantly easier on the hands than traditional knitting, requiring less dexterity. PDF resources, such as “Loom Knitting Made Easy”, provide clear instructions, making the learning curve gentle. The loom’s structure helps maintain consistent tension, resulting in neater projects.
Beginners appreciate the speed and simplicity; projects are often completed faster than with needles. Access to PDF guides like the “Knifty Knitter Slipper Socks Guide” (2 pages) allows for quick wins and builds confidence. It’s a fantastic gateway to more complex knitting techniques.
Essential Loom Knitting Tools
To begin loom knitting, you’ll need a loom – various types are available, detailed in PDF guides like the “Big Book of Loom Knitting” (190 pages). A yarn winding tool is helpful for preparing yarn, enhancing the crafting experience. Accessing PDF instructions for beginners simplifies project setup.
Essential tools also include a loom hook for lifting stitches, and scissors for finishing. While not strictly necessary, stitch markers aid in pattern following. Many beginner PDFs recommend starting with bulky yarn for easier handling and quicker results.

Understanding Loom Components
PDF guides, such as the “Big Book of Loom Knitting”, detail loom parts; understanding pegs and sizes is crucial for successful projects, as yarn weight compatibility varies.
Types of Loom Knitting Looms
Loom knitting utilizes diverse loom types, each suited for different projects. PDF resources, like introductory guides, often showcase these variations. Round looms are ideal for hats and cowls, while long looms excel at scarves.
Smaller looms create items like socks – the “Knifty Knitter Slipper Socks Guide” (2 pages) provides specific instructions. Understanding these differences, detailed in available PDFs, is key for beginners. Choosing the right loom impacts project success and ease of learning, making PDF guides invaluable.
Pegs and Their Functions
Loom pegs are fundamental to the knitting process, guiding yarn to create stitches. PDF instructions often visually demonstrate how yarn wraps around each peg. Their primary function is to hold loops, forming the fabric’s structure.
Different peg heights and spacing influence stitch definition. Beginner PDF guides emphasize proper yarn wrapping technique around pegs for consistent tension. Understanding peg function, as illustrated in downloadable resources, is crucial for mastering basic loom knitting and achieving desired results.
Loom Sizes and Yarn Weight Compatibility
Loom size directly impacts project scale and yarn weight suitability. PDF guides often include charts detailing compatible yarn weights for specific loom dimensions. Smaller looms work best with finer yarns, while larger looms accommodate bulky options.
Beginner PDF resources emphasize matching yarn weight to peg spacing for optimal stitch definition. Incorrect pairings can lead to loose or overly tight fabric. Understanding this relationship, detailed in downloadable instructions, ensures successful project completion and a polished final product.

Basic Loom Knitting Techniques
PDF guides detail fundamental techniques like casting on, the knit stitch, purl stitch, and binding off – essential skills for any beginner loom knitter.
Casting On (Starting Your Project)
Casting on is the crucial first step, establishing the foundation for your loom knitted creation. PDF resources, such as beginner guides, illustrate various methods for securing the yarn onto the loom pegs.
These PDF instructions often demonstrate wrapping each peg individually, creating a stable base row. Understanding this initial step, detailed in downloadable guides, is paramount for preventing stitches from slipping off during the knitting process.
Proper casting on ensures consistent tension and a neat project start, as explained within comprehensive loom knitting instructions for beginners PDF documents.
Knit Stitch – The Foundation
The knit stitch is the cornerstone of loom knitting, forming the basic fabric structure. PDF guides, like “Big Book of Loom Knitting”, visually demonstrate looping the yarn around each peg in a consistent manner.
These loom knitting instructions for beginners PDF resources emphasize maintaining even tension while working each stitch, preventing a loose or overly tight fabric. Mastering this fundamental stitch, as illustrated in downloadable patterns, unlocks a world of project possibilities.
Consistent practice, guided by PDF tutorials, builds muscle memory and proficiency.
Purl Stitch – Adding Texture
The purl stitch introduces texture to loom-knit projects, creating a different visual effect compared to the knit stitch. While not always covered extensively in introductory loom knitting instructions for beginners PDF, it expands design options.
Resources like the “Big Book of Loom Knitting” PDF may include purl stitch variations. Mastering this stitch, alongside the knit stitch, allows for creating ribbing and more complex stitch patterns.
PDF guides often demonstrate how alternating knit and purl stitches creates appealing fabric textures.
Binding Off (Finishing Your Project)
Binding off secures your loom-knit stitches, preventing unraveling and completing your project. Many loom knitting instructions for beginners PDF guides dedicate sections to this crucial step, often demonstrating various techniques.
These PDF resources, like “Loom Knitting Made Easy”, illustrate how to carefully remove loops from the loom pegs, creating a finished edge. Proper binding off ensures a neat and durable result.
Understanding this final stage, detailed in PDFs, is essential for a polished, professional-looking loom-knit creation.

Beginner Loom Knitting Projects
PDF guides, such as those for scarves and cowls, offer simple projects for new loom knitters, building skills with accessible loom knitting instructions.
These projects provide a gentle introduction to the craft, fostering confidence and creativity.
Simple Scarf Project
Beginners can easily create a cozy scarf using readily available loom knitting instructions found in PDF format. These guides typically demonstrate a basic knit stitch repeated across the loom pegs.
Starting with casting on, the PDF will illustrate how to secure the yarn and begin the knitting process. The pattern involves consistently wrapping the yarn around each peg, creating rows of interlocking loops.
“Loom Knitting Made Easy” PDF likely contains a similar project, perfect for practicing fundamental techniques. Finishing involves carefully binding off the stitches to prevent unraveling, resulting in a warm and stylish accessory.
Easy Cowl Pattern
Loom knitting a cowl is an excellent project for beginners, often detailed in beginner-friendly PDF guides. These patterns typically utilize a circular loom, simplifying the process of creating a continuous loop.
PDF resources like “Loom Knitting Made Easy” may feature a similar design, focusing on the repetitive knit stitch to build the cowl’s height. Casting on involves securing the yarn around all loom pegs.
The pattern emphasizes consistent tension for an even fabric; Binding off creates a finished edge, and the cowl is joined seamlessly, offering a stylish and practical accessory.
Basic Hat Instructions
Loom knitting a hat is a popular beginner project, frequently found within comprehensive PDF guides. Many patterns utilize a round loom, simplifying the shaping process for the crown of the hat.
PDF resources often detail casting on, followed by consistent knit stitches to establish the hat’s body. Decreasing stitches, as explained in guides, shapes the crown, creating a snug fit.
Binding off securely finishes the hat. These instructions emphasize maintaining even tension throughout, resulting in a comfortable and well-formed hat, perfect for practicing basic loom techniques.
Advanced Loom Knitting Techniques
PDF guides expand beyond basics, introducing colorwork and ribbing. Mastering increasing/decreasing stitches unlocks complex patterns, elevating your loom knitting skills.
Colorwork Techniques
Colorwork in loom knitting opens a vibrant world of design possibilities, moving beyond single-color projects. While beginner PDF guides focus on foundational skills, exploring color changes adds depth and visual interest to your creations.
Successfully incorporating multiple colors requires careful yarn management and understanding how to switch yarns mid-row. Resources like the “Big Book of Loom Knitting” (190 pages) may offer more detailed colorwork instructions, though often, experimentation is key.
Begin with simple stripes or basic geometric patterns before tackling intricate designs. Consistent tension is crucial when changing colors to avoid puckering or loose stitches, ensuring a polished final product.
Creating Ribbing
Ribbing adds elasticity and a professional finish to loom-knitted edges, like cuffs and hats. While basic PDF guides often prioritize simple patterns, understanding ribbing expands project possibilities. It’s achieved by alternating knit and purl stitches, creating vertical ridges.
Loom knitting ribbing typically involves manipulating the yarn on adjacent pegs in a specific sequence. Though detailed instructions may not be prevalent in introductory PDFs like “Loom Knitting Made Easy” (36 pages), online tutorials demonstrate the technique effectively.
Experimentation and practice are vital for mastering consistent ribbing, ensuring a snug and durable edge for your finished projects.
Increasing and Decreasing Stitches
Increasing and decreasing stitches are fundamental techniques for shaping loom-knitted projects, allowing for fitted garments or decorative details. While beginner PDF guides like “Loom Knitting Made Easy” (36 pages) focus on basic stitch patterns, mastering these skills unlocks more complex designs.
Increasing typically involves working two stitches into one peg, while decreasing combines two pegs into one. These manipulations require careful attention to maintain even tension and avoid gaps.
Detailed visual guides, often found online, complement PDF instructions, demonstrating precise peg manipulation for seamless shaping.

Finding Loom Knitting Patterns (PDF Resources)
PDF resources like “Big Book of Loom Knitting” (190 pages) and “Knifty Knitter Slipper Socks Guide” (2 pages) offer diverse patterns for all skill levels.
“Big Book of Loom Knitting” PDF Overview
The “Big Book of Loom Knitting”, a comprehensive PDF resource spanning 190 pages, serves as an excellent starting point for beginners eager to explore this craft. It provides a wealth of patterns, ranging from simple introductory projects to more complex designs, catering to varying skill levels.
This PDF guide likely includes detailed instructions, clear diagrams, and helpful tips to navigate the fundamentals of loom knitting. Expect to find projects encompassing scarves, hats, cowls, and potentially even more ambitious items. It’s a valuable asset for anyone seeking a broad collection of loom knitting patterns in a single, downloadable format.
“Loom Knitting Made Easy” PDF Overview
“Loom Knitting Made Easy”, a concise PDF guide totaling 36 pages, is specifically designed to introduce newcomers to the world of loom knitting. Its streamlined format focuses on delivering essential techniques and beginner-friendly projects without overwhelming the reader with excessive detail.
Expect clear, step-by-step instructions accompanied by illustrative visuals, making it easy to grasp the core principles of casting on, knitting, purling, and binding off. This PDF is ideal for those seeking a quick and accessible introduction to loom knitting basics, enabling them to start creating simple projects immediately.
“Knifty Knitter Slipper Socks Guide” PDF Overview
The “Knifty Knitter Slipper Socks Guide”, a brief PDF resource spanning just 2 pages, provides focused instructions for crafting comfortable and practical slipper socks using a loom. While concise, it delivers targeted guidance for this specific project, assuming a basic understanding of loom knitting fundamentals.
Expect a streamlined approach, prioritizing efficiency and clarity. This PDF is best suited for those already familiar with casting on and basic knit stitches, seeking a quick and easy pattern to create cozy slipper socks. It’s a practical guide for a rewarding, small-scale project.
Troubleshooting Common Loom Knitting Issues
PDF guides often address issues like dropped stitches, uneven tension, and peg slippage – common hurdles for beginners learning loom knitting techniques.
Dropped Stitches
Dropped stitches are a frequent frustration for new loom knitters, but easily remedied with practice and guidance often found within PDF instructional materials. These resources, like “Loom Knitting Made Easy”, typically demonstrate how to carefully loop the yarn back through the peg, recreating the stitch.
Beginners should focus on maintaining consistent tension to prevent stitches from slipping off. Utilizing a stitch marker on the dropped stitch’s peg can also help during the repair process. Remember to gently pull the working yarn to secure the restored stitch, avoiding excessive tightness that could distort the fabric. Consistent practice, aided by PDF guides, builds confidence and skill.
Uneven Tension
Uneven tension is a common challenge for those new to loom knitting, often addressed in beginner PDF guides like “Big Book of Loom Knitting”. Maintaining consistent yarn pull is key; too loose creates a floppy fabric, while too tight makes it rigid.
Practice controlling the yarn flow, ensuring each wrap around the peg is similar. Some PDF resources suggest using a yarn winder for uniform skeins. Regularly checking stitch density throughout your project helps identify and correct tension variations early on, resulting in a more polished final product.
Peg Slippage
Peg slippage can be frustrating, especially for beginners, but many PDF loom knitting guides offer solutions. Ensure your loom pegs are securely fastened; loose pegs contribute to yarn sliding off. Using a slightly thicker yarn or adjusting your wrapping technique can also help secure the loops.
Some crafters recommend a light adhesive on pegs, though caution is advised. Regularly checking your work and gently repositioning slipped loops prevents larger errors. Detailed instructions within PDF resources like “Knifty Knitter Slipper Socks Guide” often address this issue specifically.

Resources for Further Learning
PDF guides like “Big Book of Loom Knitting” and online communities provide extensive support. Explore video tutorials for visual loom knitting instructions.
Online Loom Knitting Communities
Loom knitting thrives on shared knowledge! Numerous online platforms connect enthusiasts, offering invaluable support, especially for beginners navigating PDF instructions. These communities are excellent spaces to ask questions, share projects, and gain inspiration.
Crafters frequently exchange tips on interpreting loom knitting instructions for beginners found in PDF formats, like “Loom Knitting Made Easy”. Members often provide helpful clarifications and demonstrate techniques visually. Active forums and social media groups dedicated to loom knitting foster a collaborative learning environment, making the craft more accessible and enjoyable for all skill levels.
Recommended Loom Knitting Books
Loom knitting resources extend beyond online platforms! Several books provide comprehensive guidance, often including patterns mirroring those found in PDF instructions. “Big Book of Loom Knitting” (190 pages) is a standout, offering a vast collection of projects and techniques.
“Loom Knitting Made Easy” (36 pages) serves as an excellent starting point for beginners, simplifying complex concepts. These books complement PDF guides, offering a tactile learning experience. They often feature detailed diagrams and step-by-step photos, enhancing understanding of loom knitting instructions.
Video Tutorials and Courses
Loom knitting thrives on visual learning! Numerous online platforms host video tutorials, supplementing PDF instructions like those in “Knifty Knitter Slipper Socks Guide” (2 pages). These videos demonstrate techniques in real-time, clarifying steps that might be unclear in written form.
Beginners benefit from seeing the process unfold, from casting on to binding off. Courses, often paid, offer structured learning paths, building skills progressively. Combining PDF guides with video instruction creates a powerful learning synergy, accelerating mastery of loom knitting.

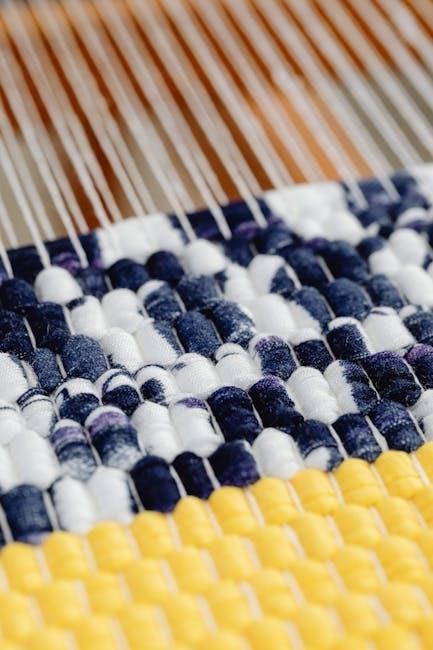
Weaving Basics Related to Loom Knitting
Loom knitting shares roots with weaving, utilizing interlaced yarns – the warp and weft – to create fabric, concepts explained in basic weaving skills guides.
Warp and Weft Explained
Warp and weft are fundamental to understanding fabric construction, and while loom knitting differs from traditional weaving, the principle remains relevant. The warp consists of yarns held taut on a loom, forming the base structure.
In weaving, this is achieved by making a warp, then chaining it, and finally beaming it onto the loom. The weft, however, is the yarn interlaced through the warp, creating the pattern.
Though loom knitting uses pegs instead of a traditional loom, visualizing these elements helps grasp how loops interlock to form a knitted fabric. Understanding this basic interplay enhances your crafting knowledge.
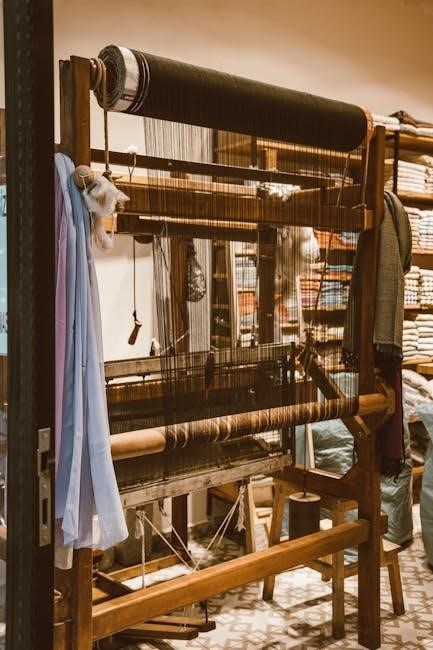
Basic Weaving Skills for Loom Knitters
While loom knitting isn’t weaving, grasping basic weaving skills provides a foundational understanding of fabric creation. Key skills include making a warp – essentially creating the lengthwise threads – often achieved through a giant crochet chain.
Beaming warp involves carefully rolling the warp onto the back beam of a loom, ensuring even tension. Threading the warp then prepares it for the weft.
These techniques, though applied differently in loom knitting, illuminate how loops interlock, enhancing your appreciation for textile arts and potentially inspiring future projects.
Yarn Selection for Loom Knitting
Beginners should explore various yarn types, understanding that weight compatibility impacts project outcomes; resources like PDF guides can aid selection.
A yarn winding tool enhances efficiency.
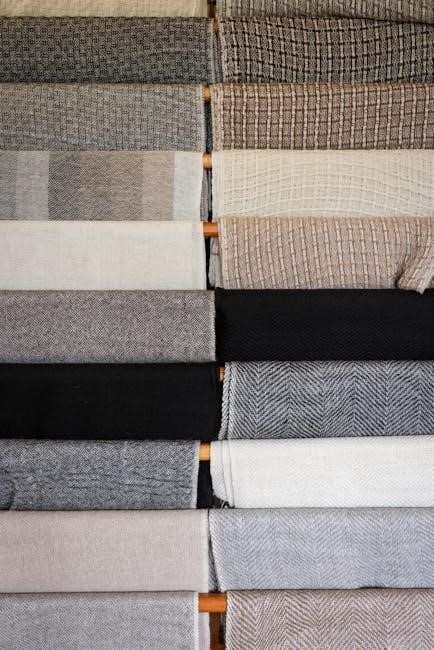
Best Yarn Types for Beginners
For newcomers to loom knitting, selecting the right yarn is crucial for a positive experience. PDF guides, such as those offering beginner instructions, often recommend smoother, worsted weight yarns initially.
These yarns are easier to manage on the loom pegs and provide clear stitch definition. Acrylic and cotton blends are excellent choices due to their affordability, durability, and wide availability. Avoid overly fuzzy or textured yarns at first, as they can obscure the stitches and make learning more challenging.
Experimenting with different fibers later is encouraged, but starting with a simple, reliable yarn will build confidence and skill.
Understanding Yarn Weights
Yarn weight significantly impacts the final look and feel of your loom-knitted projects. PDF instructions often specify a recommended yarn weight for each pattern. Common weights include fingering, sport, DK, worsted, bulky, and super bulky.
Worsted weight is frequently suggested in beginner PDF guides due to its versatility and ease of handling. Heavier weights create quicker projects, while lighter weights offer finer detail. Matching the yarn weight to your loom’s peg spacing is essential for achieving the correct gauge and desired fabric density.
Always check the pattern’s yarn weight recommendation before starting!
Yarn Winding Tools
Efficient yarn management is crucial for smooth loom knitting. While not always detailed in basic PDF instructions, yarn winding tools greatly simplify the process. A yarn winder helps create uniform cakes or balls, preventing tangles and snags during knitting.
Swift yarn winders are particularly useful for larger quantities. Additionally, a ball winder can create neat, compact balls ideal for smaller projects. Many beginner PDF resources assume hand-winding, but investing in tools enhances the experience.
Consider a winder to make your loom knitting more enjoyable!
Loom Knitting Stitch Patterns
Explore diverse stitch patterns! The Reverse Ridge Knit Stitch (Horizontal Welts) is an easy pattern, often found in beginner PDF guides, offering textured results.
Reverse Ridge Knit Stitch Pattern
The Reverse Ridge Knit Stitch Pattern, also known as Horizontal Welts, is a wonderfully simple technique ideal for beginners exploring loom knitting. This pattern utilizes a straightforward sequence of knit and purl stitches, making it easily accessible through various PDF resources.
Many introductory loom knitting PDF guides feature this stitch, demonstrating its foundational nature. It creates a visually appealing textured fabric, perfect for scarves, cowls, or adding detail to larger projects. Learning this stitch opens doors to more complex patterns, building confidence and skill.
Its repetitive nature makes it relaxing and satisfying to create!
Horizontal Welts Explained
Horizontal Welts are a classic loom knitting stitch, frequently detailed in beginner-friendly PDF guides. Often presented alongside the Reverse Ridge Knit Stitch Pattern, these welts create a textured fabric with raised ridges running horizontally across the piece.
These patterns, available as downloadable PDFs, typically illustrate the simple knit and purl stitch combination required. This technique is excellent for adding visual interest to projects like scarves or hats, offering a subtle yet effective design element.
Mastering horizontal welts builds a solid foundation for more intricate loom knitting designs.
Seasonal Loom Knitting Projects
PDF guides offer festive projects like quick knit pumpkins, requiring no prior skills, perfect for beginners wanting seasonal décor patterns.
Quick Knit Pumpkin Pattern
Beginners can easily create adorable pumpkins using a hat loom, bypassing traditional knitting or crochet techniques! Numerous PDF resources, though not explicitly detailing a “quick knit pumpkin” pattern by name, demonstrate the simplicity of loom knitting for fast projects.
These resources showcase how to utilize basic knit and purl stitches – easily learned from introductory PDF guides – to form the pumpkin’s shape. The pattern relies on creating a rounded form, then cinching the top to resemble a pumpkin stem. It’s a delightful, seasonal project accessible through readily available loom knitting PDFs.