Category Archives: Instructions

  • 0

carolina gold rice cooking instructions

Category : Instructions

Carolina Gold Rice is a heritage grain known for its buttery flavor and tender texture, originating from 18th-century South Carolina. Its unique taste makes it a culinary treasure.

1.1 Origin and History

Carolina Gold Rice is a heritage grain with roots tracing back to the 18th century in South Carolina’s Lowcountry. Originally cultivated by enslaved West Africans, it became a cornerstone of the region’s economy and cuisine. Known for its golden hue and long grains, this rice thrived in the marshy wetlands. After the Civil War, its popularity declined due to labor and environmental challenges. Revived in the 21st century by passionate farmers and historians, Carolina Gold Rice now enjoys a resurgence, celebrated for its historical significance and unique flavor. It remains a cherished part of Southern culinary traditions, particularly in dishes like Charleston pilau and other Lowcountry recipes.

1.2 Unique Characteristics and Flavor Profile

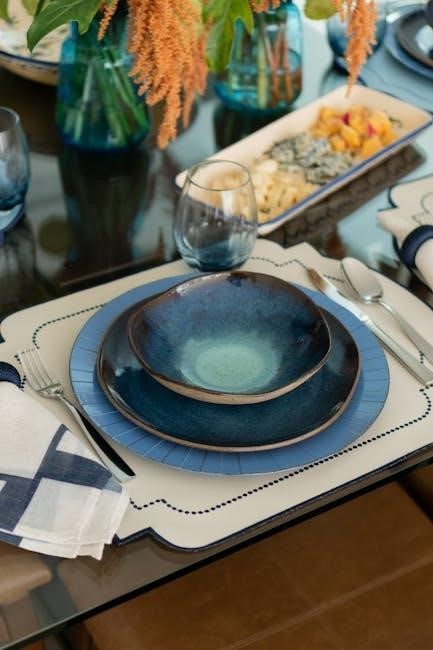
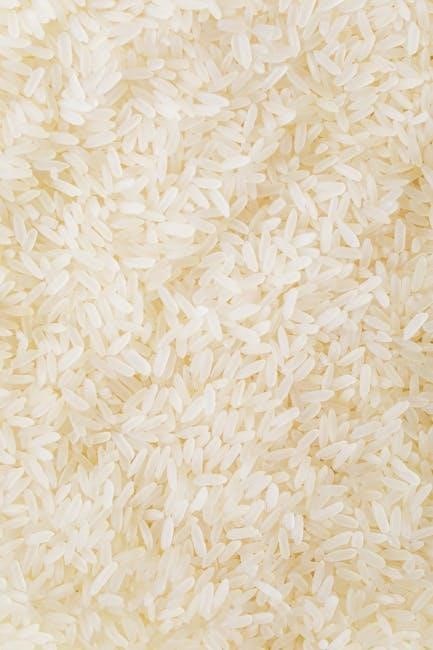
Carolina Gold Rice is renowned for its distinctive golden hue and long, slender grains, which yield a light, fluffy texture when cooked. Unlike shorter-grain varieties, it retains a tender yet separate structure, avoiding mushiness. The rice boasts a subtle buttery flavor with hints of nuttiness, making it a versatile base for various cuisines. Its aromatic qualities and mild taste allow it to complement a wide range of dishes, from Southern classics to global recipes. The grain’s ability to absorb flavors without overpowering them makes it a favorite for chefs and home cooks alike. This heirloom rice offers a delicate balance of taste and texture, elevating any meal with its unique charm.

Basic Cooking Methods

Cooking Carolina Gold Rice is straightforward, with versatile methods like stovetop, rice cooker, Instant Pot, or microwave. Combine rice and water, bring to a boil, reduce heat, and let rest for fluffy results.

2.1 Stovetop Cooking

Cooking Carolina Gold Rice on the stovetop is simple and effective. Start by rinsing the rice thoroughly in a fine mesh sieve under cold water to remove excess starch. In a medium saucepan, combine 1 cup of rinsed rice with 1.5 cups of water, broth, or stock for added flavor. Place the saucepan over high heat and bring the mixture to a rolling boil. Once boiling, reduce the heat to low, cover with a tight-fitting lid, and simmer for 15 minutes. Avoid lifting the lid during cooking to ensure even steam distribution. After 15 minutes, remove from heat and let the rice rest, covered, for 5 minutes. Fluff the rice gently with a fork before serving. This method yields perfectly cooked, fluffy grains every time.

2.2 Rice Cooker Instructions

Cooking Carolina Gold Rice in a rice cooker is a convenient and foolproof method. Start by rinsing the rice thoroughly in a fine mesh sieve under cold water to remove excess starch. Add 1 cup of rinsed Carolina Gold Rice and 1.5 cups of water, broth, or stock to the rice cooker. Stir gently to distribute evenly. Turn on the rice cooker and select the standard white rice setting. Allow the rice to cook until the machine switches to the “keep warm” mode, typically 15-20 minutes. Once cooked, let the rice rest for 5 minutes before fluffing with a fork. This method ensures tender, fluffy grains with minimal effort and consistent results.

2.3 Instant Pot Method

Cooking Carolina Gold Rice in an Instant Pot is quick and efficient. Rinse the rice thoroughly in a fine mesh sieve under cold water to remove excess starch. Add 1 cup of rinsed Carolina Gold Rice and 1.5 cups of water, broth, or stock to the Instant Pot. Stir gently to distribute evenly. Secure the lid, ensuring the valve is sealed. Turn on the “Rice” setting or “Manual” mode at high pressure for 5 minutes. Allow a natural release for 10 minutes, then quick-release any remaining pressure. Let the rice rest for 2-3 minutes before fluffing with a fork. This method ensures perfectly cooked, fluffy grains with minimal effort and time.

2.4 Microwave Cooking

Cooking Carolina Gold Rice in the microwave is a convenient option for quick meals. Rinse the rice thoroughly in a fine mesh sieve under cold water to remove excess starch. In a microwave-safe dish, combine 1 cup of rinsed Carolina Gold Rice with 1.75 cups of water or broth. Cover the dish with a microwave-safe lid or plastic wrap. Cook on high for 3-4 minutes, then reduce the power to 50% and continue cooking for an additional 10-12 minutes. Let the rice stand, covered, for 5 minutes to allow the steam to distribute evenly. Fluff the rice with a fork before serving for the best texture and separation of grains.

Advanced Tips for Perfect Texture

Rinsing Carolina Gold Rice removes excess starch, ensuring fluffiness. Use a 1:2 water ratio and let it rest post-cooking for optimal texture and separation of grains.

3.1 Rinsing the Rice

Rinsing Carolina Gold Rice is a crucial step to remove excess starch, ensuring a fluffier texture. Rinse the rice under cold water until it runs clear, then drain well. This process helps eliminate impurities and reduces stickiness, allowing the grains to separate nicely during cooking. For optimal results, rinse gently but thoroughly to avoid breaking the grains. Some cooks also recommend soaking the rice for 15–30 minutes after rinsing to further enhance texture and reduce cooking time. Pat the rice dry with a paper towel before cooking to remove excess moisture. Proper rinsing and preparation lay the foundation for achieving the perfect texture in your final dish.

3.2 Water Ratio and Absorption

The ideal water ratio for Carolina Gold Rice is typically 1.5 cups of water for every 1 cup of rice. This ensures proper hydration without making the rice overly mushy. Bring the water to a boil, add the rice, then reduce the heat to low, cover, and simmer for 15–18 minutes. The rice should absorb most of the water, leaving it tender and slightly firm in the center. Avoid using too much water, as this can result in a soggy texture. After cooking, allow the rice to rest, covered, for 5–10 minutes to complete the absorption process and achieve the perfect fluffy consistency. Adjust the water ratio slightly based on desired texture.

3.3 Resting and Fluffing

After cooking, allow the Carolina Gold Rice to rest, covered, for 5–10 minutes. This step is crucial for even steam distribution and texture development. Once rested, gently fluff the rice using a fork to separate the grains, ensuring a light and airy texture. For optimal results, avoid over-stirring, as this can make the rice clumpy; If desired, spread the fluffed rice on a baking sheet and let it cool slightly to remove excess moisture, enhancing its fluffy consistency. Proper resting and fluffing techniques are essential to bring out the natural buttery flavor and tender texture of Carolina Gold Rice, making it a perfect accompaniment to any dish.

Serving Suggestions

Carolina Gold Rice pairs perfectly with Southern cuisine, seafood, and fried chicken. Its buttery flavor enhances global dishes, making it ideal for salads, bowls, or as a flavorful side.

4.1 Pairing with Southern Cuisine

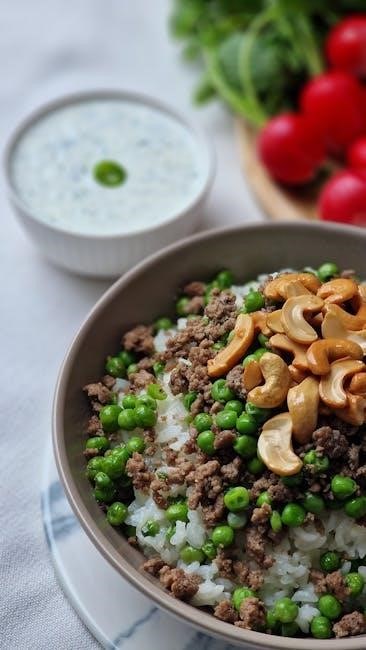
Carolina Gold Rice is a staple in Southern cuisine, complementing dishes like fried chicken, shrimp and grits, and gumbo. Its buttery flavor enhances classic Southern sides, such as collard greens or black-eyed peas. The rice’s fluffy texture pairs beautifully with rich, savory meats like brisket or pulled pork. For a traditional Lowcountry meal, serve it alongside seafood boils or Frogmore stew. It also pairs well with Southern-style vegetables like fried okra or green beans. The rice’s mild yet distinct flavor makes it a versatile base for hearty, comforting Southern dishes, ensuring a balanced and satisfying meal every time.

4.2 Incorporating into Global Dishes

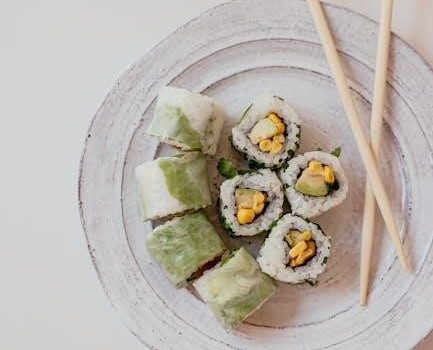
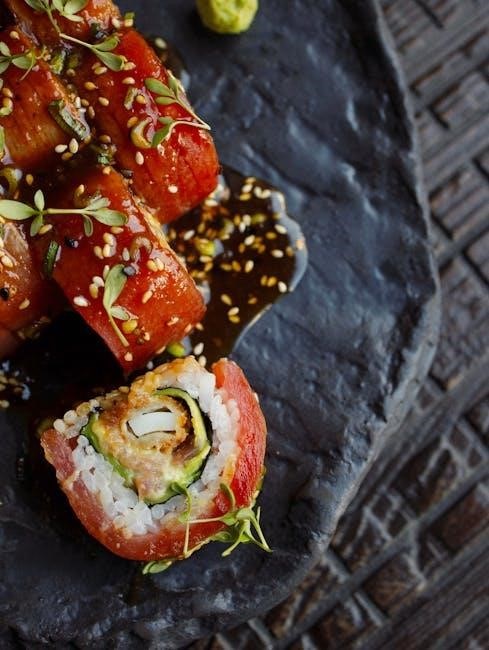
Carolina Gold Rice adds a unique twist to global cuisine, pairing well with international flavors. In Asian-inspired dishes, it complements stir-fries and curries, while its buttery notes enhance Mediterranean recipes like paella or herb-infused pilafs. For Middle Eastern dishes, it pairs seamlessly with spiced meats or as a base for biryani. Its mild flavor also works in Latin-inspired meals, such as arroz con pollo or empanada fillings. Toasting the rice in oil before cooking enhances its aroma and texture, making it ideal for global recipes. This versatile grain bridges Southern heritage with worldwide culinary traditions, offering a delicious and authentic touch to any dish.

Nutritional Benefits

Carolina Gold Rice is rich in fiber, vitamins, and minerals like iron, making it a nutritious choice. It’s gluten-free and offers a healthier alternative to processed grains.

5.1 Health Advantages of Carolina Gold Rice

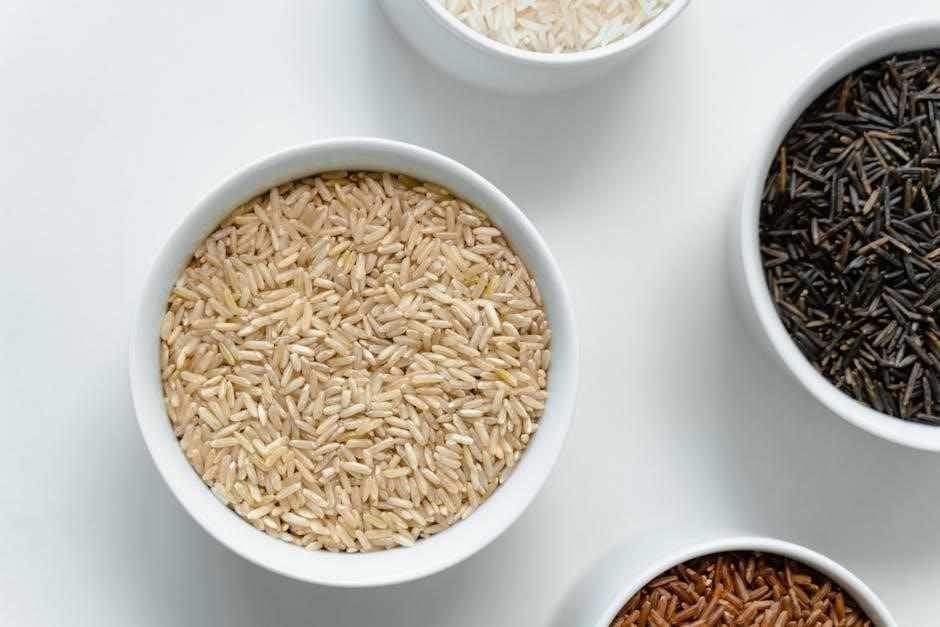
Carolina Gold Rice is a nutrient-rich, heritage grain offering numerous health benefits. It is non-GMO and contains no artificial additives, making it a natural choice for health-conscious individuals. With a lower glycemic index compared to other rice varieties, it provides sustained energy release, benefiting those with dietary restrictions. The rice is high in dietary fiber, which aids digestion and promotes a feeling of fullness. It is also a good source of essential minerals like iron, magnesium, and selenium, supporting immune function and overall well-being. Additionally, Carolina Gold Rice is gluten-free, making it an excellent option for those with gluten intolerance or celiac disease.


instructions for the host of a comedic takedown crossword

Category : Instructions

Hosting a comedic takedown crossword is an artful blend of humor and mental challenge, where the host sets the tone for a lively, entertaining event. Ensuring audience engagement through witty clues and banter is key to creating a memorable experience that combines laughter with problem-solving fun.

Setting the Tone for a Humorous Event

Setting the tone for a humorous event begins with the host’s energetic and charismatic entrance, immediately signaling that the gathering will be lighthearted and fun. Using self-deprecating humor or playful jabs at the audience can break the ice and create a relaxed atmosphere. The host should establish a balance between wit and approachability, ensuring participants feel comfortable laughing and engaging. Themed attire or props can also enhance the comedic vibe, making the event visually entertaining. By fostering a sense of camaraderie and shared fun, the host lays the groundwork for a memorable and laughter-filled experience. Keeping the energy high from the start ensures the audience is primed for the challenges and jokes ahead.

Understanding the Role of the Host in a Comedic Takedown Crossword

The host plays a pivotal role in a comedic takedown crossword, serving as both the game’s conductor and its primary entertainer. Their main responsibilities include delivering clues with clarity and humor, keeping the game’s pace lively, and ensuring all participants are engaged. A skilled host must strike a balance between being witty and maintaining the game’s structure, preventing chaos while fostering a playful atmosphere. They must also think on their feet, turning unexpected moments or errors into comedic gold. By combining charisma, quick thinking, and a deep understanding of the audience, the host ensures the event is both fun and memorable. Their ability to adapt and connect with the crowd is crucial for the game’s success and overall enjoyment.

Preparing for the Comedic Takedown Crossword

Preparing involves selecting themes and keywords that spark humor and crafting clues that are both funny and challenging. Balancing wit with clarity ensures the game’s success;

Selecting Themes and Keywords for Maximum Laughs

Selecting themes and keywords is crucial for a comedic takedown crossword. Themes should be relatable and humorous, such as pop culture, memes, or everyday absurdities. Keywords should be witty, playful, or unexpected to spark laughter. Consider wordplay, puns, and double meanings to create clues that are both funny and challenging. Ensure the content aligns with the audience’s sense of humor to maximize engagement. Balancing humor with solvability is key—clues should be clever but not impossible to decipher. By mixing light-hearted fun with clever twists, you’ll create a crossword that entertains and delights participants throughout the event.

Writing Clues That Are Both Funny and Challenging

Crafting clues that are both humorous and challenging requires a delicate balance. Use witty wordplay, puns, and double meanings to create laughter while keeping the puzzle engaging. Ensure clues are clever but not overly obscure—participants should feel a sense of achievement when they solve them. Incorporate relatable references like pop culture, memes, or everyday situations to make the humor resonate. Avoid being too vague or too straightforward; aim for a middle ground where the clue sparks a chuckle and a lightbulb moment. Test your clues beforehand to ensure they land well and are solvable. By blending humor with cleverness, you’ll keep the audience entertained and intellectually stimulated throughout the game.

Delivering Punchlines and Keeping the Flow

Timing is everything when delivering punchlines during a comedic takedown crossword. Keep the energy high with witty remarks and smooth transitions to maintain audience engagement and laughter.

Timing Your Jokes and Clues for Maximum Impact

Timing is crucial when delivering jokes and clues in a comedic takedown crossword. A well-timed punchline can elevate the humor and keep the audience engaged, while a poorly timed one might fall flat. Start by delivering clues at a steady pace, allowing participants to absorb the information without feeling rushed. Pause briefly after setting up a joke to let the humor land, but avoid overdoing it, as it can disrupt the flow. Use voice modulation to emphasize key words or phrases, making the clues more entertaining and memorable. Practice your delivery beforehand to ensure smooth transitions between jokes and clues. Additionally, observe your audience’s reactions to adjust your timing on the fly, ensuring maximum laughter and engagement throughout the event.

Engaging the Audience with Wit and Banter

Engaging the audience with wit and banter is essential for keeping the energy high during a comedic takedown crossword. Use quick, clever remarks to respond to participants’ answers or reactions, turning even mistakes into laughable moments. Encourage audience participation by asking rhetorical questions or playfully teasing teams for their creative guesses. Acknowledge clever solutions or humorous missteps to create a sense of camaraderie. Maintain a lighthearted tone by sprinkling in jokes or puns throughout the event. This not only keeps the mood upbeat but also fosters a connection between the host and the audience. Remember, wit and banter should feel natural and spontaneous, so practice your delivery to ensure it enhances, rather than distracts from, the game.

Managing the Game and Handling Mistakes

Managing the game and handling mistakes requires a balance of organization and humor. Keep the pace smooth and turn errors into comedy gold to entertain the audience.

Keeping the Game Moving Smoothly

Keeping the game moving smoothly requires a mix of organization and quick thinking. Prepare a clear structure with timed rounds and pre-planned clues to maintain momentum. Use a balance of easy and challenging clues to keep participants engaged without causing frustration. Communicate clearly and concisely, ensuring everyone understands the rules and their turns. Timing is crucial—avoid long pauses or overly complicated explanations. If the game stalls, inject humor or a light-hearted comment to keep the energy high. Remember, the goal is to entertain and challenge simultaneously, so stay flexible and ready to adapt based on the audience’s reactions. A smooth flow ensures a fun and memorable experience for all participants.

Turning Errors into Comedy Gold

Mistakes are inevitable, but a skilled host turns them into hilarious moments. Embrace mishaps with humor—a wrong answer or a misplaced clue can become a laugh-out-loud opportunity. For instance, if a participant misreads a clue, playfully highlight the absurdity of their interpretation. Quick wit and clever comebacks keep the mood light and engaging. Prepared one-liners or jokes can transform a potential awkward silence into a comedic highlight. Remember, the goal is to entertain, so even if the game falters, your humor will keep the energy high. By mastering the art of turning errors into comedy gold, you ensure a fun and memorable experience for all involved.

Hosting a comedic takedown crossword is a delightful mix of humor and mental stimulation. End on a high note by thanking participants and encouraging audience feedback for future events.

Wrapping Up the Event on a High Note

Ending your comedic takedown crossword on a high note ensures a lasting impression. Thank participants for their engagement and acknowledge the winners with a light-hearted prize or shoutout. Summarize the funniest moments to keep the laughter alive. Encourage attendees to share their favorite clues or jokes, fostering a sense of community. A final, clever quip or pun can leave the audience smiling. Remember, the goal is to leave everyone feeling entertained and eager for the next event. Keep the energy upbeat until the very end, ensuring your comedic takedown crossword is remembered fondly.

Encouraging Audience Participation and Feedback

Engaging the audience is crucial for a successful comedic takedown crossword. Encourage participants to shout out ideas or jokes during the game, fostering a collaborative and lively atmosphere. After the event, invite feedback through surveys, social media, or verbal comments to gauge what worked well and what could be improved. Highlighting audience contributions during the game not only boosts morale but also creates a sense of ownership. Positive reinforcement, such as acknowledging clever answers or funny suggestions, keeps the energy high. By making the audience feel valued, you ensure they leave with a positive experience and look forward to future events. Their input is invaluable for refining your approach and keeping the humor fresh and relevant.


singer one instruction manual

Category : Instructions

The Singer One is a user-friendly computerized sewing machine designed for versatility and ease of use, perfect for quilting and home textiles. Its SwiftSmart threading system simplifies setup, while the automatic buttonhole feature and customizable stitches enhance creativity. The machine comes with a comprehensive instruction manual, essential for both beginners and experienced sewists to unlock its full potential. The manual is available for download in English, ensuring easy access to guidance and troubleshooting tips.

1.1 What is the Singer One?

The Singer One is a cutting-edge, user-friendly computerized sewing machine designed to cater to both hobbyists and professional sewists. It features an intuitive interface, a wide range of customizable stitches, and advanced functionalities such as automatic buttonhole creation and the SwiftSmart threading system. The machine is well-suited for various sewing projects, from basic repairs to intricate quilting and home decor; Its large sewing area and robust construction make it ideal for handling thick fabrics and large-scale projects. The Singer One is accompanied by a comprehensive instruction manual, which guides users through its features, setup, and operation. This manual is available for free download, ensuring easy access to troubleshooting and maintenance tips. The Singer One is praised for its versatility, ease of use, and durability, making it a popular choice among sewing enthusiasts.

1.2 Importance of the Instruction Manual

The Singer One instruction manual is an essential resource for mastering the machine’s features and operations. It provides detailed guidance on parts identification, stitch customization, and troubleshooting, ensuring users can fully utilize the machine’s capabilities. The manual is available for free download in English, making it accessible to a broad audience. It serves as a comprehensive guide for both beginners and experienced sewists, offering step-by-step instructions for setup, maintenance, and advanced techniques. By following the manual, users can avoid common mistakes, optimize performance, and extend the machine’s lifespan. Its clear and organized structure ensures that users can quickly find solutions to any issues, making it an indispensable companion for achieving professional-grade sewing results with the Singer One.

Quick Start Guide

The Quick Start Guide provides essential steps for unpacking, setting up, and beginning your sewing journey with the Singer One. It offers a straightforward approach to understanding basic functions, ensuring a smooth start for new users.

2.1 Unpacking and Initial Setup

When unpacking the Singer One, carefully remove all components from the box, including the machine, accessories, and the instruction manual. Ensure all items are accounted for to avoid missing parts. Place the machine on a stable, flat surface, preferably a sewing table, to ensure proper operation. Plug in the power cord and familiarize yourself with the control panel and accessories provided. Review the manual for initial setup instructions, such as adjusting the machine’s tension settings and preparing for threading. Properly organizing your workspace and understanding each component will help you start sewing efficiently. Take your time during setup to ensure everything is ready for your first project.

2.2 Basic Functions and Features

The Singer One sewing machine offers a variety of basic functions and features designed to enhance your sewing experience. It includes a range of built-in stitches, from essential straight and zigzag stitches to decorative and stretch stitches, providing versatility for different fabrics and projects. The machine also features a free-arm design for easy sewing of cuffs and sleeves. With its automatic needle threader and top-drop bobbin system, setup is streamlined. The Singer One includes adjustable stitch length and width, allowing for customization based on your sewing needs. Additionally, the machine’s LCD screen displays stitch selections, making it easy to navigate and choose the right stitch for your project. These features make the Singer One a versatile and user-friendly option for sewists of all skill levels.

Understanding Your Singer One Sewing Machine

Understanding your Singer One sewing machine involves familiarizing yourself with its design, features, and operation. This section helps you grasp the machine’s core elements for optimal use.

3.1 Parts Identification

Identifying the parts of your Singer One sewing machine is essential for effective operation. Key components include the needle, bobbin, spool pins, and stitch selection buttons. The SwiftSmart threading system simplifies thread guidance, while the large sewing surface accommodates bulky projects. The automatic buttonhole feature and tension dials are located on the front panel for easy access. Understanding each part’s function ensures proper machine setup and use. Refer to the instruction manual for detailed diagrams and descriptions to familiarize yourself with every element, from the power button to the presser foot. Accurate part identification helps maintain your machine and troubleshoot issues efficiently.

3;2 Stitch Selection and Customization

The Singer One offers a wide range of built-in stitches, including straight, zigzag, and decorative options, allowing for versatility in sewing projects. Users can easily select stitches using the LCD screen and navigation buttons. The machine also features customizable stitch length and width adjustments, enabling precise control over sewing results. Automatic buttonhole creation is another highlight, providing professional-looking finishes. The SwiftSmart threading system streamlines setup, ensuring smooth operation. With these features, sewists can explore creative possibilities while maintaining ease of use. The instruction manual provides detailed guidance on stitch customization, helping users maximize the machine’s capabilities for various fabrics and projects.

Basic Sewing Operations

Learn essential sewing steps, including threading the machine, managing the bobbin, and handling fabric. These operations ensure smooth stitching and proper machine function for all projects.

4.1 Threading the Machine

Threading the Singer One sewing machine is a straightforward process that ensures proper stitch formation. Start by placing the spool on the spool pin and guide the thread through the tension discs. Next, pass the thread through the take-up lever and then insert it into the needle’s eye. The machine’s SwiftSmart threading system simplifies this process, reducing manual effort. Always use high-quality thread suitable for your fabric type. If threading issues arise, refer to the manual for troubleshooting tips. Proper threading is essential for consistent stitching and optimal machine performance. Follow the step-by-step guide in the manual to ensure accuracy and avoid common mistakes during setup.

4.2 Bobbin Installation and Management

Proper bobbin installation is essential for smooth stitching on the Singer One. Begin by winding the bobbin evenly, ensuring it is not overfilled. Insert the bobbin into the bobbin case, aligning it correctly to avoid misalignment. Gently pull the thread to seat the bobbin properly. Use the same type of thread for both the bobbin and the machine for consistency. If the bobbin is not installed correctly, it may cause uneven tension or poor stitch quality. Refer to the manual for troubleshooting common issues like loose or tight bobbin thread. Always use the correct size and type of bobbin recommended for your machine. Regularly check and replace the bobbin as needed to maintain optimal performance and prevent thread breakage during sewing.

Advanced Features of the Singer One

The Singer One offers advanced features like automatic buttonhole creation and the SwiftSmart threading system, designed for precision and ease of use. Explore various stitch options for creative stitching.

5.1 Automatic Buttonhole Creation

The Singer One sewing machine features an advanced automatic buttonhole creation system, enabling users to sew perfect buttonholes with minimal effort. This feature is particularly useful for garments and home decor projects, ensuring consistent results. The machine offers multiple buttonhole styles to choose from, allowing for customization to suit various fabrics and designs. The process is streamlined, with the machine automatically adjusting settings for precise stitching. This function not only saves time but also enhances the professional finish of sewing projects. By following the instructions in the manual, users can easily navigate the buttonhole creation process, making it accessible even for those new to sewing. This feature exemplifies the Singer One’s commitment to innovation and user convenience.

5.2 Using the SwiftSmart Threading System

The Singer One sewing machine incorporates the innovative SwiftSmart Threading System, designed to simplify the threading process. This user-friendly feature guides the thread through the machine with ease, reducing the risk of tangles and errors. The system automatically adjusts tension settings, ensuring optimal stitching results. To use the SwiftSmart Threading System, simply follow the step-by-step instructions in the manual, which detail how to properly align and feed the thread through the machine’s pathways. This advanced feature is particularly beneficial for beginners, as it streamlines the setup process and allows users to focus on their sewing projects. The SwiftSmart system enhances efficiency, saving time and improving overall sewing accuracy.

Maintenance and Troubleshooting

Regularly clean the machine to remove dust and debris. Lubricate moving parts as instructed in the manual. Check for loose threads and inspect the bobbin area. Troubleshooting common issues like uneven stitching or thread breakage can be addressed by referring to the manual’s detailed solutions.

6.1 Cleaning the Machine

Regular cleaning is essential to maintain the Singer One’s performance and longevity. Turn off and unplug the machine before cleaning. Use a soft, dry cloth to wipe down the exterior and remove any dust or debris. For more thorough cleaning, gently brush the bobbin area and tension dials with a small, dry brush to prevent lint buildup. Avoid using harsh chemicals or liquids, as they may damage the machine’s finish. Refer to your instruction manual for specific cleaning guidelines tailored to your Singer One. Proper maintenance ensures smooth operation and prevents potential issues, keeping your machine in optimal condition for all your sewing projects.

6.2 Common Issues and Solutions

The Singer One sewing machine, like any device, may encounter occasional issues. One common problem is thread bunching or uneven stitching, often due to incorrect tension settings. To resolve this, adjust the tension dials according to the manual’s guidelines. Another issue is the bobbin not threading properly, which can be fixed by re-installing it and ensuring it’s seated correctly. If the automatic buttonhole feature malfunctions, check that the fabric is properly stabilized and the buttonhole foot is securely attached; For error messages, refer to the manual’s troubleshooting section or restart the machine. Regular cleaning and maintenance, as outlined in the manual, can prevent many of these issues. Always consult the Singer One instruction manual for specific solutions tailored to your machine.


uniden dect 6.0 instruction manual

Category : Instructions

The Uniden DECT 6.0 Cordless Phone System offers reliable communication with advanced features like caller ID, call blocking, and expandable handsets for seamless connectivity.

1.1 Overview of the DECT 6;0 Technology

The DECT (Digitally Enhanced Cordless Telecommunications) 6.0 technology operates on a 1.9 GHz frequency, ensuring clear and interference-free communication. It provides superior range, security, and sound quality compared to older cordless systems. This technology supports multiple handsets, making it ideal for homes and offices. Its digital encryption enhances privacy, while low power consumption extends battery life. DECT 6.0 is compatible with various accessories and offers reliable performance in both indoor and outdoor environments.

1.2 Key Features of the Uniden DECT 6.0 System

The Uniden DECT 6.0 system offers a range of features, including caller ID, call waiting, and a built-in answering machine. It supports up to six handsets, ensuring coverage throughout your home or office. The system also includes a phonebook directory, volume control, and a speakerphone option for hands-free conversations. Additionally, it provides call blocking and do-not-disturb functions for enhanced privacy. The expandable design and long-lasting battery life make it a reliable and versatile communication solution.

Installation and Setup

To set up your Uniden DECT 6.0 system, start by positioning the base unit in a central location. Connect the base to a power source and telephone jack. Next, charge and register each handset to the base unit, ensuring proper synchronization for reliable functionality. Follow the manual’s step-by-step guide for seamless installation.

2.1 Choosing the Right Location for the Base Unit

The base unit should be placed in a central location to ensure optimal coverage and signal strength. Avoid areas near microwaves, computers, or other electronic devices that may cause interference. Position the base unit away from walls or metal objects to maximize range. Elevating the base unit can also improve signal distribution. Ensure the location is dry and avoid extreme temperatures to maintain proper functionality. This placement ensures reliable communication and minimizes potential signal issues.

2.2 Connecting the Base Unit and Handsets

To connect the base unit and handsets, first power on the base unit. Charge each handset by placing it in the charging cradle for at least 24 hours. Once charged, turn on the handsets and ensure they are nearby to the base unit for registration. Press and hold the registration button on the base until the indicator lights up, then press the ‘menu’ or ‘OK’ button on the handset. Follow prompts to complete pairing. Once connected, handsets are ready for use.

2.3 Initial Setup and Registration of Handsets

After connecting the base unit and handsets, start the registration process. Press and hold the registration button on the base until the indicator lights up. On the handset, navigate to the menu, select ‘register,’ and follow the on-screen prompts. Ensure the handset is in range of the base during this process. Once registered, a confirmation tone or light will indicate successful pairing. Repeat this process for each handset to ensure proper system integration. The handsets are now ready for use.

Battery Management

Proper battery care ensures optimal performance. Use the provided charger and avoid extreme temperatures. Charge batteries fully before first use to maximize longevity and reliability.

3.1 Installing and Charging the Battery

To ensure proper functionality, install the battery by aligning the terminals correctly in the handset. Place the handset in the charging cradle and plug it into a power source. Allow the battery to charge for at least 12 hours initially. Avoid overcharging, as it may reduce battery life. Use only the provided charger to maintain safety and compatibility. Always follow the manual’s guidelines for optimal battery performance.

3.2 Battery Maintenance Tips

To prolong battery life, ensure the terminals are clean and free from corrosion. Avoid extreme temperatures and overcharging. Store batteries in a cool, dry place if not in use. Use only the provided charger to prevent damage. Replace the battery if it no longer holds a charge. Regularly check the battery level and recharge as needed. Proper maintenance ensures optimal performance and extends the lifespan of your Uniden DECT 6.0 system.

Basic Operations

The Uniden DECT 6.0 system allows users to make and receive calls, adjust volume, and navigate menus effortlessly. Ensure the handset is charged and registered properly for optimal functionality.

4.1 Making and Receiving Calls

To make a call, dial the number using the keypad and press the Talk button. For incoming calls, press Talk to answer. Use the volume buttons to adjust sound during calls. Features like caller ID and call blocking enhance call management. Ensure the handset is fully charged and registered to the base unit for reliable connectivity. Mute calls using the Mute button and end calls with the End key.

4.2 Using the Phonebook and Directory

The Uniden DECT 6.0 allows storing up to 100 contacts in the phonebook, accessible from the base unit and synchronized with handsets. To use the directory, press the Menu button, select Directory, and navigate through contacts using the up/down arrows. Edit entries by selecting Add/Edit and delete unwanted numbers with the Delete option. Ensure the handset is synchronized with the base unit for updated contact lists. This feature streamlines call management and enhances user convenience.

4.3 Adjusting Volume and Sound Settings

Adjust the Uniden DECT 6.0’s volume during calls using the Volume Up/Down buttons. Press Menu, then Settings > Sound Settings to customize ringer and keypad tones. Enable Silent Mode to mute all sounds, ideal for quiet environments. Use the Equalizer to enhance voice clarity, and select from various ringtone options. These settings ensure personalized audio preferences and optimal communication comfort.

Call Management Features

The Uniden DECT 6.0 system includes caller ID, call waiting, and call blocking to manage incoming calls effectively, enhancing user control over communication.

5.1 Caller ID and Call Waiting

The Uniden DECT 6.0 system features Caller ID, displaying the caller’s name and number, and Call Waiting, allowing users to hold or switch between calls without missing important connections. These features enhance communication efficiency by providing real-time caller information and managing multiple calls seamlessly. Users can easily identify callers and handle incoming calls efficiently, ensuring optimal communication management with these advanced functionalities.

5.2 Call Blocking and Do Not Disturb

The Uniden DECT 6.0 system includes Call Blocking, which allows users to block specific numbers, reducing unwanted calls. Additionally, the Do Not Disturb feature silences the phone during selected times, minimizing interruptions. These features provide enhanced control over incoming calls, ensuring a quieter and more private communication experience. Users can customize settings to block calls or activate Do Not Disturb, offering flexibility and convenience for managing their call preferences effectively.

5.3 Transferring and Conferencing Calls

The Uniden DECT 6.0 system supports call transfers and conferencing, enabling users to manage multiple calls effortlessly. During a call, users can transfer to another handset or an external number by accessing the menu and selecting the transfer option. For conferencing, users can add another caller to the current call, creating a three-way conversation. These features enhance communication flexibility, allowing seamless call management and collaboration.

Advanced Features

The Uniden DECT 6.0 system offers advanced features like an answering machine, speakerphone, and customizable settings, enhancing call management and user experience with versatile functionality.

6.1 Setting Up the Answering System

To set up the answering system on your Uniden DECT 6.0, start by accessing the base unit’s menu. Navigate to the “Answering System” or “Voice Mail” settings and enable the feature. Record a personalized greeting or use the pre-recorded default option. Set the number of rings before the system answers, typically between 2-6 rings. Save your settings and test the system by calling the phone to ensure it records and plays back messages correctly. Regularly check and delete messages to maintain storage capacity. Refer to the manual for troubleshooting tips if issues arise.

6.2 Using the Speakerphone and Intercom

The Uniden DECT 6.0 system features a built-in speakerphone, allowing hands-free conversations. To activate, press the “Speaker” button during a call. For intercom functionality, select a handset or “All” to page other handsets. Use the volume controls to adjust speakerphone levels for clarity. This feature is ideal for multitasking or group discussions. Ensure all handsets are registered and within range for seamless intercom communication. Refer to the manual for troubleshooting intercom connectivity issues.

6.3 Customizing Settings and Preferences

The Uniden DECT 6.0 system allows users to personalize their experience through customizable settings. Adjust ringtones, volume levels, and display brightness to suit preferences. Program the phonebook with frequently called numbers and set up speed dial for convenience. Additional features include call blocking and Do Not Disturb modes. The manual provides detailed instructions for configuring these settings to enhance functionality and user comfort. Explore the menu options to tailor the system to your needs.

Troubleshooting Common Issues

This section addresses frequent problems like weak signals, power failures, and connectivity issues, providing solutions to ensure optimal performance of your Uniden DECT 6.0 system.

7.1 Addressing Power Failures and Weak Signals

Power failures and weak signals can disrupt your Uniden DECT 6.0 system’s performance. Ensure the base unit is connected to a stable power source and batteries are charged. If signals are weak, move the base to a central location and minimize obstructions. Resetting the system by unplugging and reconnecting the power may resolve connectivity issues. Regularly update firmware to maintain optimal signal strength and performance.

7.2 Resolving Connectivity Problems

To resolve connectivity issues, ensure all handsets are registered to the base unit and batteries are fully charged. Restart the base and handsets, and check for firmware updates. Move devices away from sources of interference, such as Wi-Fi routers or microwaves. If problems persist, reset the system by disconnecting power, waiting 30 seconds, and reconnecting. This often restores proper communication between the base and handsets, ensuring reliable performance.

Maintenance and Care

Regular cleaning ensures optimal performance and longevity. Gently wipe handsets and base with a soft cloth. Avoid harsh chemicals. Proper battery maintenance extends life and reliability.

8.1 Cleaning the Phone and Handsets

Regular cleaning ensures optimal performance and longevity. Gently wipe handsets and base with a soft cloth, avoiding harsh chemicals. Clean the keypad, screen, and microphone with a slightly damp cloth. Avoid moisture exposure to internal components. For stubborn stains, use a mild soap solution but dry thoroughly. Regular maintenance prevents dust buildup and ensures clear sound quality and reliable functionality. Always power off before cleaning.

8.2 Updating Firmware and Software

Regular firmware updates ensure optimal performance and security. Visit the official Uniden website to check for the latest updates. Download the update using a computer and follow on-screen instructions. Connect the base unit to the computer via USB or use the handset’s menu to initiate the update. Never interrupt the process to prevent system corruption. Updated firmware enhances features, fixes bugs, and improves compatibility, ensuring your phone system remains efficient and secure. Always restart the system after updating.

Compliance and Safety Information

The Uniden DECT 6.0 system complies with FCC and Industry Canada regulations, ensuring safe and interference-free operation. It also meets hearing aid compatibility standards for user accessibility.

9.1 FCC and Industry Canada Compliance

The Uniden DECT 6.0 system adheres to FCC and Industry Canada regulations, ensuring safe and interference-free operation. It meets strict standards for electromagnetic compatibility and hearing aid compatibility. Users must follow all safety precautions outlined in the manual to maintain compliance. Proper disposal instructions are also provided to comply with environmental regulations. Always refer to the manual for specific compliance details and local adherence requirements.

9.2 Hearing Aid Compatibility and Safety Precautions

The Uniden DECT 6.0 system is designed to be compatible with hearing aids, meeting FCC standards for M4/T4 rating. It ensures minimal interference and clear communication for users with hearing aids. Always use the phone in a well-ventilated area and avoid exposure to extreme temperatures or liquids. Never modify the device or use damaged products, as this could pose safety risks. Follow all safety precautions outlined in the manual to ensure safe and effective use.

The Uniden DECT 6.0 Cordless Phone System is a reliable and feature-rich communication solution. For optimal performance, regularly update firmware, charge batteries properly, and refer to the manual for troubleshooting. Always follow safety guidelines and ensure hearing aid compatibility for uninterrupted use. Proper maintenance will extend the system’s lifespan and ensure seamless connectivity.

10.1 Best Practices for Optimal Performance

For optimal performance, regularly update the firmware to ensure the latest features and bug fixes. Charge batteries fully before first use and avoid overcharging. Place the base unit in a central location to maximize coverage. Clean handsets and base units regularly to maintain functionality. Organize phonebooks and directories for easy access. Refer to the manual for troubleshooting common issues promptly. Use compatible accessories to ensure proper connectivity and performance.

10.2 Resources for Further Assistance

For additional support, visit Uniden’s official website for downloadable manuals, FAQs, and troubleshooting guides. Contact Uniden Customer Care for direct assistance. Refer to the provided user manual or online resources for detailed instructions and updates. Ensure to use compatible accessories and follow safety guidelines for optimal performance and longevity of your Uniden DECT 6.0 system.