indesit condenser tumble dryer manual
Category : United Kingdom
Welcome to the Indesit Condenser Tumble Dryer Manual. Today is 10/21/2025. This guide provides essential information for safe and efficient use of your appliance.
Overview of the Indesit Condenser Tumble Dryer
The Indesit Condenser Tumble Dryer is a high-quality appliance designed for efficient and convenient laundry drying. Manufactured by the Italian company Indesit, known for its innovative home appliances, this dryer combines modern technology with user-friendly design. It features a condenser system, which eliminates the need for external venting, making it ideal for various household setups. The dryer is built with energy efficiency in mind, offering multiple drying programs tailored for different fabric types. Its large drum capacity ensures ample space for bulky loads, while the intuitive control panel simplifies operation. Designed to minimize noise and maximize performance, the Indesit Condenser Tumble Dryer is a practical solution for modern households seeking reliable and efficient drying solutions.
Key Features and Benefits
The Indesit Condenser Tumble Dryer offers a range of innovative features designed to enhance your drying experience. Its advanced condenser technology eliminates the need for venting, making it suitable for any room. The dryer boasts multiple drying programs, including delicate, normal, and eco modes, ensuring optimal care for all fabric types. With a spacious drum capacity, it can handle large loads efficiently. Energy efficiency is a key benefit, as the dryer is designed to minimize energy consumption while maintaining performance. Additionally, the quiet operation and user-friendly interface make it a convenient addition to any home. These features combine to provide a reliable, efficient, and hassle-free drying solution for modern households.

Safety Guidelines and Precautions

Always read and follow the manual instructions carefully. Ensure proper ventilation to avoid overheating. Keep the dryer out of reach of children and pets. Supervise usage closely.
Important Safety Information
Welcome to the Indesit Condenser Tumble Dryer Manual. Today is 10/21/2025. This manual is designed to ensure safe and efficient operation of your appliance. Always read and follow the instructions carefully to avoid accidents. Proper ventilation is crucial to prevent overheating and ensure optimal performance. Keep the dryer out of reach of children and pets, as they may accidentally start the machine or get injured. Never leave the dryer unattended during operation. Avoid placing flammable materials near the dryer, and ensure the area is clear of clutter. Do not lean on the dryer, as it may tip over. Always unplug the dryer when cleaning or performing maintenance. Failure to follow these guidelines may result in damage to the appliance or personal injury. This manual serves as a guide, but it is your responsibility to exercise caution and common sense when using the dryer.
Precautions Before Using the Dryer

Before using your Indesit Condenser Tumble Dryer, ensure the power supply matches the specifications in the manual. Always place the dryer on a stable, level surface to prevent tipping. Check that the venting system is properly installed and free from obstructions to avoid moisture buildup. Never overload the dryer, as this can damage clothes or the machine. Avoid drying items with metal parts, as they may cause damage or pose a fire risk. Do not dry damp cleaning rags or items contaminated with flammable substances. Keep the dryer away from direct sunlight and flammable materials. Ensure the lint filter is clean before each use to maintain efficiency and safety. Refer to the manual for specific guidelines on compatible fabrics and drying times. Always unplug the dryer before cleaning or performing maintenance tasks.
Venting Requirements and Safety
Proper venting is essential for the safe and efficient operation of your Indesit Condenser Tumble Dryer. Ensure the dryer is installed in a well-ventilated area to prevent moisture buildup. Use a high-quality, kink-resistant venting hose that meets the manufacturer’s specifications. Avoid bending or coiling the hose excessively, as this can restrict airflow. Regularly inspect the venting system for blockages, such as lint or debris, and clean it as needed. Never vent the dryer into a confined space, as this can lead to mold growth or fire hazards. Ensure the vent outlet is at least 1 meter away from any flammable materials. Always follow the venting guidelines provided in the manual to maintain optimal performance and safety. Regular checks will help prevent issues and ensure efficient drying cycles.
Installation and Setup
Ensure the dryer is placed on a flat, stable surface in a well-ventilated area. Connect the appliance according to the manual’s instructions, ensuring proper ventilation and electrical connections. Always check the dryer is level to prevent vibration and ensure efficient operation. Secure the dryer to prevent movement during use. Follow all safety guidelines for installation to guarantee optimal performance and safety.

Choosing the Right Location
When selecting a location for your Indesit Condenser Tumble Dryer, ensure it is placed in a well-ventilated area to prevent moisture buildup. Avoid direct sunlight and extreme temperatures. The dryer should be installed on a flat, stable surface to ensure proper operation and minimize vibration. Keep it away from water sources like sinks or bathtubs to reduce the risk of electrical hazards. Additionally, place the dryer near a drainage point if your model requires water drainage. Ensure there is enough space around the appliance for proper airflow and easy access. Avoid placing it near flammable materials or in areas where it could be exposed to splashes or spills. Proper placement ensures safety, efficiency, and longevity of the appliance.
Step-by-Step Installation Guide
Installing your Indesit Condenser Tumble Dryer requires careful planning and execution. First, unpack the appliance and ensure all components are included. Place the dryer in the chosen location, ensuring it is level and stable. Connect the water drainage hose to a nearby drain or sink. If using a condenser, attach the provided hose to a ventilation point or window. Plug in the dryer and ensure the power supply matches the appliance’s requirements. Refer to the manual for specific electrical connections. Secure any loose parts and test the dryer on a short cycle to ensure proper function. If unsure, consult a professional for assistance. Proper installation ensures safe and efficient operation of your Indesit Condenser Tumble Dryer.
Leveling the Dryer for Proper Operation
Proper leveling of your Indesit Condenser Tumble Dryer is essential for optimal performance and safety. Begin by placing the dryer on a firm, even surface. Check the floor for any unevenness and adjust the dryer’s feet accordingly. Use a spirit level to ensure the appliance is perfectly horizontal. If necessary, rotate the adjustable feet to achieve balance. Once leveled, tighten the feet securely to prevent movement during operation. Improper leveling can lead to vibration, noise, and reduced efficiency. Ensure the dryer is stable before use to avoid moisture accumulation and ensure energy efficiency. Regularly check the leveling, especially if the dryer is moved or the floor surface changes. Proper leveling guarantees safe and efficient operation of your Indesit Condenser Tumble Dryer.
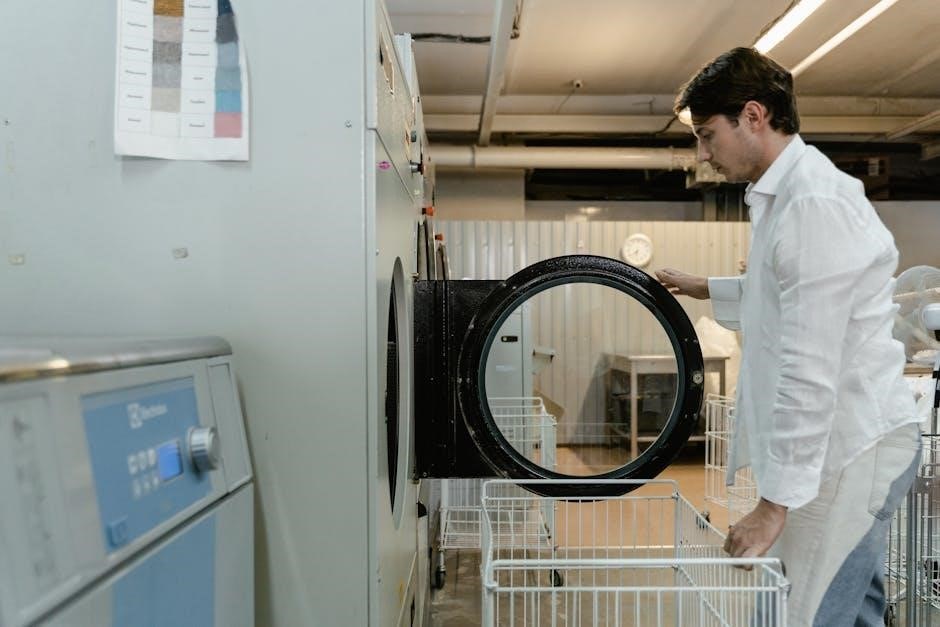
Operating the Indesit Condenser Tumble Dryer
Operating the Indesit Condenser Tumble Dryer involves selecting the right cycle, loading clothes properly, and ensuring the lint filter is clean for efficient drying performance.
Understanding the Control Panel
The control panel of the Indesit Condenser Tumble Dryer is designed for intuitive operation. It features a user-friendly interface with buttons and a LED display. The panel includes options for selecting drying programs, adjusting temperature settings, and monitoring cycle progress. Key buttons include the power button, start/stop, and program selection. The LED display shows remaining time, error codes, and current settings. Additional indicators alert you when the lint filter needs cleaning or if the condenser requires maintenance. The panel also includes a child lock button to prevent accidental changes. By familiarizing yourself with the control panel, you can optimize drying performance and ensure safe operation. Always refer to the manual for detailed explanations of each function and symbol.
Selecting the Right Drying Cycle
Selecting the right drying cycle on your Indesit Condenser Tumble Dryer ensures optimal drying results for different fabric types. The dryer offers various pre-set programs, including cotton, synthetic, and delicate cycles. Each cycle is designed for specific fabric care needs, with adjustable temperature settings to protect sensitive materials. For energy efficiency, eco-friendly cycles are available, which use lower temperatures and longer drying times. Additionally, there are specialized cycles for bulky items, wool, and quick drying. Always choose the cycle that matches the fabric type and load size for best performance. The manual provides detailed descriptions of each cycle to help you make the right selection. Proper cycle selection ensures efficient drying, fabric protection, and energy savings.
Starting and Monitoring the Drying Cycle
To start the drying cycle, ensure the dryer is properly loaded, the lint filter is clean, and the condenser is free from blockages. Press the Start button on the control panel after selecting the desired cycle. The dryer will begin operation, and the display will show the remaining time and cycle progress. Monitor the cycle by checking the display periodically to ensure it is running smoothly. If necessary, pause the cycle to add or remove items. Always check the lint filter during longer cycles to maintain efficiency. Proper monitoring ensures even drying, prevents overheating, and extends the appliance’s lifespan. Regular checks also help maintain energy efficiency and fabric care.
Maintenance and Cleaning
Regular maintenance ensures optimal performance and longevity. Clean the lint filter after each use and check the condenser monthly. Inspect the hose for kinks or blockages, and ensure proper ventilation. Empty the water tank after each cycle and wipe the gasket. These steps maintain efficiency and prevent damage.
Cleaning the Lint Filter
Cleaning the lint filter is essential for maintaining your Indesit Condenser Tumble Dryer’s performance and safety. Locate the filter in the door or drum. After each use, remove and gently brush off lint with your hands or a soft cloth. For stubborn residue, rinse with warm water but avoid using detergents. Ensure the filter is completely dry before reinstalling. Regular cleaning prevents lint buildup, which can reduce efficiency and pose a fire risk. Always disconnect the dryer from power before cleaning. Neglecting this step can lead to poor drying results and increased energy consumption. Make this a routine part of your maintenance to keep your dryer running smoothly and safely.
Maintaining the Condenser
Maintaining the condenser is crucial for optimal performance and energy efficiency. Turn off and unplug the dryer before starting. Locate the condenser, usually behind or at the back of the dryer. Remove any protective cover and gently clean the condenser coils with a soft brush or vacuum cleaner. Check for blockages or lint buildup, as these can reduce airflow and efficiency. Regularly cleaning the condenser prevents overheating and ensures proper moisture removal. If the condenser is damaged or clogged, it may cause longer drying times or increased energy consumption. Always refer to your Indesit manual for specific instructions. Cleaning the condenser every 1-2 months is recommended, depending on usage. Proper maintenance ensures your dryer operates safely and efficiently, saving time and energy.
Checking and Replacing the Hose
Regularly inspect the condenser hose for blockages, kinks, or damage. A damaged or obstructed hose can reduce efficiency and cause safety issues. Turn off the dryer and unplug it before examining the hose. Check for lint buildup, which can restrict airflow. Clean the hose gently with a soft brush or vacuum cleaner. If the hose is damaged, replace it immediately to ensure proper ventilation. Always use a hose compatible with your Indesit dryer model. Securely reconnect the hose to both the dryer and the vent outlet. Replace the hose every 2-3 years or as recommended in your manual. Proper maintenance ensures safe operation and optimal performance of your condenser tumble dryer.
Troubleshooting Common Issues
Troubleshooting common issues with your Indesit condenser tumble dryer involves identifying problems like the dryer not starting, overheating, or poor drying performance. Refer to the error code section for guidance.

Identifying and Resolving Common Problems

Identifying and resolving common issues with your Indesit condenser tumble dryer ensures optimal performance. Common problems include the dryer not starting, overheating, or poor drying results. Check if the power supply is stable and ensure the door is closed properly. If the dryer overheats, clean the lint filter and condenser. For poor drying, verify that the venting system is clear and unobstructed. Consult the manual for error codes, as they provide specific solutions. Regular maintenance, such as cleaning the filter after each use, can prevent many issues. If problems persist, contact Indesit customer support for professional assistance. Always follow safety guidelines when troubleshooting to avoid further damage or hazards.
Understanding Error Codes
Understanding error codes on your Indesit condenser tumble dryer is crucial for quick resolution of issues. Error codes like E01, E02, or E03 indicate specific problems, such as a blocked condenser or venting system. These codes are designed to help you identify malfunctions promptly. Always refer to the manual for a detailed explanation of each code. For example, E01 may signal a blockage in the condenser, while E02 could indicate a problem with the drying cycle. Regular maintenance, such as cleaning the condenser and checking the venting system, can prevent many of these issues. If an error code appears, follow the recommended steps in the manual to resolve it. If the problem persists, contact Indesit customer support for professional assistance. This ensures your dryer operates safely and efficiently.

Energy Efficiency and Eco Modes
The Indesit condenser tumble dryer features advanced energy-saving technology. Eco mode optimizes energy consumption while maintaining performance. Sensor drying detects moisture levels for efficient cycles, reducing energy use.
Energy-Saving Features

The Indesit condenser tumble dryer is designed with energy efficiency in mind. It incorporates advanced technology to reduce power consumption while maintaining optimal drying performance. The Eco Mode is a standout feature, optimizing energy use by adjusting cycle duration and temperature. Additionally, the dryer includes smart sensors that detect moisture levels, automatically stopping the cycle once clothes are dry to prevent over-drying. This not only saves energy but also prolongs the life of your garments. The appliance also boasts an energy-efficient condenser system, which recirculates hot air and minimizes heat loss. With an A+ energy rating, this dryer ensures lower energy bills and a reduced environmental footprint. Regular maintenance, such as cleaning the lint filter, further enhances its energy-saving capabilities.
- Eco Mode for reduced energy consumption
- Smart sensors for precise moisture detection
- Energy-efficient condenser system
- A+ energy rating for lower bills
Using Eco Mode for Optimal Efficiency
The Eco Mode on your Indesit condenser tumble dryer is designed to maximize energy efficiency while ensuring excellent drying results. By selecting this mode, the dryer adjusts cycle duration and temperature to minimize energy consumption. The smart sensors detect moisture levels and fabric type, optimizing the drying process to avoid over-drying. This not only reduces energy use but also helps preserve the quality of your clothes. For the best results, use Eco Mode for normal or lightly soiled laundry. The dryer will automatically extend the cycle time if needed, ensuring clothes are dry while keeping energy usage low. Regularly cleaning the lint filter further enhances efficiency in Eco Mode.
- Optimizes energy consumption
- Adjusts cycle duration and temperature
- Smart sensors for precise fabric care
- Ideal for normal or lightly soiled laundry
Warranty and Customer Support
Your Indesit tumble dryer is backed by a comprehensive warranty. For inquiries or assistance, contact Indesit’s customer support team via phone, email, or their official website.
Understanding Your Warranty Coverage
Your Indesit Condenser Tumble Dryer is protected by a comprehensive warranty that covers manufacturing defects and ensures reliable performance. The standard warranty period typically lasts for one year from the date of purchase, but extended coverage options may be available. This warranty includes repairs and replacements of faulty parts and labor costs, provided the appliance is used in accordance with the manufacturer’s guidelines. To maintain warranty validity, ensure all maintenance and repairs are performed by authorized technicians. Additionally, registering your product on Indesit’s official website can enhance your warranty benefits and provide access to exclusive support services. Always refer to the warranty terms and conditions in your manual for detailed information. Regular maintenance, as outlined in the manual, is essential to uphold your warranty coverage and ensure optimal performance.
Contacting Indesit Customer Service
For assistance with your Indesit Condenser Tumble Dryer, contact our dedicated customer service team. You can reach us via phone at 1-800-IND-ESIT or through the live chat feature on the official Indesit website. Additionally, you can submit inquiries via email or by completing the contact form online. Our support team is available Monday to Friday, 8:00 AM to 8:00 PM, and Saturday, 9:00 AM to 5:00 PM. For urgent issues, visit the Indesit Support Center at www.indesit.com/support. Remember to have your appliance’s serial number ready for faster assistance. Registering your product online also provides access to exclusive support benefits and warranty updates. Our team is committed to ensuring your experience with Indesit is seamless and satisfactory.