ice breakers for elementary students pdf
Category : PDF
Ice breakers are essential activities designed for elementary classrooms, fostering immediate connections among young learners. These engaging strategies help students feel comfortable, learn names, and begin building a positive group dynamic from the very first moment, setting a welcoming tone.
Defining Ice Breakers for Young Learners
Ice breakers for elementary students are brief, interactive activities fostering a welcoming, inclusive classroom. They serve as essential introductory tools, valuable at the start of a school year, a new unit, or when new students join. For young learners, these activities are intentionally simple, fun, and low-pressure, ensuring every child participates comfortably. Their core purpose is facilitating initial introductions: helping children learn names, share personal information, and discover common interests through playful engagement; This effectively eases initial shyness, promoting comfort among students.
Beyond introductions, these exercises are fundamental for establishing a positive classroom culture, fostering secure self-expression and free interaction. Utilizing movement, simple questions, or quick cooperative tasks, ice breakers encourage participation, dismantling social barriers hindering early connections. They operate less as academic lessons and more as vital social catalysts, laying groundwork for strong peer bonds and a unified community. Defining ice breakers for young learners involves recognizing their pivotal role in promoting belonging and readiness for collaborative learning in elementary settings.
Why Ice Breakers are Essential in Elementary Settings
Ice breakers are fundamentally essential in elementary settings for several compelling reasons. Primarily, they serve as powerful tools for fostering a sense of community and belonging among young children. Many students arrive with anxieties, especially at the start of a new school year or when transitioning into a new group; these activities significantly alleviate such apprehension by providing a lighthearted, non-threatening way for students to interact. By engaging in simple, fun tasks, children learn each other’s names, discover shared interests, and begin to form friendships, which are crucial for social-emotional development. Furthermore, ice breakers encourage active participation from all students, including those who might be naturally shy or reserved. They create an inclusive environment where every voice feels valued from the outset, laying the groundwork for a classroom where students feel safe to express themselves and take risks. This initial positive engagement sets the stage for improved classroom management and more effective collaborative learning throughout the academic year; Ultimately, these activities transform a collection of individuals into a cohesive, supportive learning unit, making the elementary school experience richer and more productive for everyone involved.

Benefits of Using Ice Breakers
Ice breakers are invaluable for elementary students, fostering a positive classroom environment where children feel welcome and connected. They boost confidence, encourage participation, and help build essential social skills from the very first day, creating a cohesive learning community.
Fostering a Positive Classroom Environment
Ice breakers are paramount in establishing a truly positive and welcoming classroom environment for elementary students. By engaging children in fun, low-pressure activities, these tools effectively break down initial social barriers, helping students feel comfortable and safe from the very first interaction. They create immediate opportunities for peers to learn about each other and for the teacher to connect with everyone individually. This process naturally cultivates a strong sense of community and belonging, crucial for young learners to thrive and feel secure. When students feel accepted and understood, their anxiety diminishes, replaced by enthusiasm for active participation and academic exploration. Such a supportive atmosphere fosters mutual respect and early friendships, laying a vital foundation for collaborative learning, positive interactions, and overall emotional well-being throughout the academic year. Many comprehensive “ice breakers for elementary students pdf” guides highlight activities specifically designed to build this cohesive, respectful classroom culture effectively.
Encouraging Student Participation
Ice breakers are incredibly effective tools for encouraging student participation within elementary classrooms. These engaging activities create a low-pressure environment where young learners feel safe to share thoughts and engage with peers without fear of judgment. By introducing fun, interactive games, teachers can gently coax even the most hesitant students out of their shells, building their confidence incrementally. The playful nature of ice breakers naturally sparks curiosity and enthusiasm, motivating children to actively contribute and express themselves. When students experience success and positive feedback during these initial interactions, they become more comfortable and willing to speak up during subsequent lessons and discussions. Facilitating peer connections, ice breakers make the classroom feel like a more familiar and supportive space, reducing anxiety. This increases the likelihood of active involvement from everyone, with many ‘ice breakers for elementary students pdf’ resources offering tailored techniques to boost participation.
Building Social Skills and Confidence
Ice breakers are instrumental in building crucial social skills and boosting confidence among elementary students. These structured activities create a safe and engaging environment where young learners can practice essential interpersonal interactions. By participating in fun games and collaborative challenges, children learn valuable communication skills, such as active listening, sharing ideas, and taking turns effectively. This direct experience helps them navigate social dynamics more effectively and develop empathy as they discover commonalities and differences among their peers. The success they experience during these low-stakes interactions directly contributes to increased self-esteem and a greater willingness to engage in future social settings. Many available ‘ice breakers for elementary students pdf’ guides emphasize exercises specifically designed to foster these competencies. Through repeated positive interactions, students gain the courage to express their thoughts and feelings, initiate conversations, and form new friendships. This systematic approach to social learning reduces shyness and anxiety, replacing it with a sense of belonging and capability. Ultimately, these activities lay a strong foundation for lifelong social adeptness and personal assurance, actively preparing children for collaborative learning and a harmonious classroom community, fostering holistic development.

Reducing Anxiety on the First Day
The first day of elementary school can be a source of significant anxiety for many young students, marked by unfamiliar faces and new routines. Ice breakers play a crucial role in alleviating these jitters by providing a structured yet playful way for children to connect immediately. These initial activities create a warm, welcoming atmosphere, helping students feel more at ease and less overwhelmed in their new classroom environment. Engaging in simple, fun games distracts from potential worries about fitting in or performing, allowing children to focus on positive interactions. Many ‘ice breakers for elementary students pdf’ resources specifically target this goal, offering ready-to-use activities that encourage lighthearted self-introduction and discovery of common interests. When students feel seen and heard early on, their confidence grows, replacing apprehension with excitement. This proactive approach helps to transform a potentially daunting day into an enjoyable experience, setting a positive foundation for the entire academic year. By breaking down social barriers from the outset, ice breakers empower children to transition smoothly, fostering a sense of belonging and psychological safety, which is paramount for effective learning.

Types of Ice Breakers
Ice breakers for elementary students come in diverse forms, from engaging get-to-know-you games to dynamic movement activities. Many ‘ice breakers for elementary students pdf’ resources categorize these as creative, expressive, or team-building challenges, offering varied approaches to foster classroom connections effectively.
Get-to-Know-You Games
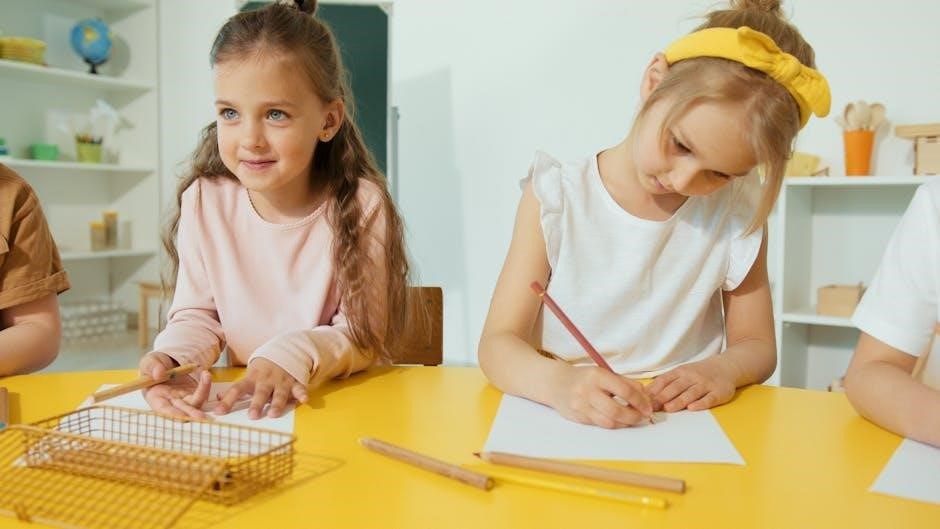
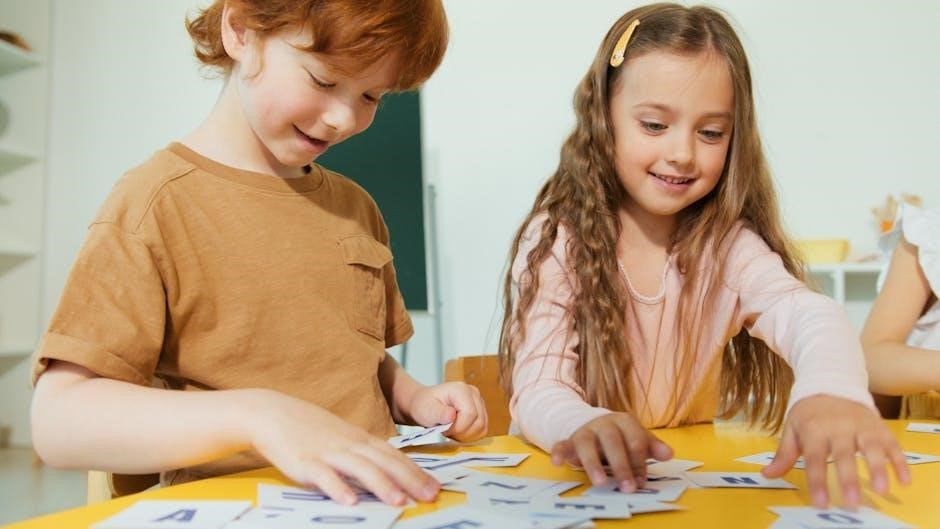
Get-to-know-you games are essential ice breakers for elementary students, fostering immediate connections and a sense of community. These activities, often found in “ice breakers for elementary students pdf” collections, are crucial at the start of the school year or when new classmates arrive. They provide a fun, low-pressure way for children to learn names and discover shared interests. Popular examples include “Two Truths and a Lie,” where students share three statements (two true, one false), prompting classmates to guess the lie. Another effective game is “Find Someone Who,” encouraging interaction as children move to find peers matching specific criteria, like a summer birthday or favorite animal. “Human Bingo” is also common, with squares representing characteristics, requiring students to find classmates for each match. Such games break down social barriers, reduce first-day anxiety, and boost confidence. They help children practice vital social skills: active listening, asking questions, and sharing personal information. By engaging, a positive, inclusive classroom environment is established, ensuring every child feels seen, valued, and ready to participate from the outset. Educators frequently utilize these structured games to create a welcoming space where friendships naturally begin to form.
Movement-Based Activities
Movement-based activities serve as dynamic ice breakers, particularly effective for elementary students who thrive on physical engagement. These energetic games, frequently featured in “ice breakers for elementary students pdf” resources, are excellent for releasing pent-up energy, especially at the beginning of the school day or after prolonged sitting. They encourage participation by offering a less intimidating way for children to interact, moving beyond purely verbal introductions. Examples include “Musical Statues with a Twist,” where students freeze when the music stops, then share a quick fact about themselves with a nearby peer before the music resumes. “Stand Up If…” is another popular choice, prompting children to stand if a statement applies to them (e.g., “Stand up if you have a pet”), visually highlighting shared traits; “Follow the Leader” can also be adapted, with each new leader demonstrating a move and saying their name or a favorite hobby. Such activities are invaluable for kinesthetic learners, helping to build rapport and reduce shyness by providing a fun, active context for interaction. They foster a sense of community, improve coordination, and ensure that all students, regardless of their verbal confidence, have an opportunity to connect and feel included in the classroom environment.
Creative and Expressive Ice Breakers
Creative and expressive ice breakers provide elementary students with a valuable platform to share personal insights in imaginative ways, often detailed in “ice breakers for elementary students pdf” collections. These activities are especially beneficial for children hesitant about verbal introductions, enabling them to convey personality through art, movement, or storytelling. For instance, “My Favorite Things Drawing” invites each student to draw three items they love, which they can then briefly explain, revealing interests and sparking peer discussions. Another engaging option is “Character Design,” where students create a unique character representing an aspect of their personality or aspiration, fostering self-expression and imaginative play. “Story Starter” activities, where children complete an open-ended sentence or illustrate a narrative beginning, also encourage creative thought and communication. These great ice breakers tap into children’s innate creativity, making the process of getting acquainted enjoyable and less intimidating. They celebrate individuality while simultaneously building a sense of shared experience through artistic and narrative exploration. By engaging diverse forms of expression, these activities effectively foster deeper connections and cultivate a vibrant, inclusive classroom environment right from the start of the school year.
Team-Building Challenges
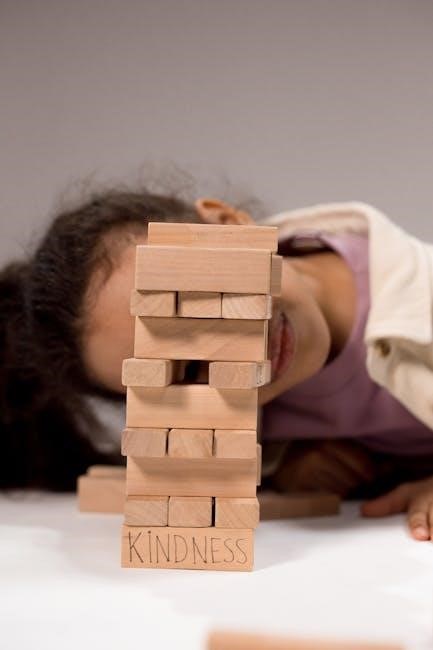
Team-building challenges serve as dynamic ice breakers, designed to encourage collaboration and problem-solving among elementary students. These activities, often detailed in comprehensive “ice breakers for elementary students pdf” resources, move beyond simple introductions, requiring groups to work together towards a common goal. For instance, the ‘Human Knot’ exercise has students stand in a circle, link hands with non-adjacent partners, and collectively untangle themselves, fostering communication and physical cooperation. Similarly, ‘Tower Building’ challenges small groups to construct the tallest freestanding structure using limited materials like straws and tape, promoting strategic thinking and shared decision-making. ‘Blindfolded Maze’ activities build trust, as one student is guided verbally by teammates through an imaginary or real obstacle course, highlighting the importance of clear instructions and active listening. These challenges not only break the ice but also lay foundational skills for group work throughout the school year. They help children understand diverse perspectives, negotiate roles, and celebrate collective achievements, thereby strengthening peer bonds and cultivating a supportive classroom community from the very beginning.

Choosing the Right Ice Breaker
Selecting the ideal ice breaker requires careful thought. Consider the students’ age, the activity’s learning objective, and classroom size for optimal engagement. Many effective ideas are found in “ice breakers for elementary students pdf” resources, often requiring minimal materials to ensure smooth implementation.
Considering Age Appropriateness
Age appropriateness is a critical factor when selecting ice breakers for elementary students, directly impacting engagement and the success of the activity. What captivates a kindergartner might bore a fifth grader, and vice versa. Younger learners, particularly those in early elementary grades (Kindergarten to second grade), benefit immensely from simple, movement-based games or activities focused on naming and very basic sharing. Their attention spans are shorter, and their social-emotional development is still nascent, making complex rules or abstract questions less effective.
As students progress into upper elementary grades (third to fifth grade), their cognitive abilities and social understanding evolve. They can handle more intricate rules, participate in slightly longer discussions, and enjoy team-building challenges that require strategic thinking or collaborative problem-solving. When searching for “ice breakers for elementary students pdf” resources, it’s crucial to filter or review content specifically designed for the target age group. Many downloadable resources thoughtfully categorize activities by grade level, ensuring that the chosen ice breaker aligns with the developmental stage of the class. Implementing an activity that is too childish can lead to disinterest, while one that is too complex might cause frustration and anxiety, defeating the very purpose of an ice breaker. Therefore, tailoring the complexity, content, and duration of the activity to the students’ developmental stage is essential for fostering a positive and inclusive classroom environment from the outset.
Matching Activity to Learning Objectives
Matching ice breakers to learning objectives elevates them beyond simple introductions. A carefully chosen activity prepares elementary students for lessons or reinforces crucial skills. For instance, if enhancing descriptive language is a goal, an ice breaker asking students to describe a favorite toy without naming it proves effective. If promoting active listening is an objective, a “tell-me-more” activity, where students expand on a peer’s share, is invaluable.
When exploring “ice breakers for elementary students pdf” resources, educators must align activities with curriculum. Sorting objects by attributes could preface a science unit on classification. Multi-step instruction games strengthen executive function skills. The aim is to choose activities that build community, serve as engaging, low-stakes introductions to academic content, activating prior knowledge, and practicing essential competencies. This strategic alignment ensures initial class moments contribute meaningfully to educational objectives, making ice breakers vital instructional design.
Adapting for Classroom Size
Adapting ice breakers for varying classroom sizes is crucial for their success and impact on elementary students. In a small class, perhaps 10-15 children, activities can be more intimate and allow for deeper sharing. Teachers might opt for a circle time activity where each child shares a personal detail, fostering strong connections. There’s ample time for everyone to speak without feeling rushed, encouraging a sense of belonging. The “ice breakers for elementary students pdf” often provide modifications for smaller groups, emphasizing rich interaction and individual attention.
Conversely, large classrooms, with 25 or more students, require a different approach. Whole-group sharing can become unwieldy and time-consuming, leading to disengagement. Here, breaking students into smaller, manageable groups of 3-5 is highly effective. Teachers can implement “think-pair-share” activities or assign a quick task to each small group, followed by a brief report-out. Movement-based games that don’t require individual verbal contributions from everyone, like “Find Someone Who…”, also work well. The key is to ensure every child participates actively without overwhelming the class, maintaining high energy and engagement levels, regardless of the group’s scale, ensuring effective community building.
Requiring Minimal Materials
Selecting ice breakers that require minimal materials is a practical and often preferred approach for elementary educators. This ensures activities can be implemented spontaneously, without extensive preparation or budget constraints, which is especially beneficial in dynamic classroom environments. Many effective ice breakers focus on interaction and communication rather than elaborate props, making them accessible for all teachers.
Consider games like “Two Truths and a Lie,” where students simply share three statements about themselves, and peers guess the falsehood. Another example is “Desert Island,” where children name one item they would bring and explain why, using only their imagination. “Human Bingo” can be adapted with simple printable sheets, often found in “ice breakers for elementary students pdf” resources, requiring only pencils. These activities emphasize student voice and peer connection, fostering a welcoming atmosphere through shared experiences and dialogue. The absence of complex materials allows the focus to remain squarely on the students and their emerging relationships, simplifying logistics while maximizing engagement and effectiveness in building a positive classroom community.

Implementing Ice Breakers Effectively
Implementing ice breakers effectively involves clear instructions and thoughtful facilitation. Teachers must model expectations, ensure all students feel included, and manage time efficiently. This creates a positive, engaging start to any lesson or school year, maximizing the benefits for young learners.
Clear Instructions and Modeling
For ice breakers to be truly effective in an elementary classroom, clarity in instruction is paramount. Young learners benefit immensely from simple, concise directions that avoid jargon or overly complex language. Before an activity begins, the educator should outline the steps sequentially, perhaps using visual aids or numbering to help students track the flow. It’s crucial to break down complex tasks into smaller, manageable parts, ensuring every child understands their role and the objective.
Beyond verbal instructions, modeling the activity is perhaps the most powerful tool. Demonstrating an example round, perhaps with a co-teacher or a confident student, provides a visual representation of what is expected. This hands-on approach eliminates confusion and alleviates anxiety, especially for those who learn best by observing. Modeling allows students to see the desired behavior, the rules in action, and the overall fun of the ice breaker. Teachers can also model enthusiasm and participation, setting a positive tone and encouraging students to fully engage. This preparatory stage ensures a smooth, inclusive, and enjoyable experience for all participants, maximizing the ice breaker’s potential to foster connection and build community from the outset.
Managing Time and Transitions
Effective management of time is crucial when implementing ice breakers for elementary students. Their attention spans are typically short, making it essential to keep activities concise and moving. Before starting, allocate a clear time limit for each ice breaker, perhaps 5-10 minutes, and stick to it. Using a visible timer can help both the teacher and students track progress. Pacing is key; avoid letting an activity drag on, which can lead to disengagement and restlessness. If an activity concludes sooner than expected, have a brief, ready-to-go filler or be prepared to transition immediately to the next part of the lesson. Conversely, if an activity is highly engaging and runs slightly over, be mindful of the overall schedule but allow for a little flexibility if it’s genuinely benefiting the class.
Smooth transitions between ice breakers and subsequent classroom activities are equally vital for maintaining a productive learning environment. Abrupt shifts can disrupt student focus and create chaos. Establish clear signals for ending an activity, such as a specific clap, chime, or phrase, allowing students to anticipate the change. Prepare the space or materials for the next task beforehand to minimize downtime. Guide students through the transition step-by-step, explaining what comes next and where they should be or what they should be doing. A well-managed transition keeps the energy positive and prevents behavioral issues, ensuring that the positive momentum generated by the ice breaker carries into the next learning segment. This structured approach helps children feel secure and understand the flow of the day.

Where to Find Ice Breaker Resources (PDFs)
Find ice breaker PDFs for elementary students on educational platforms. These downloadable resources offer instructions and material lists, simplifying preparation. Teachers can access free or purchasable collections, ensuring quick, engaging activities ready for easy classroom implementation.
Online Educational Platforms for Downloads
For educators seeking readily available ice breaker activities tailored for elementary students, numerous online educational platforms are invaluable repositories for downloadable PDF resources. Websites like Teachers Pay Teachers, Education.com, or dedicated blogs frequently host extensive libraries of printable ice breaker games and activities. These platforms categorize resources by grade level, topic, or activity type, simplifying navigation to quickly find specific, well-suited classroom resources.
Many resources are convenient PDF files, ideal for printing and immediate use. Teachers easily download these, finding clear instructions, comprehensive material lists, and variations for different group sizes or learning objectives. Some platforms offer free downloads, others provide premium content via subscriptions or individual purchases. This accessibility ensures teachers quickly find diverse, engaging, age-appropriate ice breaker PDFs, fostering a positive, interactive learning environment from day one. It minimizes preparation, saves valuable time, and truly reflects current pedagogical approaches to student engagement and social-emotional learning effectively.