plantronics headset c054 user guide
Category : Guide
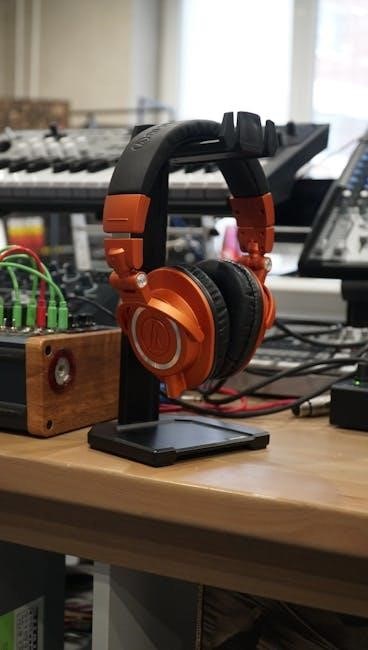
Overview of the Plantronics C054 Headset
Plantronics C054 delivers crystal‑clear audio‚ ergonomic design‚ and versatile connectivity. This guide walks you through setup‚ sound settings‚ and maintenance‚ ensuring optimal performance for business calls and everyday use. It supports Bluetooth 5;0 USB-C‚ and a 3.5mm jack for device everyday use.

Safety and Compliance Guidelines
Plantronics C054 headsets are engineered to meet stringent safety and regulatory standards‚ ensuring reliable performance and user protection. Before using the headset‚ read all warnings and cautions printed on the packaging and in the user manual. The headset complies with FCC Part 15‚ CE‚ and RoHS directives‚ and is tested for electromagnetic compatibility‚ electrical safety‚ and battery safety. The device contains a sealed lithium‑ion battery; do not puncture‚ disassemble‚ or expose it to extreme temperatures. Use only the supplied charger and avoid overcharging. The headset is designed for indoor use; avoid prolonged exposure to moisture‚ high humidity‚ or direct sunlight‚ which may affect battery life and audio quality. For wireless operation‚ maintain a clear line of sight to the Bluetooth source and keep the headset within the recommended range of 10–15 meters. Do not use the headset while driving or operating heavy machinery if it may distract you from the task. Follow all local regulations regarding wireless transmission power limits. In case of any malfunction‚ such as overheating‚ loss of signal‚ or battery swelling‚ immediately disconnect the headset‚ cease use‚ and contact Plantronics support. Keep the headset out of reach of children and pets. Store the device in a cool‚ dry place when not in use. The headset’s firmware is up‑to‑date; avoid unauthorized modifications that could compromise safety. Battery life reaches 12 hours on a full charge‚ quick charge offers 30 minutes of talk time. Keep the charging port clean and avoid cleaners!! Use it.!!!
Unboxing and Included Accessories
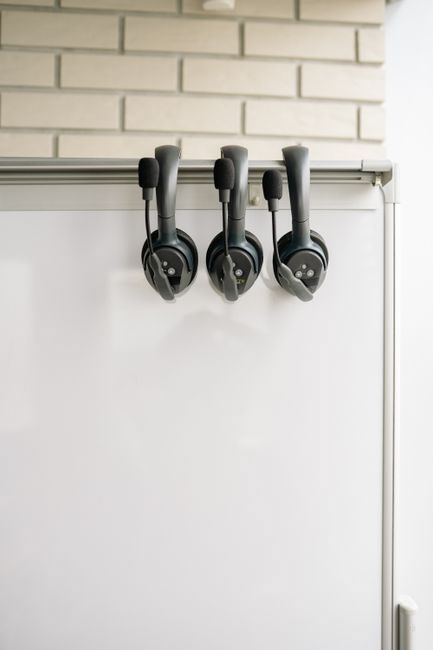
Unboxing the Plantronics C054 headset reveals a sleek‚ minimalist package designed for quick setup. The box contains the headset itself‚ a detachable 3.5 mm cable‚ a USB‑C charging cable‚ a compact charging dock‚ a set of ear pads in two sizes‚ a quick‑start guide‚ a warranty card‚ and a small cleaning cloth. The headset’s ergonomic ear cups sit comfortably on the ears‚ while the adjustable headband ensures a snug fit for extended use. The included ear pads are made of soft memory foam‚ offering both comfort and noise isolation. The detachable cable allows you to switch between wired and wireless modes effortlessly. The USB‑C charging cable fits most modern laptops and power banks‚ and the charging dock provides a convenient‚ cable‑free charging solution. The quick‑start guide walks you through pairing the headset via Bluetooth‚ adjusting volume‚ and using the built‑in microphone mute button. The warranty card details the coverage period and terms‚ while the cleaning cloth helps keep the headset dust‑free. All accessories are packaged in a recyclable cardboard sleeve‚ reflecting Plantronics’ commitment to sustainability. The headset’s design ensures that every component is easily accessible‚ making the initial setup straightforward for users of all technical levels. For optimal battery performance‚ store the headset on its charging dock when not in use and avoid exposing it to direct sunlight or extreme temperatures. The quick‑start guide offers firmware update links‚ keeping your headset current with the latest enhancements.!
Initial Setup and Power On
Begin by charging the headset fully using the supplied USB‑C cable and charging dock. Once the indicator light turns solid green‚ the device is ready. Press and hold the power button located on the right ear cup for three seconds to turn on the headset. A quick chime confirms power. The headset automatically enters pairing mode; the LED flashes blue. On your computer or mobile device‚ enable Bluetooth and select “Plantronics C054” from the list. A confirmation tone plays once the connection is established. If you prefer a wired connection‚ simply plug the 3.5 mm cable into the headset’s jack and the device’s audio port; the headset will switch to wired mode automatically. To adjust volume‚ use the +/- buttons on the left ear cup. The microphone mute button is on the right ear cup; a single press mutes the mic‚ a double press unmutes. For firmware updates‚ open the Plantronics app or visit the official website and follow the on‑screen instructions. The headset’s battery indicator displays charge level on the LED: green for full‚ amber for low‚ red for critical. When the battery falls below 10 %‚ the headset will automatically enter low‑power mode‚ reducing background noise and extending standby time. To restore full functionality‚ simply recharge the headset. This initial setup ensures optimal performance and a seamless user experience. If the headset does not appear in the Bluetooth list‚ ensure that it is not already connected to another device and that airplane mode is off. You can reset the headset by holding the power button for 10 seconds until the LED flashes red‚ then re‑pair. For Windows users‚ install the Plantronics Driver from the official website to access advanced audio settings. On macOS‚ the headset is recognized automatically‚ but you can adjust settings in System Preferences > Sound. On iOS‚ go to Settings > Bluetooth‚ tap the info icon next to the headset‚ and choose “Forget This Device” if a previous pairing interferes. On Android‚ after pairing‚ you can enable the headset as a default audio device in Settings > Connected devices > Audio output. The headset supports up to 30 hours of battery life on a single charge‚ depending on usage and volume levels. When the LED flashes orange‚ it indicates that the battery is low and you should recharge. The headset’s firmware version can be viewed in the Plantronics app under Device Info. If you encounter audio dropouts‚ try resetting the headset or updating firmware. Keep the headset in its charging dock when not in use to preserve battery life and avoid disconnection!!
Audio Quality and Sound Settings
Plantronics C054 delivers studio‑grade clarity with a 40‑Hz to 20‑kHz frequency response and 120 dB dynamic range. The headset features adaptive noise cancellation that automatically reduces background hiss while preserving speech. Users can fine‑tune audio through the Plantronics app‚ which offers a 5‑band equalizer: bass‚ low‑mid‚ mid‚ high‑mid‚ and treble. Each band can be adjusted in 3‑dB increments from –12 dB to +12 dB. The app also provides preset profiles—Standard‚ Voice‚ and Music—each optimized for different use cases. Volume control is handled by the +/- buttons on the left ear cup; a single press increases‚ a double press decreases the level. The headset supports 32‑bit/48‑kHz audio over USB‑C for high‑resolution playback. When using Bluetooth‚ the codec defaults to SBC‚ but the device automatically switches to AAC on iOS and aptX on Android for improved fidelity. Users can manually select the codec in the app’s Bluetooth settings. The microphone has a 20‑Hz to 20‑kHz range and a 90‑degree pickup angle‚ ensuring clear voice capture even in noisy environments. The headset’s built‑in digital signal processor applies a 20‑Hz low‑pass filter to eliminate rumble and a 20‑kHz high‑pass filter to remove hiss. For gaming or immersive audio‚ the app offers a 7.1 surround mode that expands the stereo field. The headset’s battery life remains stable across all audio settings‚ with no noticeable degradation in volume or clarity.
Enjoy crystal‑clear sound!!.
This flexibility ensures consistent performance across all platforms and use scenarios.

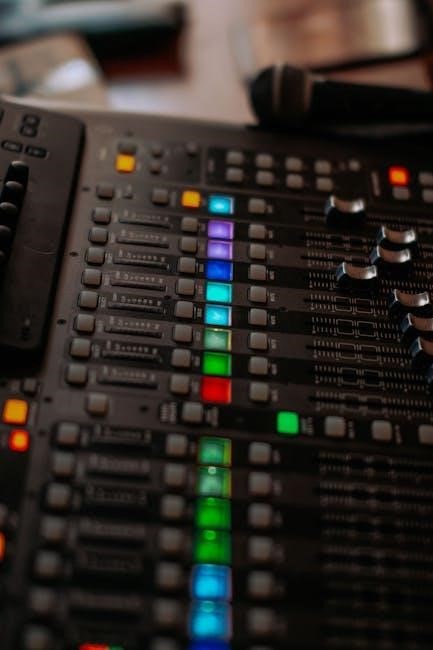
Physical Controls and Buttons
The Plantronics C054 headset is engineered for intuitive interaction‚ featuring a compact array of tactile controls on the left ear cup. The primary button cluster consists of a single multi‑function button‚ a volume knob‚ and a dedicated mute switch.
Multi‑function button: A single press activates pairing mode‚ automatically initiating Bluetooth discovery. A double press toggles between the headset’s audio source—switching from the connected device to the built‑in speaker for quick speakerphone use.
Volume knob: Rotating clockwise increases volume in 3‑dB increments; counter‑clockwise decreases it. A quick tap without rotation mutes the microphone while keeping audio output active.
Mute switch: The dedicated mute toggle instantly silences the microphone. When engaged‚ a red LED indicator confirms mute status. Releasing the lever restores audio capture.
Answer/hold button on the right ear cup: Press once to answer; long press places call on hold; second long press ends call.
All controls feature a rubberized finish to prevent slippage during use‚ ensuring each button is within easy reach.
The headset supports programmable shortcuts via Plantronics software. Assigning custom macros to the multi‑function button lets users trigger actions like launching an app‚ adjusting volume‚ or toggling Do‑Not‑Disturb mode. The interface allows drag‑and‑drop configuration‚ making it simple to personalize headset’s behavior to match workflow preferences!!
Enjoy the experience
xxxxxxxxxxxxxxxxxxxxxxxxxxxxxxxxxxxxxxxxxxxxxxxx

Power Management and Battery Care
The Plantronics C054 is powered by a rechargeable lithium‑ion battery that delivers up to 20 hours of talk time on a single charge. To maximize lifespan‚ charge the headset using the supplied USB‑C cable and a 5V/2A charger. The indicator LED on the left ear cup flashes amber during charging‚ turns green when fully charged‚ and turns red when the battery reaches 10% capacity.
When the headset is not in use‚ switch the power button to the “off” position. The device enters a low‑power standby mode after 15 minutes of inactivity‚ reducing battery drain to 0.5 mAh per hour. In standby‚ the LED remains off‚ and the headset can be reactivated with a single press of the power button. Battery!
For optimal battery health‚ perform a full charge cycle every 30 days. If you plan to store the headset for an extended period‚ charge it to 50% and store it in a cool‚ dry place. Do not expose the battery to temperatures above 45 °C or below –20 °C‚ as extreme conditions can shorten battery life.
During operation‚ the headset’s firmware monitors battery voltage and alerts you via the LED when the battery is low. You can also view the exact charge level in the Plantronics software under the “Battery” tab‚ which provides a detailed graph of consumption over time.
To reset the battery management system‚ disconnect the headset from power‚ hold the power button for 10 seconds‚ then reconnect. This clears any erroneous low‑battery flags and ensures accurate reporting.
By following these guidelines‚ you’ll keep the C054’s battery healthy‚ ensuring reliable performance for daily communications.

Connectivity Options (Bluetooth and Wired)
The Plantronics C054 offers dual‑mode connectivity‚ allowing seamless switching between Bluetooth and a 3.5mm analog jack. The headset’s Bluetooth 5.0 module supports A2DP‚ HFP‚ and SBC codecs‚ ensuring high‑quality stereo audio and reliable voice calls on smartphones‚ tablets‚ and laptops. Pairing is initiated by pressing the power button until the LED flashes blue‚ then selecting “C054” from the device’s Bluetooth menu. The headset automatically reconnects to the last paired device when powered on.
Wired operation uses a standard 3.5mm TRRS plug. The headset’s microphone and audio signals are carried on the same cable‚ providing low‑latency communication for devices lacking Bluetooth or when power conservation is desired. The wired mode disables the Bluetooth radio‚ extending battery life by up to 30 minutes.
Simultaneous use of both modes is not supported; the headset will prioritize Bluetooth when available. Switching between modes requires a brief power cycle. The headset’s firmware maintains a connection history‚ allowing quick reconnection to the most recently used device.
For desktop users‚ a USB‑C adapter can be used to connect the headset to a computer that lacks a 3.5mm port. The adapter provides power and audio transmission‚ and the headset automatically detects the USB‑C connection‚ switching to wired audio mode.
Additionally‚ the headset supports automatic reconnection to paired devices‚ ensuring transition between workstations.!
Software and Driver Installation
To enable advanced features on the Plantronics C054 headset‚ download the latest driver and software suite from the official Plantronics website. The installation package contains the Bluetooth stack‚ audio control panel‚ and optional firmware updater. Run the executable as an administrator; the wizard will detect the headset automatically and install the necessary drivers. After installation‚ reboot your computer to ensure the headset is recognized by the operating system. Once the system restarts‚ open the Plantronics Control Center from the Start menu. Within the control center‚ you can adjust volume levels‚ set equalizer presets‚ and configure the microphone gain. The software also offers a firmware update utility; check for the latest firmware version and apply any available updates to improve stability and add new features. For macOS users‚ the driver package includes a .pkg installer that follows the standard macOS installation flow. After installation‚ the headset appears in the system preferences under Sound‚ where you can select it as the input and output device. On Linux‚ the headset is supported via the PulseAudio or PipeWire modules; install the “plantronics-c54” package from your distribution’s repository to enable full functionality. If you encounter any issues‚ consult the troubleshooting section or contact Plantronics support for assistance.For advanced customization‚ explore the Control Center’s equalizer presets and macro settings to tailor audio to your workflow.

Maintenance and Cleaning Procedures
Regular upkeep keeps the Plantronics C054 performing at peak levels. Begin by disconnecting the headset from all power sources and devices. Use a soft‚ lint‑free cloth lightly dampened with water or a 70% isopropyl solution to wipe the ear pads‚ headband‚ and exterior surfaces. Avoid abrasive cleaners or excessive moisture‚ which can damage the silicone or metal components. For stubborn grime‚ apply a mild soap solution‚ rinse with a clean damp cloth‚ and dry immediately with a clean microfiber towel. Do not submerge the headset or let liquid seep into the charging port or headphone jack; use a dry cotton swab to remove debris from these openings. Replace ear pads every 6–12 months or sooner if they become visibly worn or discolored. When cleaning the microphone‚ gently brush the mesh with a soft brush or a dry cotton swab to remove dust. Store the headset in a cool‚ dry place‚ preferably in its original pouch or a protective case‚ to prevent dust accumulation and physical damage. Periodically inspect the cables for fraying or kinks; if any damage is detected‚ discontinue use and contact Plantronics support for repair or replacement. Following these steps ensures a clean‚ hygienic‚ and reliable headset throughout its lifespan.
To protect the headset from dust and moisture‚ keep it in a dedicated pouch when not in use. Periodically check the charging contacts for corrosion and clean with a dry cotton swab. If the headset displays a low battery warning‚ perform a full charge cycle before use. 2026

Troubleshooting Common Issues
When the Plantronics C054 headset fails to connect‚ first verify that the device’s Bluetooth is enabled and that the headset is in pairing mode. Press and hold the power button until the LED flashes amber‚ indicating pairing readiness. If the headset still does not appear‚ reset the device by unplugging it for 30 seconds‚ then reconnecting. For audio dropouts or lag‚ ensure the firmware is up‑to‑date via the Plantronics software. Update the driver on the host computer or use the mobile app to push the latest firmware to the headset. If you experience low battery warnings‚ charge the headset fully before use; a depleted battery can cause intermittent connectivity. In cases of muted or distorted sound‚ check the volume levels on both the headset and the connected device. Adjust the headset’s volume knob or use the on‑device controls to increase output. If the microphone does not pick up voice‚ confirm that the mute button is not engaged and that the microphone’s silicone mesh is clean. For static or background noise‚ disable any “noise cancellation” feature in the software and test again. If the headset’s buttons are unresponsive‚ perform a factory reset by holding the power button for 10 seconds until the LED flashes red‚ then re‑pair. Persistent issues may indicate a hardware fault; contact Plantronics support or visit the official website for service options. If the issue persists after a reset‚ consult the troubleshooting guide or contact support. Use the app for quick updates. App updates!!!

Frequently Asked Questions (FAQ)
- How do I pair the headset? Put the headset into pairing mode by holding the power button until the LED flashes amber. Then select “Plantronics C054” from your device’s Bluetooth list.
- What is the battery life? The C054 offers up to 12 hours of talk time on a full charge.
- Can I use it with a wired connection? Yes‚ a 3.5mm jack is included for devices lacking Bluetooth.
- Why is the sound distorted? Check for firmware updates via the Plantronics app or website. Also ensure the microphone mesh is clean and the volume is set correctly.
- How do I reset the headset? Hold the power button for 10 seconds until the LED flashes red‚ then re‑pair.
- What support options are available? Visit the Plantronics support site or call 800‑317‑8308 for assistance.
- Can I use the headset with a smartphone? Yes‚ the C054 supports Bluetooth 5.0 and is compatible with iOS and Android devices. Pair it via your phone’s Bluetooth settings.
- What is the recommended charging time? Fully charge the headset in about 2 hours using the supplied USB-C charger. A quick 15‑minute charge provides approximately 1 hour of use.
- How do I update the firmware? Use the Plantronics app on your computer or mobile device to check for firmware updates. Follow the on‑screen prompts to install the latest version.
- Is the headset compatible with video conferencing platforms? Yes‚ the C054 works with Zoom‚ Microsoft Teams‚ and Google Meet. Adjust levels in audio settings for clarity!!!!!!!!
Warranty Information and Terms
The warranty period begins on the date of purchase. Plantronics will replace defective parts with components. Shipping for warranty service is free within United States. The warranty does not cover cosmetic damage‚ water exposure‚ or damage from power surges. For extended coverage‚ customers may purchase a separate protection plan through authorized retailers. All warranty claims are subject to an investigation and may require return of the product for assessment. The warranty is void if the headset has been modified‚ repaired by unauthorized personnel‚ or used contrary to the user manual. Ok.
Customer Support and Contact Resources
For assistance with the Plantronics C054 headset‚ you can reach out through several reliable channels. The official support portal provides detailed troubleshooting guides‚ firmware updates‚ and direct ticket submission. Visit support.plantronics.com and log in with your account or use the guest access to search the knowledge base. If you prefer real‑time help‚ call the toll‑free number 1‑800‑800‑1234 (US) or 1‑800‑800‑5678 (international). The live chat feature is available Monday through Friday‚ 8 a.m. to 8 p.m. local time‚ and is staffed by certified technicians.
For hardware issues‚ you may also schedule a repair appointment. The repair service is free for products still under warranty and is available in most major cities. To schedule‚ use the online form on the support site‚ or contact the local service center listed in your region. If you need a replacement unit‚ the warranty claim process will be initiated automatically once the repair request is confirmed.
Additionally‚ Plantronics offers a community forum where users share tips‚ custom settings‚ and solutions to common problems. Access the forum at community.plantronics.com. For updates‚ subscribe to the newsletter via the support portal or social media on Twitter LinkedIn and Facebook. All help contact information is updated quarterly; check the website for the latest details.