chain link fence installation guide pdf
Category : PDF
Chain Link Fence Installation Guide
Detailed PDF specifications cover PVC-coated chain link systems, outlining materials for frameworks, fabrics, posts, and accessories, ensuring proper installation․
Comprehensive guides detail post spacing, concrete footings, fabric attachment, and accessory installation for a secure and lasting chain link barrier․

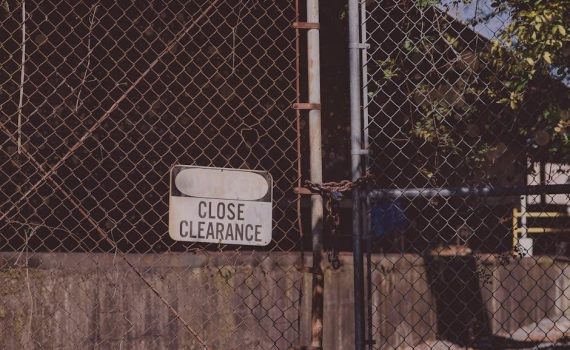
Chain link fencing represents a practical and economical solution for a wide array of property security and containment needs․ Often detailed in comprehensive installation guides, including readily available PDF documents, this fencing type offers durability and effectiveness․ These guides, like those from Fencing Without Boundaries and Slagle Fence, emphasize the importance of understanding the system’s components before beginning any work․
Historically, chain link has been favored for its cost-effectiveness and relative ease of installation, making it a popular choice for both residential and commercial applications․ Modern guides, such as those specifying PVC-coated options, focus on longevity and aesthetic appeal․ The core principle remains consistent: a woven mesh of galvanized or PVC-coated steel wire, supported by sturdy posts and framework․
Understanding the nuances of proper installation, as outlined in these PDF resources, is crucial for maximizing the fence’s lifespan and security․ From verifying property lines to correctly tensioning the fabric, each step contributes to a robust and reliable barrier․
Benefits of Chain Link Fences
Chain link fences offer a compelling combination of security, affordability, and durability, frequently detailed within comprehensive installation guides available as PDF downloads․ A primary benefit is cost-effectiveness; they represent a budget-friendly perimeter solution compared to alternatives like wood or wrought iron․ Resources from Slagle Fence highlight this advantage․
Security is another key benefit, providing a clear deterrent against trespassers and offering a safe enclosure for children or pets․ PDF guides, like those from Polyvinyl Chloride Building Materials, emphasize proper installation techniques to maximize this security․ Furthermore, chain link requires minimal maintenance, reducing long-term ownership costs․
Versatility is also notable; chain link adapts to various terrains and applications․ Installation guides demonstrate how to navigate slopes and incorporate gates seamlessly․ The availability of PVC coating enhances aesthetics and extends the fence’s lifespan, as detailed in numerous PDF specifications․ Ultimately, chain link provides a practical and reliable fencing solution․
Tools and Materials Required
PDF installation guides consistently outline essential tools and materials for successful chain link fence projects․ Core requirements include a post hole digger, crucial for creating appropriately sized and spaced holes for post placement, as detailed in various PDF specifications․ Concrete mix is vital for securely setting posts, ensuring stability and longevity․
Regarding materials, chain link fabric – specified by gauge and coating type in PDF documents – forms the fence’s body․ Post materials, typically steel or aluminum, dictate strength and corrosion resistance․ Fittings and accessories, such as tension bands, brace bands, and caps, are indispensable for proper assembly, as illustrated in guides from Fencing Without Boundaries․
Additional tools include levels, measuring tapes, wrenches, pliers, and safety glasses․ PDF resources often provide detailed material lists and quantities, streamlining the purchasing process․ Proper preparation with these tools and materials, guided by a comprehensive PDF, is key to a professional and durable fence installation․
Post Materials (Steel, Aluminum)
PDF guides emphasize the importance of selecting appropriate post materials – typically steel or aluminum – based on project needs and budget․ Steel posts, often galvanized, offer superior strength and are ideal for high-security applications or areas requiring robust support, as detailed in installation specifications․
Aluminum posts, while lighter and corrosion-resistant, are generally suited for lighter-duty residential fences․ PDF documentation clarifies that aluminum’s cost-effectiveness makes it a popular choice for many homeowners․ The gauge or thickness of the post material is also crucial, with heavier gauges providing greater stability․
Installation PDFs frequently detail specific post size recommendations based on fence height and local wind conditions․ Choosing the correct material and gauge, guided by a PDF, ensures the fence’s structural integrity and longevity․ Proper material selection prevents premature failure and maintains the fence’s intended function․
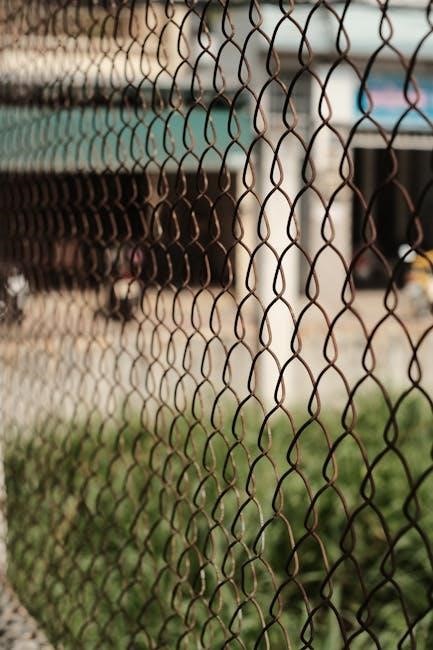
Chain Link Fabric (Gauge & Coating)
PDF installation guides meticulously detail chain link fabric specifications, focusing on gauge and coating․ The gauge, referring to wire thickness, directly impacts the fence’s durability; lower gauges indicate thicker, stronger wire․ Common gauges range from 6 to 11․5, with lower numbers preferred for security or high-traffic areas, as outlined in detailed PDF documents․
Coatings are crucial for corrosion resistance․ PDFs highlight several options, including galvanized, vinyl-coated, and polyester-coated․ Galvanized provides a zinc layer, while vinyl coating offers superior protection and aesthetic appeal․ PDF specifications often include coating weight measurements to ensure quality․
Installation PDFs emphasize matching fabric gauge and coating to the intended application and environmental conditions․ Proper selection, guided by PDF recommendations, maximizes the fence’s lifespan and minimizes maintenance․ Understanding these specifications is vital for a long-lasting, secure chain link fence․
Fittings & Accessories (Tension Bands, Brace Bands, Caps)
PDF installation guides thoroughly cover essential fittings and accessories for chain link fences․ Tension bands, crucial for securing the chain link fabric to terminal posts, are detailed with specific sizing and installation instructions within the PDFs․ Brace bands, used to reinforce corner and gate posts, are explained with diagrams showing proper placement and bolt sizes․
Loop caps, vital for supporting the top rail, are illustrated in PDF schematics, demonstrating how they fit over post tops․ PDFs also specify the use of post caps to prevent water accumulation and corrosion inside posts․ Tension wire, used to tighten the fabric, is detailed with instructions on securing it to end bands․
These PDF resources emphasize using the correct accessories for the chosen gauge and height of the chain link fabric․ Proper installation, as outlined in the PDFs, ensures the fence’s structural integrity and longevity, preventing sagging and maintaining security․
Concrete Mix & Post Hole Digger

PDF installation guides consistently emphasize the importance of a robust foundation, detailing appropriate concrete mix specifications for chain link fence posts․ Recommendations typically lean towards a mix with a minimum compressive strength, ensuring long-term stability․ The PDFs often specify the correct ratio of cement, sand, and gravel for optimal results, alongside guidance on adding water․
Regarding excavation, PDF documents highlight the necessity of a reliable post hole digger – manual or powered – to achieve the required depth and diameter․ Diagrams within the PDFs illustrate proper hole dimensions based on post size and soil conditions․ They also detail techniques for ensuring straight, clean holes for optimal concrete adhesion․
PDF resources stress the importance of thoroughly compacting the soil at the base of the hole before pouring concrete, preventing settling․ Proper concrete mixing and hole preparation, as detailed in the PDFs, are critical for a durable and secure fence installation․
Planning Your Fence Layout
Chain link fence installation guide PDFs universally stress meticulous pre-planning․ They emphasize the critical first step of property line verification, advising homeowners to consult official surveys or local land records to avoid disputes․ PDFs often include disclaimers regarding responsibility for accurate boundary identification․
PDF documents dedicate sections to gate placement considerations, recommending strategic locations for accessibility and security․ They advise factoring in pedestrian and vehicular traffic flow, as well as potential obstructions․ Diagrams within the PDFs illustrate optimal gate swing directions and width requirements․
Furthermore, PDF guides highlight the importance of marking post locations accurately before digging․ They suggest using stakes and string to visualize the fence line and identify potential challenges, such as underground utilities or uneven terrain․ Careful planning, as detailed in these PDFs, minimizes installation issues․
Property Line Verification
Chain link fence installation guide PDFs consistently prioritize accurate property line verification as the foundational step․ These documents strongly recommend consulting official property surveys, plats, or county land records before commencing any installation work․ Ignoring this step can lead to costly legal disputes and fence relocation․
PDF guides often include cautionary notes emphasizing that homeowners are solely responsible for ensuring their fence remains within their property boundaries․ They advise against relying on assumed lines or neighborly agreements․ PDFs frequently suggest contacting a professional surveyor if there’s any uncertainty regarding property lines․
Detailed PDF instructions explain how to locate and interpret property markers, such as iron pins or concrete monuments․ They also highlight the importance of understanding local zoning regulations and setback requirements, which dictate how close a fence can be built to property lines․ Thorough verification, as outlined in these PDFs, is paramount․

Gate Placement Considerations
Chain link fence installation guide PDFs dedicate sections to strategic gate placement, emphasizing accessibility and functionality․ These documents advise considering traffic flow – pedestrian and vehicular – when determining gate locations․ PDFs often recommend positioning gates to minimize obstruction of walkways or driveways․
PDF guides highlight the importance of sufficient space around the gate for full swing operation, preventing collisions with landscaping or structures․ They detail how to account for gate post size when planning the overall fence layout․ PDFs frequently suggest avoiding gate placement in areas prone to water accumulation or snowdrifts․
Detailed PDF instructions cover considerations for single versus double gates, depending on access needs․ They also address the impact of gate width on security and convenience․ Proper gate placement, as outlined in these PDFs, enhances both the usability and aesthetic appeal of the fence system․
Installing the Posts
Chain link fence installation guide PDFs meticulously detail the post installation process, beginning with precise hole dimensions․ PDFs specify depth and diameter requirements based on post material (steel or aluminum) and local soil conditions․ Corner posts receive particular attention, with PDFs emphasizing the need for robust concrete footings to withstand tension․
These PDF guides provide step-by-step instructions for setting corner posts plumb and securely․ Line post spacing is also clearly defined, typically ranging from 8 to 10 feet, as detailed in the PDFs․ PDFs illustrate proper concrete pouring techniques, including mixing ratios and curing times for optimal strength․
PDF documents often include diagrams showing correct post alignment and concrete encasement․ They stress the importance of allowing sufficient curing time before proceeding with fence fabric installation, ensuring a stable and long-lasting structure, as per the PDF instructions․
Digging Post Holes (Depth & Diameter)

Chain link fence installation guide PDFs provide precise specifications for post hole dimensions․ PDFs generally recommend a hole depth of at least 24-36 inches, or deeper in areas with frost lines, to ensure stability․ Diameter requirements vary based on post size and material; PDFs typically specify 8-12 inch diameter holes for standard line posts․
These PDF documents emphasize the importance of accurate hole depth and diameter for proper post setting․ PDFs often include charts correlating post size with recommended hole dimensions․ They also detail techniques for maintaining straight hole walls to prevent concrete cracking․
PDF guides frequently advise using a post hole digger or auger for efficient excavation․ They stress the need to remove any rocks or debris from the hole before setting the post, as detailed in the PDF instructions, ensuring a solid foundation for the fence․
Setting Corner Posts

Chain link fence installation guide PDFs prioritize corner post installation as foundational for fence integrity․ PDFs detail aligning corner posts precisely with the planned fence layout, utilizing string lines and levels for accuracy․ They emphasize plumbness – ensuring posts are perfectly vertical – before concrete sets․
PDF documents specify bracing corner posts temporarily with wooden supports to maintain alignment during concrete pouring and curing․ These PDFs often illustrate bracing techniques․ They also detail the importance of checking for squareness, particularly at 90-degree corners, using the 3-4-5 triangle method as outlined in the PDF․
PDF guides frequently recommend setting corner posts deeper than line posts for increased stability․ They also advise against disturbing the post during concrete setting․ Proper corner post placement, as detailed in the PDF, is crucial for a structurally sound and aesthetically pleasing fence․
Setting Line Posts (Spacing)
Chain link fence installation guide PDFs consistently emphasize consistent line post spacing for a professional appearance and structural integrity․ PDF documents typically recommend spacing line posts between 8 and 10 feet apart, though this can vary based on terrain and local wind load requirements, as detailed in the PDF․
PDF guides illustrate using a string line stretched tightly between corner posts to ensure line posts are aligned․ They stress maintaining consistent depth for all line posts, referencing diagrams for proper hole dimensions․ PDFs often include tables specifying post height based on fence height and post spacing․
PDF instructions highlight the importance of checking plumbness after setting each line post, using a level․ They also advise against over-excavating post holes, as this can compromise stability․ Following the PDF’s spacing recommendations ensures a uniform and robust chain link fence installation․
Concrete Pouring & Curing
Chain link fence installation guide PDFs universally detail concrete pouring as a critical step for post stability․ PDF documents specify using a concrete mix with a minimum compressive strength of 2000 PSI, often recommending pre-mixed concrete for consistency․ PDFs illustrate slowly adding concrete to the post hole, avoiding sudden impacts that could shift the post․
PDF guides emphasize compacting the concrete around the post with a shovel or rod to eliminate air pockets․ They advise filling the hole to within a few inches of the surface, then sloping the concrete away from the post to promote water runoff, as shown in PDF diagrams․
PDF instructions stress the importance of proper curing – keeping the concrete moist for at least 3-7 days․ This prevents cracking and ensures maximum strength․ PDFs recommend covering the concrete with plastic sheeting or burlap and periodically wetting it․ Following these PDF guidelines guarantees a durable foundation․
Attaching Top Rail
Chain link fence installation guide PDFs consistently highlight top rail attachment as a key structural element․ PDF documents detail the use of “loop caps” – guides placed atop line posts to receive the top rail, ensuring proper alignment and height․ These PDFs illustrate how the rail rests within these caps․
PDF instructions emphasize that top rail sections, typically 21 feet long, should be connected end-to-end using tension bands and brace bands․ PDF diagrams show how these bands secure the rail to the terminal posts and corner posts, creating a continuous run․ PDFs often specify using galvanized or PVC-coated rails for corrosion resistance․
PDF guides stress ensuring a snug fit between rail sections and utilizing appropriate hardware․ Proper attachment, as detailed in the PDFs, prevents sagging and maintains the fence’s overall integrity․ Following these PDF instructions is crucial for a professional finish․
Loop Cap Installation
Chain link fence installation guide PDFs universally demonstrate loop cap installation as the initial step in top rail attachment․ These PDFs illustrate how loop caps are securely fastened to the top of each line post, typically using carriage bolts․ PDF diagrams emphasize ensuring the caps are level and consistently positioned for a uniform rail height․
PDF instructions detail the importance of using the correct size carriage bolt – often 5/16 x 1-1/4 inch – to prevent loosening․ PDFs often include torque specifications for tightening these bolts․ The PDFs highlight that the loop cap creates a channel guiding and supporting the top rail․
PDF guides stress that proper loop cap installation is fundamental to a straight, stable top rail․ PDFs frequently show visual aids clarifying correct placement and fastening techniques․ Following these PDF instructions ensures a professional and durable fence structure․
Top Rail Sections & Connections
Chain link fence installation guide PDFs consistently show top rail sections typically arriving in 21-foot lengths, resting within the loop caps atop line posts․ PDFs detail how sections connect using specialized fittings – rail sleeves and end cups – ensuring a smooth, continuous run․
PDF instructions emphasize sliding rail sections through loop caps, then securing connections with set screws within the rail sleeves․ PDF diagrams illustrate proper alignment and tightening procedures․ PDFs often specify using a wrench to firmly tighten set screws, preventing rail slippage․
At fence ends or gate posts, PDFs demonstrate the use of terminal posts and end cups to cap the rail․ PDF guides highlight the importance of maintaining consistent rail height throughout the installation․ Following these PDF instructions guarantees a structurally sound and aesthetically pleasing fence top rail․
Installing the Chain Link Fabric
Chain link fence installation guide PDFs detail unrolling the fabric along the fence line, often recommending assistance due to the material’s weight․ PDFs emphasize maintaining a consistent distance between the bottom of the fabric and the ground, typically 2-4 inches․ PDF instructions show initial attachment using tie wires, spaced approximately every 12-18 inches along the top rail․
PDF guides illustrate how to weave the tie wires through the fabric’s diamond pattern and around the top rail․ PDFs stress the importance of avoiding over-tightening at this stage, allowing for tensioning adjustments․ PDFs often include diagrams showing proper tie wire technique for secure attachment․
Before full tensioning, PDFs advise temporarily securing the fabric to line posts with additional tie wires․ PDFs highlight the need for careful handling to prevent damage to the fabric’s coating during installation, ensuring longevity․
Fabric Unrolling & Initial Attachment
Chain link fence installation guide PDFs consistently recommend unrolling the fabric as close to the fence line as possible, often suggesting two-person operation due to the roll’s weight and bulk․ PDFs detail laying the fabric out along the entire run before securing, allowing for adjustments and minimizing waste․ PDF instructions emphasize checking for any damage during unrolling․
PDF guides illustrate initial attachment typically beginning at a corner post, using pre-cut lengths of tie wire․ PDFs specify weaving the tie wire through the first diamond mesh opening and around the top rail, securing it loosely․ PDFs advise spacing these initial attachments approximately every 24 inches․
PDFs often include warnings against stretching the fabric excessively during initial attachment, preserving the ability to properly tension it later․ PDFs highlight the importance of maintaining a consistent height off the ground during this phase․
Tensioning the Fabric
Chain link fence installation guide PDFs universally detail tensioning as a critical step for a professional, secure fence․ PDFs explain utilizing a chain link stretcher – a specialized tool applying force to tighten the fabric․ PDFs emphasize the importance of safety precautions when operating the stretcher, including wearing gloves and eye protection․
PDF instructions outline attaching the stretcher to the fabric using a tension band and a connecting link․ PDFs specify gradually increasing tension, monitoring the fabric’s appearance for even stretching and avoiding over-tensioning which can damage the mesh․ PDFs often include recommended tension levels based on fabric gauge․
PDF guides illustrate securing the tensioned fabric by adding additional tension bands and tightening the stretcher’s ratchet mechanism․ PDFs stress the need to check for wrinkles or sags, adjusting tension as needed to achieve a smooth, taut surface․
Securing the Chain Link Fabric
Chain link fence installation guide PDFs consistently detail securing the fabric with tension wire and tie wire as essential for long-term stability․ PDFs illustrate running tension wire along both the top and bottom of the fence, threaded through the fabric’s mesh and secured to terminal posts with carriage bolts․

PDF instructions emphasize wrapping the tension wire around the post’s end band and tightening with pliers for a firm hold․ PDFs specify using tie wire – typically 11․5 gauge galvanized steel – to attach the fabric to the top rail and line posts․ PDFs detail spacing tie wires approximately every 12-18 inches․
PDF guides demonstrate twisting the tie wire securely around both the fabric and the rail/post, creating a strong connection․ PDFs often advise against over-tightening the tie wire to prevent fabric distortion․ Proper securing, as outlined in PDFs, ensures the fence withstands wind and external forces․
Tension Wire Installation (Bottom & Top)
Chain link fence installation guide PDFs universally emphasize tension wire as critical for fabric stability․ PDFs instruct running tension wire continuously along both the top and bottom of the fence line, within the fabric’s first and last vertical mesh openings․

PDFs detail securing the tension wire to terminal posts using 5/16 x 1-1/4 inch carriage bolts, passing through end bands․ PDFs illustrate wrapping the wire around the bolt before tightening, ensuring a secure grip․ PDFs often recommend using pliers to twist the wire multiple times for added firmness․
PDF guides stress maintaining consistent tension throughout the wire’s length․ PDFs clarify the tension wire’s purpose is to distribute stress and prevent sagging․ Correct installation, as detailed in PDFs, is vital for a taut, professional-looking fence․ PDFs also note the wire should be on the outside of the fence․
Tie Wire Attachment (Spacing & Method)
Chain link fence installation guide PDFs consistently detail tie wire attachment as crucial for securing the fabric to the framework․ PDFs specify using 11․5-gauge tie wire, pre-cut to appropriate lengths for efficient installation․ PDFs recommend spacing tie wires approximately 12-18 inches apart along both the top and bottom of the fabric․
PDF guides illustrate wrapping the tie wire around both the chain link mesh and the fence rail or post․ PDFs emphasize twisting the wire tightly using pliers, creating a secure connection․ PDFs often depict a figure-eight wrapping pattern for enhanced hold․
PDFs caution against over-tightening, which can damage the fabric․ PDFs stress consistent spacing for a uniform appearance and structural integrity․ Proper tie wire attachment, as outlined in PDFs, ensures the fence fabric remains taut and resists wind loads, contributing to long-term durability․
Gate Installation
Chain link fence installation guide PDFs dedicate sections to gate installation, emphasizing proper post setup․ PDFs detail installing gate posts with increased depth and concrete volume for stability, crucial for handling gate weight and frequent use․ PDFs specify using heavier-duty posts specifically designed for gate applications․
PDF guides illustrate hinge and latch installation, often recommending specific hardware types for chain link․ PDFs demonstrate aligning the gate within the opening, ensuring smooth operation and secure closure․ PDFs highlight the importance of plumb and level installation for proper functionality․
PDFs often include diagrams showing brace band placement for added gate post reinforcement․ PDFs stress adjusting the latch mechanism for a snug fit, preventing unwanted opening․ Following PDF instructions ensures a securely installed gate, complementing the overall fence system․
Gate Post Installation
Chain link fence installation guide PDFs consistently emphasize robust gate post installation․ PDFs specify using larger diameter posts for gates compared to line posts, due to increased stress․ PDFs detail digging deeper and wider post holes for gate posts, often recommending a minimum depth of 36 inches, and a wider diameter concrete footing․
PDF guides illustrate the importance of precise post alignment, ensuring the gate swings freely․ PDFs often recommend temporarily bracing the gate post during concrete setting to maintain plumb․ PDFs detail the correct concrete mix ratio for optimal strength and durability around the gate post․
PDFs frequently show diagrams of brace band placement, reinforcing the post against racking forces; PDFs stress allowing sufficient concrete curing time before attaching gate hardware, typically several days, for maximum stability․ Following these PDF guidelines guarantees a secure gate post foundation․
Gate Hinge & Latch Installation
Chain link fence installation guide PDFs provide detailed instructions for hinge and latch attachment․ PDFs typically illustrate using carriage bolts to secure hinges to both the gate post and the gate frame, ensuring a strong connection․ PDFs emphasize proper hinge alignment for smooth gate operation, avoiding binding or sagging․
PDF guides often depict different hinge types – band hinges, post hinges, and wrap-around hinges – with specific installation steps for each․ PDFs detail latch installation, including proper spacing and alignment with the gate frame․ PDFs frequently show diagrams of securing the latch with appropriate hardware․
PDFs stress the importance of tightening all bolts securely, but avoiding over-tightening which can damage the gate or post․ PDFs may include troubleshooting tips for common issues like gate sticking or latch misalignment․ Following these PDF instructions ensures a functional and secure gate closure․
Finishing Touches & Safety
Chain link fence installation guide PDFs often dedicate sections to finishing details and crucial safety precautions․ PDFs recommend capping posts with appropriate caps to prevent injury and corrosion, enhancing the fence’s longevity․ PDFs may suggest adding privacy slats for increased seclusion and aesthetic appeal, detailing secure attachment methods․
PDFs consistently emphasize safety during installation, advising the use of safety glasses, gloves, and appropriate footwear․ PDFs warn against digging near underground utilities and recommend contacting local authorities before starting excavation․ PDFs highlight the importance of proper lifting techniques to avoid back injuries․
PDF guides often include a final inspection checklist, ensuring all connections are secure and the fence meets local regulations․ PDFs may also address ongoing maintenance, like periodic tension adjustments and rust prevention․ Prioritizing these finishing touches and safety measures guarantees a durable and secure fence installation․